background image

Press the       |      button, you can quickly select two
modes of picture and sound quality standard:
One is standard mode ( on the screen displays
(STANDARD);
The other is personal select mode (on the screen
displays "MEMORY").

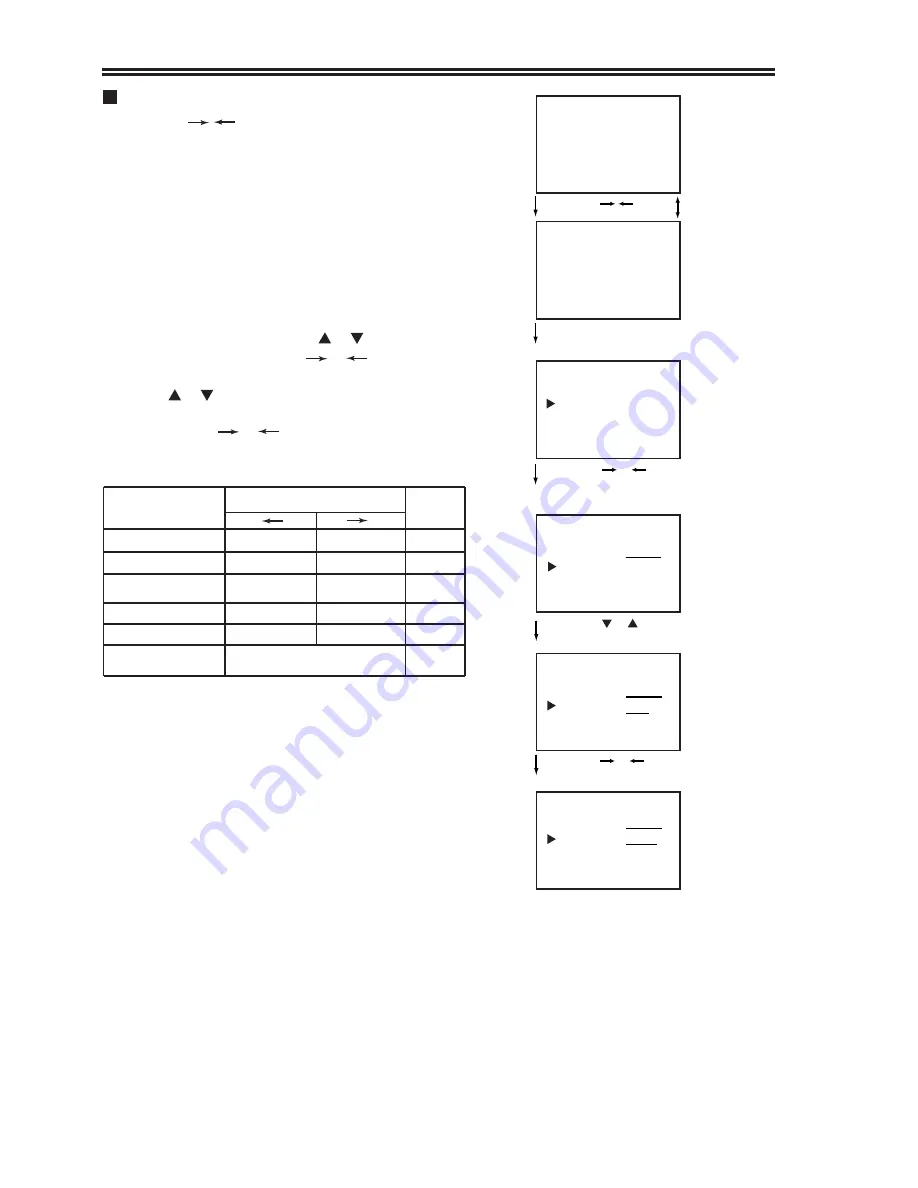
1. Picture adjustment

Complete the following steps and you will adjust the
picture quality.
Press the MENU button, on the screen will dis-
play the main menu, press the     or     button to
select PICTURE, then press       or       button to
enter into the sub-menu of PICTURE
Press      or     the button to select the items you
want to adjust (the caption on the screen is red),
then press the       or       button to adjust the level of 
picture control amount.

If the TV signals are too weak and you can not watch the program
normally, blue background will appear automatically to overcome 
the picture.  If you insist on watching the program, you can select
"BBK" item to shut off the blue background. We suggest you turn
"BKK" on in ordinary circumstances.

STANDARD

Press the MENU button
to display the main menu

Press the      or     button
to display the menu of
PICTURE 

Press the    or     button to
select adjustment item 

Press the     or     button to
adjust the level

Adjustment

item

Pressing (Memory mode)

Standard

Mode

COLOUR

paler

deeper

50

BRIGHT

darker

lighter

70

CONT (Contrast)

weaker

stronger

70

SHARP

weaker

stronger

20

TINT

purplish

bluish

0

BBK

(Blue background)

ON (OFF)

ON

PICTURE MEMORY
COLOR 70
BRIGHT 50

PICTURE MEMORY
COLOR 70
BRIGHT 60

PICTURE MEMORY
COLOR 70
BRIGHT50

MENU
PICTURE

MEMORY

Press the     |     button

12

lllllllll

Picture and sound adjustment

If the signal being received is weaker, adjust SHARP to lower
level to reduce the noise.
If the signal being is stronger, adjust SHARP to higher level to 
improve the picture quality.

1.1

1.2

lllllllll
llllll

lllllllll
llllllll

*

Note:

Only when the colour system is NTSC, there is
TINT item

*

*

Содержание 8010PF

Страница 1: ...11 FAX 02 9313 7555 www palsonic com au PALSONIC CUSTOMER SERVICE TELEPHONE AUSTRALIA 1300 657 888 80CM CORDLESS REMOTE COLOUR TELEVISION MODEL 8010PF OWNER S MANUAL Type Tested Electrical Safety AS N...

Страница 2: ...s manual in an easily accessible location for future reference Contents Main features Notes for operation Installation and appearance 2 3 Antenna connection Battery installation Apperance The remote c...

Страница 3: ...e complete separation of brightness and colour signals To reduce colour interface blurry and dotted interruptions To make the picture clearer 3 Digital Luminance Transient Improver LTI Adopts the digi...

Страница 4: ...set to rain or excessive moisture to prevent tire disaster or electric shock Avoid using the set in very warm or damp places Never use it in a bathroom There exists High Voltage in this TV set Do not...

Страница 5: ...ing strike Battery Installation 1 Remove the back battery cover 2 Insert two size AAA batteries according to the polarity indication inside the remote controller 3 Effective range of the remote contro...

Страница 6: ...emote controller Antenna input MONITOR output terminals VIDEO AUDIO L MONO R 1 Video 1 input terminals S VIDEO VIDEO AUDIO L MONO R 2 Video 2 input terminals S VIDEO VIDEO AUDIO L MONO R CHANNEL DOWN...

Страница 7: ...The Remote Controller 5...

Страница 8: ...to switch the set to standby mode the indicator turns to red Special indication Last Mode Memory after turning off the power the last TV mode picture and sound setting mode and preset channels all are...

Страница 9: ...em select button or to select AUTO SEARCH the caption on the screen is red Press or button the TV begins to search TV channels automatically All active channels will be preset and stored into the memo...

Страница 10: ...push the button to search channels from current channel to higher channel Push the button to search channels from current channel to lower channel When a channel is located the searching stops this ch...

Страница 11: ...e or two CATV channel s sound and picture are not standard you can correct by the use of Manual Fine Tuning Repeat steps 3 1 to 3 3 to select the channels you want to manually fine tune Push the or bu...

Страница 12: ...se of the CH button Press the CH button the channel number will increase pro gressively Press the CH button the channel number will decrease progressively 10 AUTO PAL SECAM NTSC 4 43 NTSC 3 58 I M B G...

Страница 13: ...you experience loud noise in digital sound channel because of the weak signal please press the button to set the sound mode to FM MONO or FORCE FM thus to select FM sound channel In FORCE FM mode the...

Страница 14: ...he program you can select BBK item to shut off the blue background We suggest you turn BKK on in ordinary circumstances STANDARD Press the MENU button to display the main menu Press the or button to d...

Страница 15: ...r decrease right side sound on off weaker stronger stronger decrease left side sound on off stronger Standard mode 50 50 0 Off 50 SOUND MEMORY BASS 50 TREBLE 50 Press the or button to select adjustmen...

Страница 16: ...urn off surround sound select SURROUND OFF 4 Adjusting the volume and muting the sound You can press the VOL button to adjust the volume and you can press the button to mute the sound Press the button...

Страница 17: ...et time Press the MENU button to enter into the main menu press the or button to select TIMER and press the or button to enter into the sub menu of TIMER 1 2 ON TIME With the ON timer the TV will auto...

Страница 18: ...EEP To make use of SLEEP function press the SLP button every time the letters displaying on the screen will change in the sequence of OFF 120 min 110min 10min OFF At the preset time the TV will automa...

Страница 19: ...ipment to be connected as well 1 To Connect to AV input You can video equipments such as a VTR and video camera to this TV and enjoy the high quality picture and sound If your video equipment has an S...

Страница 20: ...ton button to display COLOUR AUTO If not press the or button until normal colour appears Note on the S VIDEO terminal The S VIDEO input terminal has priority over the video 1 video 2 VIDEO terminals o...

Страница 21: ...nces of electronic interference from another TV set a computer electronics game machine a broadcast station etc This may be caused by reflections from nearby mountains or buildings Check the antenna d...

Страница 22: ...system Sound system Sound output Accessories NICAM728 B G 5 5 5 85 D K 6 5 5 85 IGR 2 Carrier B G 5 5 5 74 13W 13W one remote controller Note Design and specifications are subject to change without no...

Страница 23: ...PALSONIC CORPORATION PTY LTD 1 JOYNTON AVENUE WATERLOO NSW 2017 AUSTRALIA TEL 02 9313 7111 FAX 02 9313 7555 www palsonic com au PALSONIC CUSTOMER SERVICE TELEPHONE AUSTRALIA 1300 657 888 604 34F83 00...

Отзывы: