VM-Series
Deployment
Guide
31
Set Up a VM-Series Firewall on the Citrix SDX Server
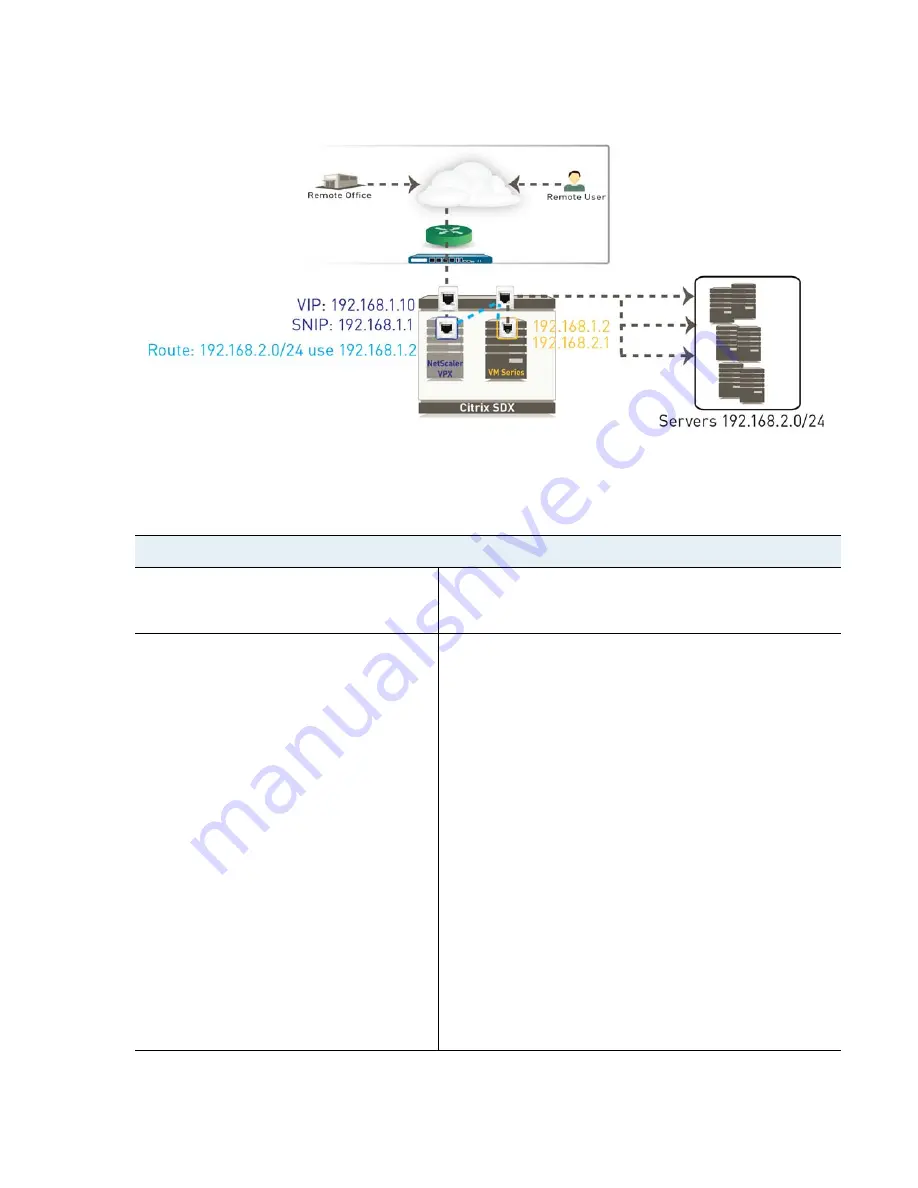
Secure North-South Traffic with the VM-Series Firewall
Topology After Adding the VM-Series Firewall
The following table includes the tasks you must perform to deploy the VM-Series firewall. For firewall
configuration instructions refer to the
PAN-OS Getting Started Guide
. The workflow and configuration on the
NetScaler VPX is beyond the scope of this document; for details on configuring the NetScaler VPX, refer to
the Citrix documentation.
Set up the VM-Series Firewall to Process North-South Traffic Using L3 interfaces
Step 1
Install the VM-Series Firewall
.
When provisioning the VM-Series firewall on the SDX server, you
must ensure that you select the data interface accurately so that the
firewall can access the server(s).
Step 2
Configure the data interface on the
firewall.
1.
Select
Network > Virtual Router
and then select the
default
link to open the Virtual Router dialog and
Add
the interface to
the virtual router.
2.
(Required only if the USIP option is enabled on the NetScaler
VPX) On the
Static Routes
tab on the virtual router, select the
interface and add the NetScaler SNIP (192.68.1.1 in this
example) as the
Next Hop
. The static route defined here will be
used to route traffic from the firewall to the NetScaler VPX.
3.
Select
Network > Interfaces> Ethernet
and then select the
interface you want to configure.
4.
Select the
Interface Type
. Although your choice here depends
on your network topology, this example uses
Layer3
.
5.
On the
Config
tab, in the
Virtual Router
drop-down, select
default
.
6.
Select
New Zone
from the
Security Zone
drop-down. In the
Zone dialog, define a
Name
for new zone, for example default,
and then click
OK
.
7.
Select the
IPv4 or IPv6
tab, click
Add
in the IP section, and enter
two IP addresses and network mask to the interface—one for
each subnet that is being serviced. For example, 192.168.1.2 and
192.168.2.1.


