background image


004778890 - 12/11/2021

2  AVVERTENZE PER LA 

SICUREZZA

2.1  Avvertenze per l’installatore

Osservare le prescrizioni indicate nel 

presente manuale.

Le istruzioni di montaggio e 

smontaggio dell’apparecchio 

sono riservate ai soli tecnici 

specializzati.

L'installazione, l'utilizzo e la manu-

tenzione del prodotto devono essere 

fatti in conformità con le disposizioni 

del costruttore e nel rispetto delle 

normative. Il mancato rispetto delle 

indicazioni fornite ed operazioni non 

corrette possono essere causa di situa-

zioni di pericolo, danni a cose, persone, 

animali, problemi di salute o anomalie 

di funziona mento.
L’installazione, il collegamento elettri-

co, la verifica del funzionamento e la 

manutenzione vanno eseguite esclu-

sivamente da personale autorizzato e 

qualificato.
Il rivestimento deve essere realizzato in 

modo tale da impedire all’utilizzatore 

di poter accedere a parti in tensioni o 

pericolose.
L'installazione e la manutenzione del 

prodotto devono essere eseguite esclu-

sivamente da personale qualificato ed 

in possesso di adeguata conoscenza 

del prodotto stesso. Usare solo ricambi 

originali consigliati dal produttore.
La responsabilità delle opere eseguite 

nello spazio d’ubicazione dell'apparec-

chio è, e rimane, a carico dell’utilizzato-

re; a quest’ultimo è demandata anche 

l’esecuzione delle verifiche relative alle 

soluzioni d’installazione proposte.
L’installatore deve ottemperare a tutti 

i regolamenti di sicurezza locali, nazio-

nali ed europei.

L’apparecchio dovrà essere installato 

su pavimenti con adeguata capacità 

portante.

Verificare che le predisposizioni 

della canna fumaria e della 

presa d’aria siano conformi al 

tipo d’installazione.

Non effettuare collegamenti elettrici 

volanti con cavi provvisori o non isolati.
Verificare che la messa a terra dell’im-

pianto elettrico sia efficiente.
L’installatore, prima di avviare le fasi di 

montaggio o di smontaggio dell'appa-

recchio, deve ottemperare alle precau-

zioni di sicurezza previste per legge e in 

particolare a:
• non operare in condizioni avverse;
• deve operare in perfette condizioni 

psicofisiche e deve verificare che i di-

spositivi antinfortunistici individuali e 

personali siano integri e perfettamen-

te funzionanti;

• deve indossare guanti e scarpe 

antinfortunistiche;

• deve usufruire di utensili muniti di 

isolamento elettrico;

• deve accertarsi che l’area interessata 

alle fasi di montaggio/smontaggio sia 

libera da ostacoli.

Installare il prodotto in locali che non 

siano a pericolo incendio e predisposti 

di tutti i servizi quali alimentazioni (aria 

ed elettriche) e scarichi per i fumi.
Valutare le condizioni statiche del piano 

su cui graviterà il peso del prodotto e 

provvedere ad un adeguato isolamen-

to nel caso sia costruito in materiale 

infiammabile (es. legno, moquette, 

plastica).
Parti elettriche in tensione: alimentare 

il prodotto solo dopo aver completato il 

suo assemblaggio.

Содержание INSERT A78

Страница 1: ...ATION USE AND MAINTENANCE MANUAL This manual is an integral part of the product Read the instructions carefully before installing servicing or operating the product Translation of the original instructions MANUELD INSTALLATION D UTILISATIONETDEMAINTENANCE Le présent manuel fait partie intégrante du produit Il est conseillé de lire attentivement les consignes avant l installation l entretien ou l u...

Страница 2: ...ke to thank you for having purchased one of our products and congratulate you on your choice To make sure you get the most out of your product please carefully follow the instructions provided in this manual FR Cher client Nous souhaitons avant tout vous remercier de la préférence que vous nous avez accordée en achetant notre produit et vous félicitions pour votre choix Afin de vous permettre de p...

Страница 3: ...arti di ricambio 7 1 11 Targhetta matricola 7 1 12 Consegna dell apparecchio 7 2 AVVERTENZE PER LA SICUREZZA 8 2 1 Avvertenze per l installatore 8 2 2 Avvertenze per il personale tecnico addetto alla manutenzione 9 2 3 Avvertenze per l utilizzatore 9 3 CARATTERISTICHE DEL COMBUSTIBILE 12 3 1 Caratteristiche del combustibile 12 3 2 Stoccaggio del pellet 12 4 CONOSCERE IL PRODOTTO 13 4 1 Descrizione...

Страница 4: ...camino tradizionale 26 7 INSTALLAZIONE 27 7 1 Considerazioni generali 27 7 2 Configurazioni installative 27 7 3 Schema di montaggio 29 7 4 Collegamento aspirazione aria ventilatore ambiente 30 7 5 Collegamento mandata aria calda 30 7 6 Realizzazione fori tecnici sul rivestimento 31 7 7 Collegamento elettrico 31 8 PRIMA ACCENSIONE 33 8 1 Carico pellet 33 8 2 Primo avvio 34 9 MANUTENZIONE 35 9 1 Pro...

Страница 5: ...el manuale è quello di fornire le regole fondamentali e di base per una corretta installa zione dell apparecchio La scrupolosa osservanza di quanto in esso de scritto garantisce un elevato grado di sicurezza e produttività dell apparecchio 1 4 Conservazione del manuale Conservazione e consultazione Il manuale deve essere conservato con cura e deve essere sempre disponibile per la consul tazione si...

Страница 6: ...te manuale sono conformi alle disposizioni legislative delle seguenti direttive comunitarie 2014 30 UE Direttiva Compatibilità Elettromagnetica 2014 35 UE Direttiva Bassa Tensione 2017 2102 UE Direttiva RoHS 2009 125 CE Direttiva Progettazione Ecocompatibile 2014 53 UE Direttiva RED Radio Equipment Directive REGOLAMENTO UE N 305 2011 CPR REGOLAMENTO UE 2015 1185 ECODESIGN Sono state applicate le s...

Страница 7: ...ovvisa dei componenti che potrebbero provocare gravi danni a persone e cose 1 11 Targhetta matricola La targhetta matricola A è posta nella parte posteriore Fig 1 e riporta tutti i dati caratteristici relativi all apparecchio compresi i dati del Co struttore il numero di Matricola e il marchio A Fig 1 Il numero di Matricola deve essere sempre indi cato per qualsiasi tipo di richiesta riguardante l...

Страница 8: ...le soluzioni d installazione proposte L installatore deve ottemperare a tutti i regolamenti di sicurezza locali nazio nali ed europei L apparecchio dovrà essere installato su pavimenti con adeguata capacità portante Verificare che le predisposizioni della canna fumaria e della presa d aria siano conformi al tipo d installazione Non effettuare collegamenti elettrici volanti con cavi provvisori o no...

Страница 9: ...mata comprensiva del rivestimento Per il corretto uso del prodotto e delle apparecchiature elettroniche ad essa collegate e per prevenire incidenti si devono sempre osservare le indicazioni riportate nel presente manuale L apparecchio presenta delle superfici esterne particolarmente calde porta maniglia vetro tubi uscita fumi ecc Occorre quindi evitare di entrare in contatto con queste parti senza...

Страница 10: ... rottura o rumori insoliti In caso di guasto o malfunzionamento spegnerel apparecchioecontattareim mediatamente il tecnico specializzato Non gettare acqua sull apparecchio in funzionamento o per spegnere il fuoco nel braciere Non spegnere l apparecchio scollegan do la connessione elettrica di rete Non appoggiarsi sulla porta aperta potrebbe compromettere la stabilita dell apparecchio Non usare l a...

Страница 11: ...dell apparecchio Non lavare il prodotto con acqua L ac qua potrebbe penetrare all interno dell unità e guastare gli isolamenti elettrici provocando scosse elettriche Non sostare per un lungo periodo da vanti al prodotto in funzione Unusoerratodelprodottoouninterven to di manutenzione scorretto possono comportare un serio rischio di esplosio ne nella camera di combustione Utilizzare esclusivamente ...

Страница 12: ... L apparecchio è dotato di un serbatoio di con tenimento del pellet della capacità indicata nel paragrafo 4 3 Caratteristiche tecniche a pagina 17 II vano di caricamento è posizionato nella parte superiore deve essere sempre apribile per poter effettuare la carica del pellet e deve restare chiuso durante il funzionamento dell apparecchio 3 2 Stoccaggio del pellet II pellet deve essere conservato i...

Страница 13: ...Serbatoio pellet D Termostato temperatura serbatoio pellet E Scheda elettronica F Alimentazione G Sonda ambiente H Sensore di livello pellet I Ventilatore ambiente J Tubo ingresso aria comburente K Tubo uscita fumi L Ventilatore fumi M Maniglia fredda N Maniglia di apertura O Camera di combustione P Vano cenere Q Braciere R Microinterruttore S Scheda elettronica T Sistema di caricamento pellet ...

Страница 14: ...serbatoio pellet E Scheda elettronica F Alimentazione G Sonda ambiente H Sensore livello pellet I Ventilatore ambiente J Tubo uscita fumi K Ventilatore fumi L Maniglia fredda M Maniglia di apertura N Camera di combustione O Vano cenere P Braciere Q Microinterruttore R Telaio supporto inserto S Tubo ingresso aria comburente T Scheda elettronica U Sistema di caricamento pellet ...

Страница 15: ...H FRANÇAIS 004778890 12 11 2021 15 4 2 Dimensioni INSERIMENTO A78 FRONTALE 490 5 782 52 182 5 Ø 80 265 390 5 641 622 561 476 643 3 Ø 4 2 336 81 198 Ø 42 Ingresso aria comburente Ø 80 uscita fumi Dimensioni in mm Fig 5 ...

Страница 16: ...4778890 12 11 2021 INSERIMENTO AC78 CANALIZZATO Ø 198 52 182 5 Ø 80 270 391 Ø 138 5 683 5 782 353 198 336 555 933 873 995 510 639 5 Ø 4 2 Ø 42 Ingresso aria comburente Ø 80 uscita fumi Dimensioni in mm Fig 6 ...

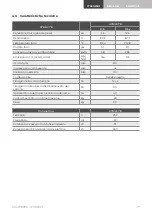
Страница 17: ... CO al 13 di O2 mg Nm3 164 115 Uscita fumi mm 80 Ingresso aria comburente mm 42 Presa d aria esterna mm 110 Combustibile Pellet di legno Tiraggio della canna fumaria Pa 12 2 Tiraggio minimo per dimensionamento del camino Pa 0 0 Apparecchio adatto per locali non inferiori a m3 40 Capacità serbatoio di alimentazione kg 23 Peso kg 110 Dati elettrici A78 AC78 Tensione V 230 Frequenza Hz 50 Potenza max...

Страница 18: ...i Tf C Distanza minima da materiali infiammabili X1 X2 Y mm Tensione V V Frequenza f Hz Potenza max assorbita in funzionamento Wmin W Potenza max assorbita in accensione Wmax W Fig 7 F Combustibile PImax Potenza termica max introdotta PImin Potenza termica min introdotta Pmax Potenza termica nominale Pmin Potenza termica ridotta EFFmax Rendimento alla potenza nominale EFFmin Rendimento alla potenz...

Страница 19: ... CN2 CN10 CN9 CN1 CN3 CN5 LD1 LD2 CN7 CN6 I01 T04 Pa Pa T03 T02 T01 T05 I03 GND GND GND I04 5V 16V F02 F03 F01 I02 BROWN BLACK BLUE Air R 20 2 7 POSITIVE RED Pa 15 13 ext 1 2 Fig 8 1 Sensore di hall 2 Termostato esterno 4 Sonda ambiente 5 Sonda pellet 6 Sonda fumi 7 Differenziale di pressione 8 Resistenza ad incandescenza 9 Ventilatore scarico fumi 10 Dosatore caricamento 11 Termostato di sicurezz...

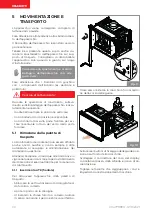
Страница 20: ...e guati mezzi Fare attenzione che i bambini non giochino con i componenti dell imballo es pellicole e polistirolo Pericolo di soffocamento Durante le operazioni di movimento solleva mento e disimballaggio dell apparecchio è asso lutamente necessario mantenerlo sempre in posizione verticale non ribaltarlo mai in posizione orizzontale non inclinarlo mai sulla parte frontale per evi tare l eventuale ...

Страница 21: ...iti di fissaggio palet ta e togliere la paletta Fig 14 5 2 Trasporto Accertarsi che il carrello sollevatore abbia una portata superiore al peso dell apparecchiatura da sollevare Al manovratore dei mezzi di sollevamen to spetterà tutta la responsabilità del sollevamento dei carichi Porre particolare attenzione a proteg gere adeguatamente i pavimenti in legno o parquet per evitare che il peso dell a...

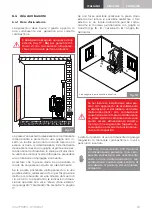
Страница 22: ...o d installazione Per le distanze minime che devono essere ri spettate nel posizionamento dell apparecchio rispetto a materiali e oggetti infiammabili fare riferimento alle indicazioni di Fig 15 X2 Y2 Z Y1 X1 Fig 15 Modello X1 X2 Y1 Y2 Z A78 AC78 800 200 200 200 750 mm Pavimenti costituiti da materiale infiammabile come ad esempio legno parquet linoleum laminato o coperti da tappeti devono essere ...

Страница 23: ...dal suolo di circa 20 30 cm rispettando le indicazioni dimen sionali riportate alla voce Presa d aria esterna del paragrafo Caratteristiche tecniche a pagina 17 Se non fosse possibile realizzare la presa d aria esterna nel locale è possibile realizzare il foro esterno in un locale adiacente purché comu nicante in maniera permanente con griglia di transito Fig 18 C Cassonetto G Griglia S Serranda C...

Страница 24: ...esa d aria ester na B per il ricircolo dell aria ambiente F A E B D L immagine è puramente indicativa Fig 20 Solo per AC78 canalizzato Fig 21 griglia inferiore A in dotazione sul rive stimento e presa d aria esterna B per il ricircolo dell aria ambiente da realizzare internamente oppure esternamente al rivestimento A E B D L immagine è puramente indicativa Fig 21 Fig 22 assicurarsi di collegare su...

Страница 25: ... si stema di evacuazione dei fumi devono essere dichiarati idonei alle specifiche condizioni di funzionamento e provvi sti di marcatura CE È obbligatorio realizzare un primo tratto verticale di 1 5 metri minimi per garantire la corretta espulsione dei fumi Si consiglia di effettuare un massimo di 3 varia zioni di direzione oltre a quello derivante dal collegamento posteriore dell apparecchio al ca...

Страница 26: ...ssicuri sullo stato di manutenzione del camino In caso di camino vecchio si consiglia di provvedere al risanamento mediante intubamento Lo scarico dei prodotti di combustione deve essere previsto a tetto 1 3 2 Fig 26 1 Comignolo antivento 2 Sigillare 3 Ispezione In caso di camino di sezione maggiore è necessario intubare il camino con una tubazione in acciaio con diametro in funzione del percorso ...

Страница 27: ... senza telaio opzionale 7 2 1 Installazione generatore sul piano di un caminetto solo A78 Nel caso di installazione in strutture con rivesti mento in marmo o altro materiale l inserimento è dotato di guide scorrevoli per agevolare l estra zione dell apparecchiatura per il fissaggio sul piano di appoggio e per i normali interventi di ispezione e controllo delle parti meccaniche ed elettriche Una vo...

Страница 28: ... in marmo o altro materiale l inserimento è dotato di guide scorrevoli per agevolare l estra zione dell apparecchiatura per il fissaggio sul piano di appoggio e per i normali interventi di ispezione e controllo delle parti meccaniche ed elettriche Il piedistallo è fornito di serie nel modello AC78 mentre è opzionale nel modello A78 Una volta rimosso il pallet fare riferimento al paragrafo MOVIMENT...

Страница 29: ...e del ventila tore ambiente solo per modello AC78 5 Il rivestimento deve essere realizzato in mate riale ignifugo 6 Distanza min 1 cm tra rivestimento e inserto 7 Schermare eventuali parti in legno con mate riale ignifugo 8 Controcappa e struttura portante ignifuga 9 Sistema di caricamento pellet Per l installa zione vedere le istruzioni fornite a corredo del kit 10 Le norme UNI prevedono l instal...

Страница 30: ...cordo in controcappa per riscaldamento in unico ambiente Prendere il tubo flessibile alle estremità e allun garlo accompagnandolo con un movimento rotatorio Fig 37 Tagliarlo alla lunghezza desiderata non su periore a 200 cm e montare le bocchette nei punti desiderati Fissare il tubo 1 ai collari 2 con le fascette 3 Coibentare i tubi materiale isolante 2 3 1 Fig 38 Le bocchette vanno fissate sulla ...

Страница 31: ...to sulle porte oppure tenere socchiuse le porte Doppio condotto Fig 39 Unico condotto Fig 40 7 6 Realizzazione fori tecnici sul rivestimento Il rivestimento deve essere fatto solo da persona le qualificato Sul rivestimento e sulla cappa devono essere eseguiti i fori tecnici per 1 alloggiamento display 2 le bocchette di aerazione 3 lo sfogo di calore in cappa 4 l aerazione del rivestimento sul basa...

Страница 32: ...la scatola ad incasso su zone calde della cappa Predisporre il passaggio del cavo tra il pannello e la scheda elettronica in modo che non venga danneggiato dalla temperatura durante il normale funzionamento dell apparecchio Collegare il cavo tra i morsetti della scheda elettronica ed il pannello di controllo prima di chiudere le scatole 7 7 2 Collegamento al termostato ambiente È possibile collega...

Страница 33: ...nsiglia l utilizzo di accessori non originali La caduta di pellet esternamente al serbatoio può creare danni al funzio namento dell apparecchio e provocare focolai di incendio Il tubo per il caricamento del pellet optional deve fungere esclusivamente come scivolo per riempire il serbatoio dell apparecchio e non come un prolungamento del serbatoio stesso evitare di caricare più pellet di quanto ne ...

Страница 34: ...azione o dall essiccamento di alcuni materiali utilizzati Tale fenomeno andrà via via a scomparire Collegare l apparecchio alla rete elettrica agire sull interruttore di accensione posto sul retro dell apparecchio posizionandolo su I Fig 47 Se il collegamento è corretto l apparecchio emette una serie di segnali acustici intermittenti e si accende il display Fare riferimento al manuale display ...

Страница 35: ...re riattivata accidentalmente Staccare la spina dalla presa a muro Operare sempre con attrezzature appropriate per la manutenzione Terminata la manutenzione o le operazioni di riparazione prima di rimettere in servizio dell appa recchio reinstallare tutte le protezioni e riattivare tutti i dispositivi di sicurezza 9 1 Programma di pulizia e manutenzione ordinaria 9 1 1 Pulizia ordinaria utente OGN...

Страница 36: ...glierlo dalla sua sede e pulire il vano che lo contiene compresa la resistenza Fig 48 Fig 48 Pulire l intera area evidenziata in Fig 49 L uso di un aspiracenere può semplifi care le operazioni di pulizia Fig 49 9 2 2 Pulizia del vetro Si effettua con un panno umido o con della carta inumidita e passata nella cenere Strofinare finché il vetro è pulito Non pulire il vetro durante il funzionamento de...

Страница 37: ...cita fumi Asportare eventuale deposito di resi dui di pellet nel serbatoio 9 3 1 Manutenzione dell apparecchio Da effettuarsi almeno una volte all anno e co munque ogni volta sia necessario procedendo nel seguente modo Sbloccare la porta utilizzando la maniglia fred da fornita a corredo Aprire la porta con la maniglia Fig 53 Rimuovere il braciere Afferrare la parete di fondo per le maniglie Estrar...

Страница 38: ...dalla sua sede e aspi rando con un aspiracenere i residui contenuti all interno del Tee Aprire la porta Utilizzando la chiave fornita a corredo ruotare in senso antiorario il perno e sbloccare il fermo Fig 57 Estrarre l apparecchio fino ad arrivare ai fine corsa delle guide Utilizzare un aspiracenere per rimuovere i resi dui all interno del Tee Fig 58 Verificare il corretto funzionamento del mecca...

Страница 39: ...tare la cenere nell area evidenziata in Fig 60 B A Fig 60 Manutenzione coclea In caso di intasamento del tubo di alimentazione che dal serbatoio porta i pellet alla camera di combustione procedere come segue Rimuovere il fermo A della piastrina d ispezio ne Rimuovere la piastrina d ispezione B B A Fig 61 Rimuovere i residui di pellet all interno del tubo di alimentazione utilizzando un cacciavite ...

Страница 40: ...hio può avere problemi di funzionalità quali Cattiva combustione Annerimento del vetro Intasamento del braciere con accumulo di ce neri e pellet Deposito di ceneri ed eccessive incrostazioni sullo scambiatore con conseguente scarso ren dimento Una volta completate le operazioni di manutenzione Rimontare tutti i componenti in ordine contra rio Resettare eventuali avvisi o allarmi i termostati a ria...

Страница 41: ...e ed animali Smaltire in modo differenziato il prodotto con sente di evitare possibili conseguenze negative per l ambiente e per la salute e permette di re cuperare i materiali di cui è composto al fine di ottenere un importante risparmio di energia e di risorse La responsabilità per eventuali danni a persone ed animali ricade sempre sul proprietario All atto della demolizione la marcatura CE il p...

Страница 42: ... the manufacturer 45 1 9 Technical assistance and maintenance 46 1 10 Spare parts 46 1 11 Serial plate 46 1 12 Delivery of the appliance 46 2 SAFETY WARNING 47 2 1 Warnings for the installer 47 2 2 Warnings for technical maintenance personnel 48 2 3 Warnings for users 48 3 FUEL CHARACTERISTICS 51 3 1 Fuel characteristics 51 3 2 Pellet storage 51 4 BECOMING FAMILIAR WITH THE PRODUCT 52 4 1 Descript...

Страница 43: ...64 6 6 Roof exhaust with traditional fireplace 65 7 INSTALLATION 67 7 1 General considerations 67 7 2 Installation configurations 67 7 3 Assembly diagram 68 7 4 Room fan air suction connection 69 7 5 Hot air delivery connection 69 7 6 Creating technical holes on the cladding 71 7 7 Electrical connection 71 8 FIRST IGNITION 73 8 1 Pellet loading 73 8 2 First start up 74 9 MAINTENANCE 75 9 1 Ordinar...

Страница 44: ...e manual The purpose of this manual is to provide the fundamental and basic regulations for correct installation of the appliance Strict observance of that which is described herein guarantees a higher level of appliance safety and productivity 1 4 Preservation of the manual Preservation and consultation The manual must be kept carefully and must always be available for consultation both by the us...

Страница 45: ...ative provisions of the following European directives 2014 30 EU Electromagnetic Compatibility Directive 2014 35 EU Low Voltage Directive 2017 2102 EU RoHS Directive 2009 125 EC Ecodesign Directive Energy related product 2014 53 EU RED Radio Equipment Directive REGULATION EU N 305 2011 CPR REGULATION EU 2015 1185 ECODESIGN The following harmonised standards and or reg ulations have been applied EM...

Страница 46: ... which may cause serious damages to persons and objects 1 11 Serial plate The serial identification plate A is positioned on the side Fig 1 and shows all the characteristic data relating to the appliance including details of the Manufacturer the Serial number and brand A Fig 1 The Serial number must always be indicated for any type of request regarding the appliance 1 12 Delivery of the appliance ...

Страница 47: ...oposed installation solutions The installer must comply with all local national and European safety regulations The appliance must be installed on floors with adequate load bearing capacity Check that the chimney flue and air inlet set ups conform to the type of installation Do not carry out on the fly electrical connections with temporary or uninsu lated cables Check that the earthing of the elec...

Страница 48: ...of the product and electronic appliances connected thereto and to prevent accidents it is important to always follow the instruc tions provided in this manual The appliance has particularly hot external surfaces door handle glass flue gas outlet pipes etc Contact with these parts must therefore be avoided unless wearing suitable protective clothing or equipment such as heat resistant gloves or in ...

Страница 49: ...tion turn the appliance off and immediately con tact your specialised technician Do not throw water on the appliance in operation or to extinguish the fire in the burn pot Do not switch the appliance off by disconnecting the mains electrical connection Do not lean on open doors this could compromise the stability of the appliance Do not use the appliance as an anchor support of any kind It is proh...

Страница 50: ...the electrical insulation caus ing electric shocks Do not sit stand in front of the product in operation for long periods Incorrect use of the product or incor rect maintenance works may create a serious risk of explosion in the combus tion chamber Only use the fuel recommended by the manufacturer The product must never be used as an incinerator It is prohibited to use benzene lamp fuel kerosene l...

Страница 51: ...ided It is prohibited to use the appliance as an incinerator to burn rubbish The appliance has a pellet hopper with the capac ity indicated in section 4 3 Technical features on page 56 The loading compartment is positioned at the top it must always be open for loading of the pel lets and must remain closed while the appliance is operating 3 2 Pellet storage Pellets must be kept in a dry place not ...

Страница 52: ... 3 A Door B Closing hook C Pellet hopper D Pellet hopper temperature thermostat E Faulty F Power supply G Room sensor H Pellet level sensor I Room fan J Combustion air inlet pipe K Smoke outlet pipe L Flue gas fan M Cold handle N Opening handle O Combustion chamber P Ash compartment Q Burn pot R Microswitch S Faulty T Pellet loading system ...

Страница 53: ...k C Pellet hopper D Pellet hopper temperature thermostat E Faulty F Power supply G Room sensor H Pellet level sensor I Room fan J Smoke outlet pipe K Flue gas fan L Cold handle M Opening handle N Combustion chamber O Ash compartment P Burn pot Q Microswitch R Insert support frame S Combustion air inlet pipe T Faulty U Pellet loading system ...

Страница 54: ...54 004778890 12 11 2021 4 2 Dimensions INSERT A78 FRONT 490 5 782 52 182 5 Ø 80 265 390 5 641 622 561 476 643 3 Ø 4 2 336 81 198 Ø 42 combustion air inlet Ø 80 flue gas outlet Dimensions in mm Fig 5 ...

Страница 55: ... 2021 55 ITALIANO ENGLISH FRANÇAIS INSERT AC78 CHANNELLED Ø 198 52 182 5 Ø 80 270 391 Ø 138 5 683 5 782 353 198 336 555 933 873 995 510 639 5 Ø 4 2 Ø 42 combustion air inlet Ø 80 flue gas outlet Dimensions in mm Fig 6 ...

Страница 56: ...CO emissions at 13 of O2 mg Nm3 164 115 Flue gas outlet mm Ø 80 Combustion air inlet mm Ø 42 External air intake mm Ø 110 Fuel Wooden pellets Flue draught Pa 0 0 Minimum draught for chimney sizing Pa 12 2 Appliance suitable for rooms no smaller than m3 40 Feeding tank capacity kg 110 Weight kg 23 Electrical data A78 AC78 Voltage V 230 Frequency Hz 50 Max power absorbed during operation W 91 Power ...

Страница 57: ...a nominale 13 O2 Dust mg Nm3 Temperatura fumi Tf C Distanza minima da materiali infiammabili X1 X2 Y mm Tensione V V Frequenza f Hz Potenza max assorbita in funzionamento Wmin W Potenza max assorbita in accensione Wmax W Fig 7 F Fuel PImax Max thermal power input PImin Min thermal power input Pmax Rated thermal power Pmin Reduced thermal power EFFmax Efficiency at rated power EFFmin Efficiency at ...

Страница 58: ...O06 CN2 CN10 CN9 CN1 CN3 CN5 LD1 LD2 CN7 CN6 I01 T04 Pa Pa T03 T02 T01 T05 I03 GND GND GND I04 5V 16V F02 F03 F01 I02 BROWN BLACK BLUE Air R 20 2 7 POSITIVE RED Pa 15 13 ext 1 2 Fig 8 1 Hall sensor 2 External thermostat 4 Room sensor 5 Pellet probe 6 Flue gas probe 7 Pressure differential 8 Incandescence resistance 9 Flue gas exhaust fan 10 Loading dispenser 11 Safety thermostat Pa 12 Pressure swi...

Страница 59: ... The product must be handled and un packed using suitable means Make sure that children do not play with the pack aging components e g films and polystyrene Danger of suffocation During moving lifting and unpacking of the appliance the following is absolutely necessary always keep it upright never tip it over into a horizontal position never tilt it on the front to avoid breaking the glass of the ...

Страница 60: ...ixing screws from the base and remove the pallet Fig 14 5 2 Transportation Make sure that the lifting carriage has a payload higher than the weight of the appliance to be lifted The full responsi bility of the lifting of loads lies with the person handling the lifting equipment Ensure wood or timber floors are prop erly protected in order to prevent the weight of the appliance from damag ing them ...

Страница 61: ... of com merce based on the Ministerial Decree 37 08 6 3 Place of installation For the minimum distances that must be re spected when positioning the appliance with respect to flammable materials and objects refer to the instructions in Fig 15 X2 Y2 Z Y1 X1 Fig 15 Model X1 X2 Y1 Y2 Z A78 AC78 800 200 200 200 750 mm Floors made of flammable material such as wood parquet linoleum laminate or floors c...

Страница 62: ...extract the combustion air 20 30 cm from the ground observing the size indica tions indicated in External air intake of section 4 3 Technical features on page 56 If it is not possible to make an external air intake in the room it is possible to make the external hole in an adjacent room as long as it perma nently connects via passage grille Fig 18 C Container G Grille S Damper C G S The image is p...

Страница 63: ...Lower grille A provided in the cladding and external air intake B for the recirculation of ambient air F A E B D The image is purely indicative Fig 20 For AC78 only ducted Fig 21 lower grille A provided in the cladding and external air intake B for the recirculation of ambient air to be created inside or outside the cladding A E B D The image is purely indicative Fig 21 Fig 22 make sure that the c...

Страница 64: ...ion The components making up the flue gas ducting system must be declared suitable for the specific operating con ditions and provided with CE marking It is mandatory to create a first vertical section measuring at least 1 5 meters to guarantee correct expulsion of the flue gases It is advisable to make a maximum of 3 direction changes in addition to that resulting from the rear connection of the ...

Страница 65: ...ditional chimney Fig 26 can be done as long as you are sure of the state of maintenance of the chimney In the case of an old chimney it is advisable to renew it using ducting The flue gas exhaust must be on the roof 1 3 2 Fig 26 1 Wind proof cowl 2 Seal 3 Inspect If the chimney has a larger section it must be intubated with a suitably in sulated steel pipe with diameter suita ble for the route Fig...

Страница 66: ...lace with or without optional frame 7 2 1 Generator installation on top of a fireplace A78 only In the event of installation in structures with marble cladding or other materials the insert has sliding guides to assist with extracting the equipment for attaching to the fixing surface and for carrying out inspections and checks on the mechanical and electrical components Once the pallet has been re...

Страница 67: ...lation in structures with marble cladding or other materials the insert has sliding guides to assist with extracting the equipment for attaching to the fixing surface and for carrying out inspections and checks on the mechanical and electrical components The stand is supplied in model AC78 while it is optional in model A78 Once the pallet has been removed refer to par agraph HANDLING AND TRANSPORT...

Страница 68: ...he room fan for model AC78 only 5 The lining must be made of fireproof material 6 Min distance 1 cm between cladding and fireplace stove 7 Protect any wooden parts with fireproof material 8 Counter hood and fireproof load bearing structure 9 Pellet loading system See the instructions supplied with the kit for installation 10 UNI standards require the installation of a heat recovery grille as close...

Страница 69: ...esired points Fasten the tube 1 to the collars 2 with the clamps 3 Insulate the pipes with insulating material 2 3 1 Fig 38 The vents are fixed on the hood or on a wall at a height of at least 1 8 2 0 m from the floor in order to prevent that the outgoing hot air invests people The ducts should not be longer than 7 8 m 7 5 2 Channelled pipelines fitting for heating in multiple rooms To heat severa...

Страница 70: ...ladding and on the hood for 1 the display housing 2 the air vents 3 the heat exhaust ventilation in the hood 4 the ventilation of the cladding on the base 5 pellet loading opening The holes must comply with the measurements indicated in the figure 115 65 295 295 295 295 4 1 2 3 5 1 Fig 41 7 7 Electrical connection Simply connect the appliance to the electrical system using the supplied plug Fig 42...

Страница 71: ...Do not install the recessed box on hot areas of the hood Arrange the passage of the cable be tween the panel and the electronic board so that it is not damaged by the high temperature during normal oper ation of the appliance Connect the cable between the terminals of the electronic board and the control panel before closing the boxes 7 7 2 Connection to the room thermostat The appliance can be co...

Страница 72: ... means to load the pellet hopper The use of non original accessories is not recommended Pellets falling outside the hopper may damage the operation of the appliance and cause fires The pipe for pellet loading optional must act exclusively as a ramp to fill the hopper of the appliance and not as an extension of the hopper itself avoid loading more pellets than the hopper can hold 8 1 1 Optionals av...

Страница 73: ...urs or fumes may be generated due to the evaporation or drying of certain mate rials used This phenomenon will grad ually disappear Connect the appliance to the mains operate the power switch on the back of the appliance by turning it to I Fig 47 If the connection is correct the appliance emits a series of intermittent noises and the display lights up See the display manual ...

Страница 74: ...e the plug from the wall socket Always use appropriate equipment for maintenance Once maintenance or repair operations have been completed before putting the appliance back into service reinstall all the safety guards and reactivate all the safety devices 9 1 Ordinary maintenance cleaning program 9 1 1 Ordinary cleaning User EVERY TIME THE APPLIANCE IS TURNED ON EVERY WEEK Burn pot Fig 48 X Ash dr...

Страница 75: ...n pot remove it from its seat and clean the compartment that contains it including the resistor Fig 48 Fig 48 Clean the entire area indicated in Fig 49 Using an ash vacuum can simplify the cleaning operations Fig 49 9 2 2 Cleaning the glass It is carried out with a damp cloth or with damp ened paper that is wiped over the ash Rub until the glass is clean Do not clean the glass while the appliance ...

Страница 76: ...utlet con nection is sealed and clean Remove any deposits of pellet resi dues in the hopper 9 3 1 Appliance maintenance This should be carried out once a year or whenev er necessary following the steps indicated below Release the door by using the cold handle pro vided Open the door with the handle Fig 53 Remove the burn pot Grip the bottom wall by the handles Remove the bottom wall by pushing it ...

Страница 77: ...oving the appliance from its seat and vacuuming the residues contained inside the T pipe with an ash vacuum cleaner Open the door Turn the pin anticlockwise using the key pro vided and release the catch Fig 57 Pull the appliance out until it reaches the end of the guides Use an ash vacuum cleaner to remove debris inside the T pipe Fig 58 Check that the door locking mechanism is working correctly a...

Страница 78: ...sket Clean the entire area indicated in Fig 60 B A Fig 60 9 3 4 Auger maintenance In case the feed pipe that takes the pellets from the hopper to the combustion chamber gets clogged proceed as follows Remove the inspection plate catch A Remove the inspection plate B B A Fig 61 Remove the pellet residues inside the feed pipe using a screwdriver Fig 62 Proceed in reverse order to paragraph 9 3 2 Flu...

Страница 79: ...ure to clean or inadequate cleaning the appliance may have operating problems including Poor combustion Glass blackened Blockage of the burn pot with accumulation of ash and pellets Deposit of ash and excessive deposits on the exchanger with consequent poor performance Oncethemaintenanceoperationsarecompleted Re fit all the components in reverse order Reset any warnings or alarms the manual re set...

Страница 80: ...d animals The differentiated disposal of the product makes it possible to avoid potentially negative conse quences on the environment and health and also allows recycling of the materials making up the product in order to achieve significant energy and resource savings Any liability for damage to people and animals always falls on the owner Upon demolition the EC marking this manual and other docu...

Страница 81: ...e technique et entretien 85 1 10 Pièces détachées 85 1 11 Plaque signalétique 85 1 12 Livraison de l appareil 85 2 AVERTISSEMENTS POUR LA SÉCURITÉ 86 2 1 Avertissements pour l installateur 86 2 2 Avertissements pour les techniciens préposés à l entretien 87 2 3 Avertissements pour l utilisateur 87 3 CARACTÉRISTIQUES DU COMBUSTIBLE 90 3 1 Caractéristiques du combustible 90 3 2 Stockage des granulés...

Страница 82: ...onnel 104 7 INSTALLATION 105 7 1 Considérations générales 105 7 2 Configurations d installation A78 AC78 105 7 3 Schéma de montage 107 7 4 Raccordement aspiration air ventilateur ambiant 108 7 5 Raccordement de l arrivée d air chaud 108 7 6 Réalisation de trous techniques sur le revêtement 109 7 7 Branchement électrique 109 8 PREMIER ALLUMAGE 111 8 1 Chargement des granulés de bois 111 8 2 Premier...

Страница 83: ...nt de vue structurel mécanique et de pose 1 3 Objet et contenu du manuel Le but de ce manuel est de fournir les règles fondamentales et de base pour l installation cor recte de l appareil Le respect scrupuleux des indications qui y fi gurent garantit un haut degré de sécurité et de productivité de l appareil 1 4 Conservation du manuel Conservation et consultation Le manuel doit être conservé avec ...

Страница 84: ...Conformité Les appareils couverts par ce manuel sont conformes aux dispositions législatives des direc tives communautaires suivantes 2014 30 UE Directive sur la compatibilité électromagnétique 2014 35 UE Directive Basse Tension 2017 2102 UE Directive RoHS 2009 125 CE Directive sur la Conception écocompatible 2014 53 UE Directive RED Radio Equipment Directive RÈGLEMENT UE N 305 2011 CPR RÈGLEMENT ...

Страница 85: ...re soudaine des composants qui pourrait provo quer de graves dommages aux personnes et aux choses 1 11 Plaque signalétique La plaque signalétique A est située au côté Fig 1 et indique toutes les données caractéristiques de l appareil y compris les données du Fabricant le numéro de série et la marque A Fig 1 Le numéro de série doit toujours être indiqué dans toute demande concernant l appareil 1 12...

Страница 86: ... respecter tous les rè glements de sécurité locaux nationaux et européens L appareil devra être installé sur des planchers ayant une capacité portante appropriée Vérifier que les prédispositions du conduit de fumée et de l ar rivée d air soient conformes au type d installation Ne pas effectuer de branchements électriques volants avec des câbles pro visoires ou non isolés Vérifier que la mise à la ...

Страница 87: ... la fumée etc Il est donc nécessaire d éviter d entrer en contact avec ces pièces sans vêtements de protection adéquats ou sans moyens appropriés tels que des gants de pro tection thermique ou des systèmes d ac tionnement de type poignée froide Pour cette raison il est recommandé d être extrêmement attentif pendant le fonctionnement en particulier Ne pas toucher et ne pas s ap procher de la vitre ...

Страница 88: ...elle ou comme structure de support Ne pas nettoyer l appareil jusqu au re froidissement complet de la structure et des cendres Toucher la porte seulement lorsque l appareil est froid En cas de fuite de fumée dans la pièce ou d explosion endommageant l appa reil éteindre celui ci ventiler la pièce et contacter immédiatement l installa teur technicien de service En cas d incendie dans le conduit des...

Страница 89: ...îner un risque sérieux d explosion dans la chambre de combustion Utiliser uniquement le combustible recommandé par le fabricant Le pro duit ne doit pas être utilisé comme incinérateur Il est interdit d utiliser de l essence du combustible pour lampe du kérosène du liquide allume feu pour bois de l al cool éthylique ou des liquides similaires pour allumer ou raviver une flamme dans cet appareil Gar...

Страница 90: ...appareil est équipé d un réservoir de stockage des granulés de la capacité indiquée au para graphe 4 3 Caractéristiques techniques en page 95 Le logement de recharge est placé sur la partie supérieure il doit toujours pouvoir être ouvert pour permettre de charger les granulés et il doit rester fermé pendant le fonctionnement de l appareil 3 2 Stockage des granulés de bois Les granulés de bois doiv...

Страница 91: ...lés D Thermostat température réservoir granulés E Carte électronique F Alimentation G Sonde ambiante H Capteur de niveau granulés I Ventilateur ambiant J Tube arrivée d air de combustion K Tube d évacuation des fumées L Ventilateur fumées M Poignée froide N Poignée d ouverture O Chambre de combustion P Compartiment à cendres Q Brasier R Microrupteur S Carte électronique T Système de chargement gra...

Страница 92: ...nulés E Carte électronique F Alimentation G Sonde ambiante H Capteur niveau granulés I Ventilateur ambiant J Tube d évacuation des fumées K Ventilateur fumées L Poignée froide M Poignée d ouverture N Chambre de combustion O Compartiment à cendres P Brasier Q Microrupteur R Cadre de support insert S Tube arrivée d air de combustion T Carte électronique U Système de chargement granulés ...

Страница 93: ...3 ITALIANO ENGLISH FRANÇAIS 4 2 Dimensions INSERTION A78 FRONTALE 490 5 782 52 182 5 Ø 80 265 390 5 641 622 561 476 643 3 Ø 4 2 336 81 198 Ø 42 arrivée de l air de combustion Ø 80 évacuation des fumées Dimensions en mm Fig 5 ...

Страница 94: ...890 12 11 2021 INSERT AC78 CANALISÉ Ø 198 52 182 5 Ø 80 270 391 Ø 138 5 683 5 782 353 198 336 555 933 873 995 510 639 5 Ø 4 2 Ø 42 arrivée de l air de combustion Ø 80 évacuation des fumées Dimensions en mm Fig 6 ...

Страница 95: ...CO à 13 de O2 mg Nm3 164 115 Sortie fumée mm Ø 80 Arrivée de l air de combustion mm Ø 42 Prise d air externe mm Ø 110 Combustible Granulés de bois Tirage du conduit de fumée Pa 0 0 Tirage minimum pour dimensionnement du poêle Pa 12 2 Appareil adapté pour des pièces non inférieures à m3 40 Capacité du réservoir d alimentation kg 110 Poids kg 23 Données électriques A78 AC78 Tension V 230 Fréquence H...

Страница 96: ...ateriali infiammabili X1 X2 Y mm Tensione V V Frequenza f Hz Potenza max assorbita in funzionamento Wmin W Potenza max assorbita in accensione Wmax W Fig 7 F Combustible PImax Puissance thermique max introduite PImin Puissance thermique min introduite Pmax Puissance thermique nominale Pmin Puissance thermique réduite EFFmax Rendement à la puissance nominale EFFmin Rendement à la puissance réduite ...

Страница 97: ...N2 CN10 CN9 CN1 CN3 CN5 LD1 LD2 CN7 CN6 I01 T04 Pa Pa T03 T02 T01 T05 I03 GND GND GND I04 5V 16V F02 F03 F01 I02 BROWN BLACK BLUE Air R 20 2 7 POSITIVE RED Pa 15 13 ext 1 2 Fig 8 1 Capteur de hall 2 Thermostat externe 4 Sonde ambiante 5 Sonde granulés 6 Sonde fumées 7 Différentiel de pression 8 Résistance à incandescence 9 Ventilateur évacuation fumées 10 Doseur chargement 11 Thermostat de sécurit...

Страница 98: ... Ne pas laisser les enfants jouer avec les éléments de l emballage film plastique et polystyrène Risque d étouffement Lors des opérations de déplacement soulève ment et déballage de l appareil toujours le maintenir en position verticale ne jamais le renverser en position horizontale ne jamais l incliner sur sa partie frontale pour éviter la rupture éventuelle de la vitre de la porte du foyer 5 1 E...

Страница 99: ...vis de fixation palette de la base et enlever la palette Fig 14 5 2 Transport S assurer que le chariot élévateur a une capacité supérieure au poids de l appareil à soulever Le conducteur de l engin de levage sera responsable du levage des charges Faire particulièrement attention à pro téger adéquatement les sols en bois ou parquet afin d éviter que le poids de l appareil ne les abime lors de son d...

Страница 100: ...eu d installation Pour les distances minimum à respecter lors du positionnement de l appareil par rapport aux matériaux et aux objets inflammables se référer aux indications de Fig 15 X2 Y2 Z Y1 X1 Fig 15 Modèle X1 X2 Y1 Y2 Z A78 AC78 800 200 200 200 750 mm Les planchers faits de matériaux inflammables comme le bois le parquet le linoléum le stratifié ou recouverts de tapis doivent être protégés p...

Страница 101: ...20 30 cm du sol en respectant les indications dimension nelles sous la rubrique Prise d air extérieure du paragraphe Caractéristiques techniques en page 95 S il n est pas possible de réaliser la prise d arrivée d air externe dans la pièce il est possible de pra tiquer le trou extérieur dans une pièce adjacente à condition qu elle soit en communication per manente avec une grille de transit Fig 18 ...

Страница 102: ...evêtement et prise extérieure B pour le recyclage de l air ambiant F A E B D L image est purement indicative Fig 20 Seulement pour AC78 canalisé Fig 21 grille inférieure A fournie sur le re vêtement et prise d air extérieure B pour le recyclage de l air ambiant à réaliser entière ment ou à l extérieur du revêtement A E B D L image est purement indicative Fig 21 Fig 22 s assurer d avoir branché sur...

Страница 103: ...ion de la fumée doivent être déclarés adaptés aux conditions de fonctionnement spécifiques et porter le marquage CE Il est obligatoire de réaliser une pre mière partie verticale de 1 5 mètre au minimum pour garantir la bonne ex pulsion de la fumée Il est recommandé d effectuer au maximum 3 changements de direction en plus de celle ré sultant du raccordement arrière de l appareil à la cheminée en u...

Страница 104: ...le Fig 26 peut se faire à condition que la cheminée soit entretenue Dans le cas d une ancienne cheminée il est recommandé de la restaurer par intubation L évacuation des produits de combustion doit être prévue sur le toit 1 3 2 Fig 26 1 Chapeau anti vent 2 Sceller 3 Inspection Si la section de la cheminée est supé rieure il est nécessaire d intuber la cheminée avec un tube en acier dont le diamètr...

Страница 105: ...ec ou sans châssis optionnel 7 2 1 Installation du générateur sur le plan d une cheminée seulement A78 En cas d installation dans des structures avec revêtement en marbre ou autre matériau l in sert est doté de rails coulissants pour faciliter l extraction de l appareil pour la fixation sur le plan d appui et pour les interventions normales d inspection et contrôle des pièces mécaniques et électri...

Страница 106: ...installation dans des structures avec revêtement en marbre ou autre matériau l in sert est doté de rails coulissants pour faciliter l extraction de l appareil pour la fixation sur le plan d appui et pour les interventions normales d inspection et contrôle des pièces mécaniques et électriques Le socle est fourni dans la version standard dans le modèle AC78 tandis que le modèle A78 est fourni en opt...

Страница 107: ...ur le nettoyage et l entretien du ventilateur ambiant seulement pour le modèle AC78 5 Le revêtement doit être réalisé dans un maté riau ignifuge 6 Distance de 1 cm minimum entre le revête ment et l insert 7 Isoler les éléments en bois avec du matériau ignifuge 8 Habillage et structure portante ignifuge 9 Système de chargement des granulés Pour l installation se référer aux instructions four nies a...

Страница 108: ...e pour le chauffage dans une seule pièce Prendre le tuyau flexible aux extrémités et l al longer en l accompagnant d un mouvement rotatoire Fig 37 Le couper à la longueur souhaitée non supé rieure à 200 cm et monter les bouches aux endroits souhaités Fixer le tuyau 1 aux colliers 2 à l aide des col liers de serrage 3 Isoler les tuyaux avec du matériau isolant 2 3 1 Fig 38 Les bouches doivent être ...

Страница 109: ...portes ou maintenir les portes entrouvertes Double conduit Fig 39 Un seul conduit Fig 40 7 6 Réalisation de trous techniques sur le revêtement Le revêtement doit être fait uniquement par du personnel qualifié Il faut réaliser des trous techniques sur le revête ment et sur la hotte pour 1 le logement de l afficheur 2 les bouches d aération 3 l évacuation de chaleur sur la hotte 4 l aération du revê...

Страница 110: ...astrable sur des zones chaudes de la hotte Préparer le passage du câble entre le tableau et la carte électronique de ma nière à ce qu il ne soit pas endommagé par la température durant le fonction nement normal de l appareil Raccorder le câble entre les bornes de la carte électronique et le tableau de commande avant de fermer les boîtiers 7 7 2 Connexion au thermostat d ambiance Il est possible de...

Страница 111: ...n d accessoires non d origine est déconseillée La chute de granulés à l extérieur du ré servoir peut endommager le fonction nement de l appareil et provoquer des foyers d incendie Le tuyau pour le chargement des granulés en option doit servir exclusivement de goulotte pour remplir le réservoir de l appareil et non pas de rallonge du réservoir lui même ne pas dé passer la capacité du réservoir en c...

Страница 112: ...e gé nérées par l évaporation ou le séchage de certains des matériaux utilisés Ce phénomène diminuera jusqu à dispa raître complètement Brancher l appareil au réseau électrique posi tionner l interrupteur d allumage situé au dos de l appareil sur I Fig 47 Si la connexion est correcte l appareil émet une série de bips intermittents et l affichage s allume Se référer au manuel de l afficheur ...

Страница 113: ...ntellement Débrancher la fiche de la prise murale Toujours travailler avec des outils appropriés à l entretien À la fin de l entretien ou des opérations de réparation avant de remettre l appareil en marche ré installer toutes les protections et réactiver tous les dispositifs de sécurité 9 1 Programme de nettoyage et entretien ordinaire 9 1 1 Nettoyage courant utilisateur À CHAQUE ALLUMAGE TOUTES L...

Страница 114: ... qui le contient y compris la résistance Fig 48 Fig 48 Nettoyer la zone indiquée en Fig 49 L utilisationd unaspirateuràcendrespeut simplifier les opérations de nettoyage Fig 49 9 2 2 Nettoyage de la vitre Le nettoyage doit être effectué à l aide d un chif fon humide ou avec du papier humidifié et passé dans les cendres Frotter jusqu à ce que la vitre soit propre Ne pas nettoyer la vitre pendant le...

Страница 115: ...dus de granulés dans le réservoir 9 3 1 Entretien de l appareil Cette opération doit être effectuée au moins une fois par an et quoi qu il en soit chaque fois que cela est nécessaire en procédant comme suit Débloquer la porte à l aide de la poignée froide fournie Ouvrir la porte à l aide de la poignée Fig 53 Extraire le brasier Saisir la paroi réfractaire arrière par les poi gnées Extraire la paro...

Страница 116: ...enus à l intérieur du té à l aide d un aspirateur à cendres Ouvrir la porte À l aide de la clé fournie tourner la goupille dans le sens inverse des aiguilles d une montre et libérer le loquet Fig 57 Extraire l appareil pour pouvoir atteindre les fins de courses des guides Utiliser un aspirateur à cendres pour éliminer les résidus à l intérieur du Tee Fig 58 Vérifier le bon fonctionnement du mécani...

Страница 117: ...r les cendres dans l endroit indiqué dans l image Fig 60 B A Fig 60 9 3 4 Entretien de la vis sans fin En cas d engorgement du tuyau d alimentation qui du réservoir transporte les granulés vers la chambre de combustion procéder comme suit Retirer le loquet A de la plaque d inspection Extraire la plaque d inspection B B A Fig 61 Éliminer les résidus de granulés à l intérieur du tuyau d alimentation...

Страница 118: ...des problèmes de fonctionnement peuvent se vérifier tels que Mauvaise combustion Noircissement de la vitre Engorgement du brasier avec accumulation de cendres et de granulés Dépôt de cendres et incrustations excessives sur l échangeur entraînant un faible rende ment du poêle Une fois les opérations de maintenance terminées Remonter tous les composants en commen çant par le dernier retiré Réinitial...

Страница 119: ...un grave danger L élimination du produit de manière différenciée permet d éviter les éventuelles conséquences négatives pour l environnement et la santé et permet de récupérer les matériaux dont il est composé afin d obtenir une importante écono mie d énergie et de ressources Le propriétaire est le seul responsable en cas d éventuels dommages à des personnes et des animaux Lors de la démolition le...

Страница 120: ...iudicarne le caratteristiche essenziali Palazzetti reserves the right to change its products at any time and without notice in order to improve them without compromising their essential characteristics Palazzetti se réserve le droit de modifier ses produits à tout moment et sans préavis afin de les améliorer sans en compromettre les caractéristiques essentielles Ufficio libretti Palazzetti 0047788...

Отзывы: