8
Auto-UV 75 & 130
MA60-19 E
ENGLISH
A
B
C
D
E
Starting
1. Check that all connections and cable screwings are tightened, including the drain plug (E).
2. Turn on the system’s water flow.
3. Switch on the Auto-UV’s power switch.
Operation
• Never use the Auto-UV without any water flow.
• A sight glass at the top of the casing makes it simple and safe to see whether the UV lamp is on.
• The Auto-UV has a clear display that shows the operating time. The UV lamp must be replaced after 9,000 hours of operation
in order to maintain sufficient radiation intensity.
• The display starts to flash after 8,000 hours to indicate that a lamp replacement is required.
After 9,000 hours the unit switches off automatically.
• After a period of operation, the quartz glass may develop a film on the outside. Iron, calcium and magnesium, which are
always present in the water, may form a brownish film on the quartz glass. This reduces the UVC radiation into the water.
The quartz glass must therefore be cleaned continuously. How often this is required depends on the water quality, but we
suggest after 1,000 hours of operation.
The quartz glass must be cleaned using the appropriate cleaning fluid (Pahlén article no. 41465).
• If there is a risk of freezing, or if the pool is closed down for a longer period, the casing must be drained of all water.
Cleaning the quartz glass
Follow the procedure below and always use gloves when handling the quartz glass and the lamp.
1. Switch off the current to the unit.
2. Turn off the flow through the casing.
3. Loosen the cable screw connection (A) so that the cable on the top of the casing can rotate.
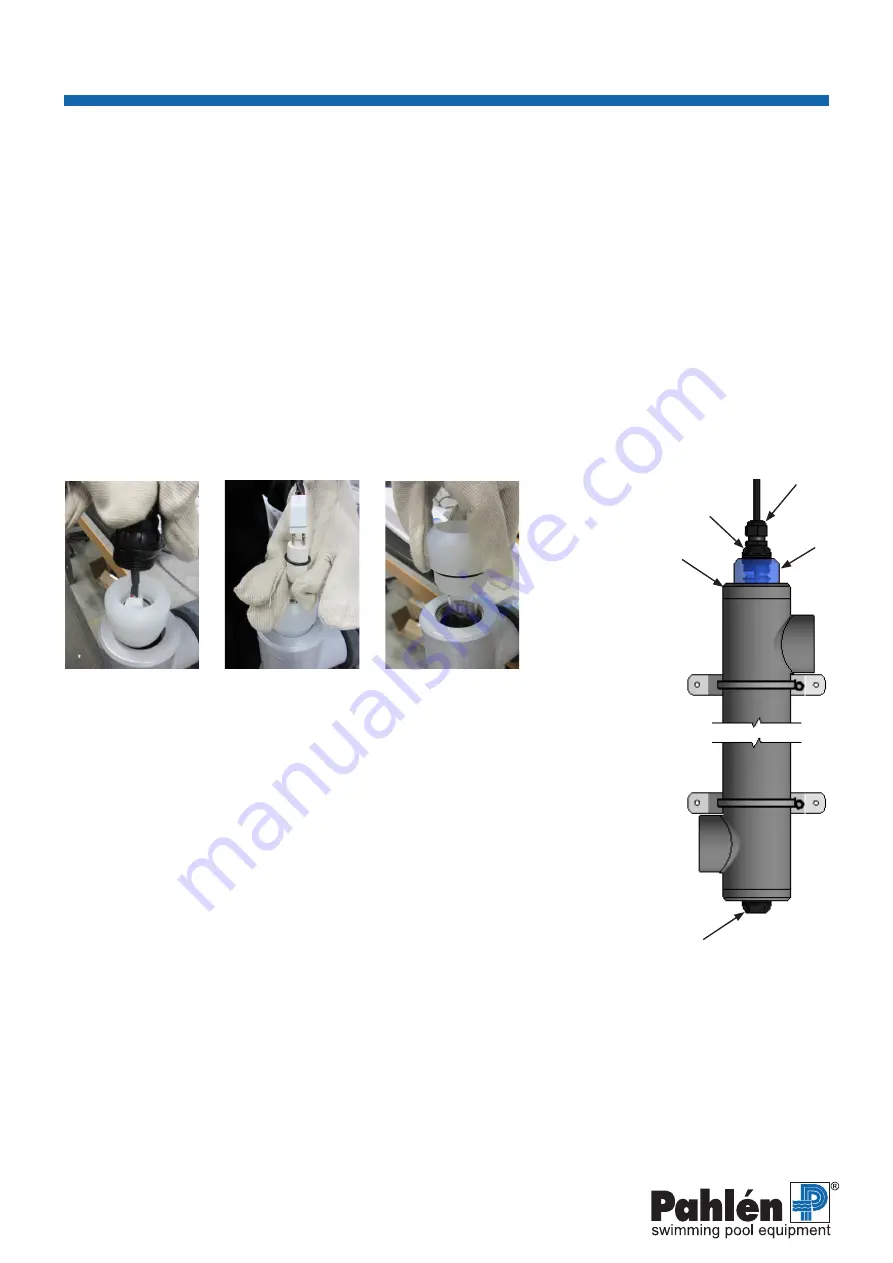
4. Unscrew the black plug (B) from the top of the casing and lift carefully (picture 1).
5. Grip the lamp and loosen it from the contact (picture 2). Lift the lamp straight up.
6. Unscrew the sight glass (C) from the casing (D) and carefully lift the quartz glass straight up (picture 3).
NOTE: The quartz glass must not be removed from the sight glass.
7. Check that the quartz glass is intact - if there are any cracks, it must be replaced.
8. Apply cleaning fluid using a lint-free cloth and dry the quartz glass.
9. Reassemble in reverse order. Make sure that the quartz glass is resting down in the bottom plug.
Replacing the lamp
Follow the procedure below and always use gloves when handling the lamp.
1. Switch off the current to the unit.
2. Loosen the cable screw connection (A) so that the cable on the top of the casing can rotate.
3. Unscrew the black plug (B) from the top of the casing and lift carefully (picture 1).
4. Grip the lamp and loosen it from the contact (picture 2). Lift the lamp straight up.
5. Replace the lamp and reassemble in reverse order.
6. Reset the operating time gauge by holding down the reset button for approx. 5 seconds.
The button is located on the underside of the box on the casing.
Picture 1
Picture 2
Picture 3
Содержание Auto-UV 75
Страница 2: ......


