


OSD
Manual
for
functions
control
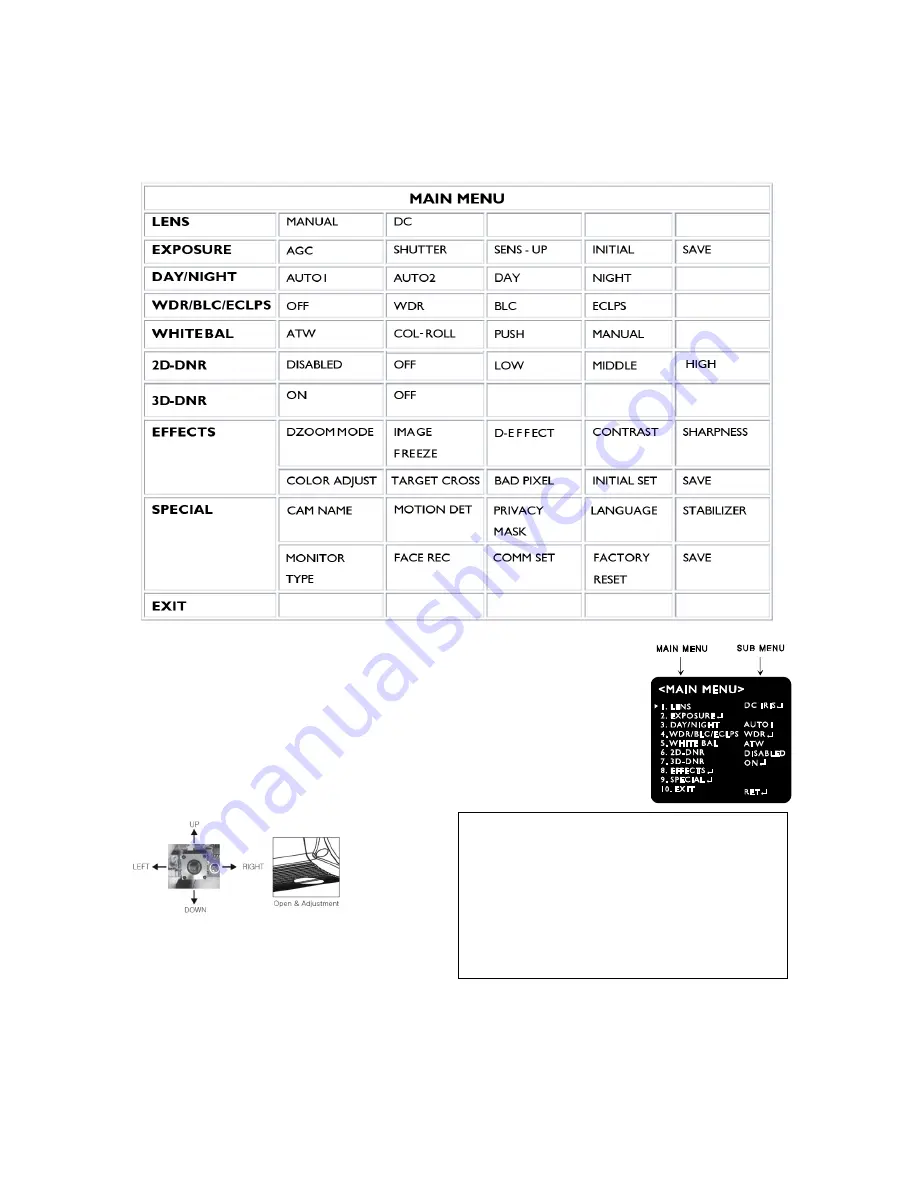
1.
On
Screen
Menu
(OSD)
2.
Setting
up
the
menu
1.
Press
the
Tact
SW
to
enter
<MAIN
MENU>.
2.
Move
the
arrow
to
a
specific
menu
by
pushing
the
Tact
SW
up
or
down.
3.
Adjust
the
selected
feature
by
pushing
the
Tact
SW
left
or
right
How
to
use
OSD
button
(Tact
SW)
Press
-
to
enter
the
menu
-
to
save
settings
Push
up
or
down
-
to
select
functions
Push
left
or
right
-
to
adjust
a
level
or
mode
of
sub
‐
menu
4.
When
completed,
move
the
arrow
indicator
to
‘EXIT’
and
press
the
Tact
SW
to
finish
all
settings.
15 version 1.0.1


