The turntable must be connected via a USB cable to the computer running the
Packshot
Spin
360 software.
Insert the installation CD-Rom into your computer. During the installation, enter the
serial number of your product situated close to the USB and power outlet connections.
Follow the on-screen instructions until the installation is completed.
Step
B
Step
A
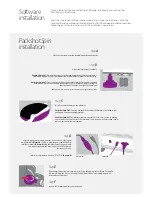
Adjust the legs of your turntable.
Packshot
Spin 06T:
Adjust all four legs to the desired height. Make sure the turntable is
stable then tighten the top screw against the bottom of the turntable to lock each leg.
Packshot
Spin 09T:
Due to its heavy weight, the
Packshot
Spin 09T turntable is equiped
with wheels to aid in transporting the turntable. To use the wheels, adjust the legs so
that they don’t touch the floor then lock each nut.
Step
C
Install the circular bases on the platform:
Packshot
Spin O6T:
You may use the black or white circular bases included in your
package to customize your animations.
Packshot
Spin 09T:
The platform features concentric circles to assist you in placing
your items at the exact center of the turntable. You may also use the included circular
bases to customize your animations.
Step
D
Depending on your product, you may also need to use the signal
amplifier cable
(Picture A)
. To do so, plug the power and USB cords
into the turntable
(Picture B)
. Plug the other end of the power cord
into a power jack and the other end of the USB cord into a
computer USB port.
Switch the turntable on position “II” or “ON”.
(Picture B)
Step
E
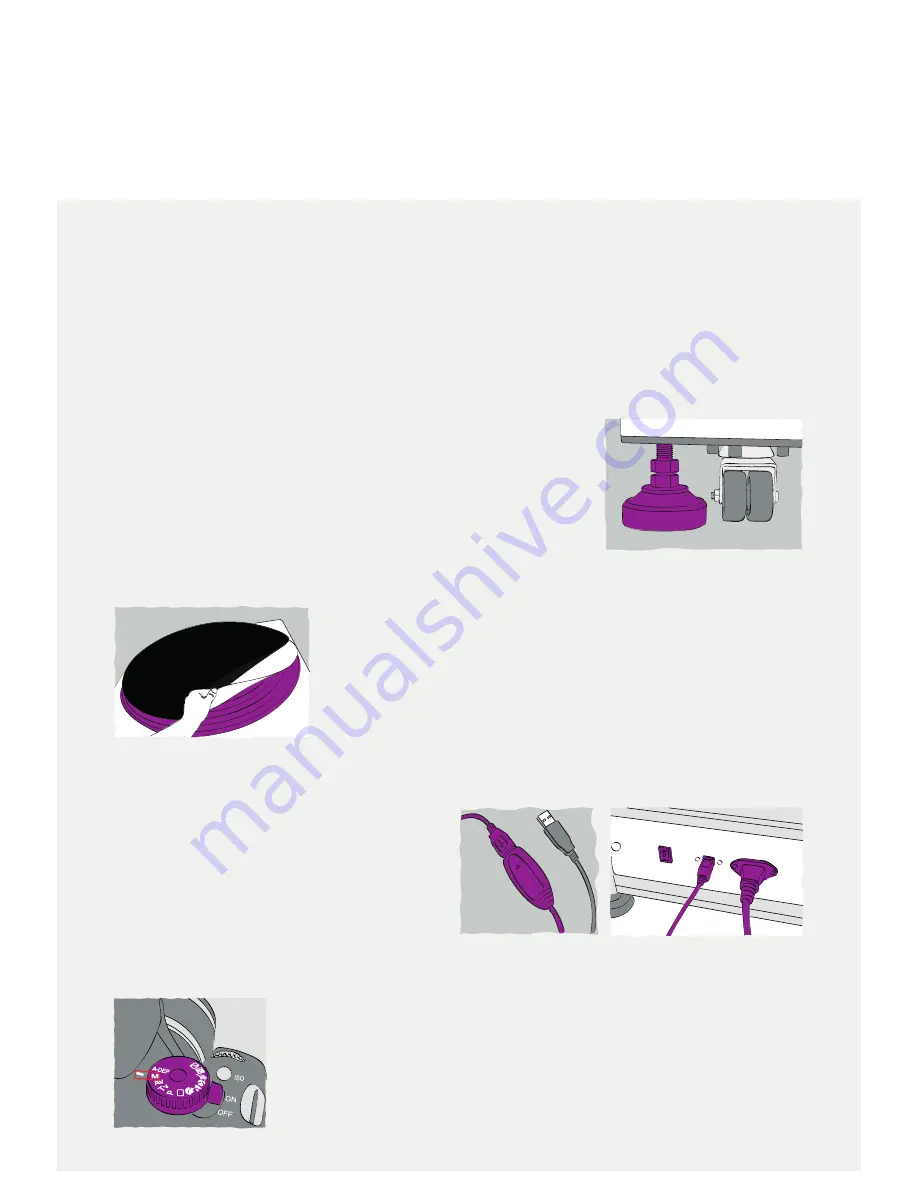
Plug the digital camera into your computer using the appropriate USB cord. To install a
SLR camera, plug the lens on the camera body, and set the mode setting ring on ‘M’
(Manual exposure mode).
Step
F
Launch the software and turn the camera on.
Picture
A
Picture
B
Software
installation
Packshot
Spin
installation
Place the computer near the turntable and the power outlet.
Note:
there should be a power outlet with proper grounding nearby.

