background image

Packard Bell oneTwo L5860 / L5861 AIO Computer Service Guide

75

Hard Disk Drive-related Symptoms

Symptom/Error

Action/FRU

Hard disk drive test failed.

• Enter CMOS Setup and load the default settings.
• Hard disk drive cable
• Hard disk drive
• Mainboard

Hard disk drive cannot format completely.

• Enter CMOS Setup and load the default settings.
• Hard disk drive cable
• Hard disk drive
• Mainboard

Hard disk drive has write error.

• Enter CMOS Setup and load the default settings.
• Hard disk drive 

Hard disk drive LED fails to light, but 
system operates normally.

• With the system power on, measure the voltage of the HDD 

LED connector.

• HDD LED cable

NOTE

Make sure the hard disk drive is configured correctly in CMOS Setup and that cable/jumper are set 
correctly before diagnosing any hard disk drive problems. (If only one drive is installed, please 
make sure the drive is connected to master connector or the drive is set to master.)

Optical Disc Drive-related Symptoms

Symptom/Error

Action/FRU

CD/DVD-ROM drive LED doesn't come on 
but works normally.

• Enter CMOS Setup and load the default settings.
• DIMM
• Mainboard

CD/DVD-ROM drive LED flashes for more 
than 30 seconds before LED shutting off.
Software asks to reinstall disc. Software 
displays a reading CD/DVD error.

• CD/DVD-ROM may have dirt or foreign material on it. Check 

with a known good disc.

• CD/DVD-ROM is not inserted properly.
• CD/DVD-ROM is damaged.

CD/DVD-ROM drive cannot load or eject 
when the system is turned on and its eject 
button is pressed and held.

• Disconnect all cables from CD/DVD-ROM drive except power 

cable, then press the eject button to try to unload the disc.

• CD/DVD-ROM drive power cable
• CD/DVD-ROM drive

CD/DVD-ROM drive does not read and 
there are no messages are displayed.

• CD may have dirt or foreign material on it. Check with a 

known good disc.

• Ensure the CD/DVD-ROM driver is installed properly.
• CD/DVD-ROM drive.

CD/DVD-ROM drive can play audio CD but 
no sound output.

• Ensure the headphone jack of the CD/DVD-ROM has an 

output.

• Turn up the sound volume.
• Speaker power/connection/cable.
• CD/DVD-ROM drive.

NOTE

Make sure the optical disc drive is configured correctly in CMOS Setup, the cable/jumper are set 
correctly and the drive’s optical lens is clean before diagnosing any optical drive problems.

Содержание oneTwo L5860

Страница 1: ...Packard Bell oneTwo L5860 L5861 All In One Computer Service Guide PRINTED IN TAIWAN Service guide files and updates are available on the Acer CSD web site for more information go to http csd acer com tw ...

Страница 2: ...l oneTwo L5860 L5861 AIO Computer Service Guide Revision History Refer to the table below for changes made on this version of the Packard Bell oneTwo L5860 L5861 All In One Computer Service Guide Date Chapter Updates ...

Страница 3: ...ncorporated makes no representations or warranties either expressed or implied with respect to the contents hereof and specifically disclaims any warranties of merchantability or fitness for any particular purpose Any Acer Incorporated software described in this guide is sold or licensed as is Should the programs prove defective following their purchase the buyer and not Acer Incorporated its dist...

Страница 4: ...es that appear on screen NOTE Gives additional information related to the current topic WARNING Alerts you to any physical risk or system damage that might result from doing or not doing specific actions CAUTION Gives precautionary measures to avoid possible hardware or software problems IMPORTANT Reminds you to do specific actions relevant to the accomplishment of procedures ...

Страница 5: ...this generic service guide In such cases please contact your regional offices or the responsible personnel channel to provide you with further technical details FRU Information Please note WHEN ORDERING FRU PARTS that you should check the most up to date information available on your regional web or channel If for whatever reason a part number change is made it will not be noted in the printed ser...

Страница 6: ...vi Packard Bell oneTwo L5860 L5861 AIO Computer Service Guide ...

Страница 7: ...h the Setup Utility 13 Setup Utility Menus 13 Chapter 3 System Disassembly 25 Disassembly Tools 25 Pre disassembly Procedure 25 Disassembly Procedures 26 Removing the Computer Stand 26 Removing the I O Cable Cover 27 Removing the Rubber Feet 27 Removing the Rear Cover 28 Removing the I O Cable Plate 28 Removing the Optical Disc Drive 29 Removing the Wireless Module 30 Removing the Scaler Board 32 ...

Страница 8: ...odule 59 Removing the Capacitive LED Board 60 Removing the Light Bars 61 Chapter 4 Troubleshooting 63 Hardware Diagnostic Procedure 63 System Check Procedures 63 Checkpoints 64 POST Error Indicators 68 Configuring the ME Firmware 79 Clearing CMOS 80 BIOS Recovery 81 BIOS Update 82 Updating the BIOS in DOS Mode 82 Updating the BIOS in Windows Mode 83 Chapter 5 System Architecture 87 Block Diagram 8...

Страница 9: ...lay size oneTwo L5860 23 inch LCD panel oneTwo L5861 23 inch LCD touchscreen panel Windows 7 compliant multi touchscreen function for oneTwo L5861 Audio Two built in 5W stereo speakers Realtek ALC662VC 5 1 2 channel high definition audio codec I O ports Right panel USB ports two Headphone jack Microphone jack Left panel HD dual digital TV tuner optional PS 2 keyboard and mouse ports Line in line o...

Страница 10: ...his optional card allows users to access protected digital TV broadcasts Power supply 220 W power supply unit with PFC or non PFC option power factor correction Ventilation Heat sink fan for the processor PSU fan System fan only for systems with certain graphics card models installed Operating system support Microsoft Windows 7 Home Premium Antivirus software Norton Internet Security Security BIOS...

Страница 11: ...reen 4 Speakers 5 Power button indicator Blue System is in power on mode Flashing blue System is in standby mode 6 Auxiliary lighting capacitive key 7 LCD brightness capacitive key 8 Volume decrease capacitive key 9 Volume increase capacitive key NOTES Icons for the capacitive keys are only visible when the system is turned on The auxiliary lighting capacitive key is designed to provide a light so...

Страница 12: ...tional cover 2 Optical disc drive ODD 3 I O cable cover 4 9 in 1 card reader 5 HD dual digital TV tuner optional 6 Line in jack 7 Line out jack 8 Microphone jack 9 USB ports 10 Ethernet port RJ 45 11 HDMI port 12 Monitor port VGA 13 DVI port optional 14 PS 2 keyboard port 15 PS 2 mouse port 16 AC power jack ...

Страница 13: ...Packard Bell oneTwo L5860 L5861 AIO Computer Service Guide 5 Right View Item Icon Component 1 Microphone jack 2 Headphone jack 3 USB ports ...

Страница 14: ...Two L5860 L5861 AIO Computer Service Guide Rear View Item Component 1 Ventilation slots 2 Mounting holes for wall mount option 3 Kensington slot 4 Computer stand Note Item 1 is compliant with the 100 100 mm VESA standard ...

Страница 15: ...L3 cache size 3 MB 6 MB 6 MB 6 MB 6 MB 8 MB TDP 65 W 95 W 95 W 95 W 65 W 65 W Item Specification PCH Intel H67 I O controller SIO ITE 8728F CX Item Specification BIOS chip AMI BIOS with 32 MM SPI Flash ROM Setup utility CMOS Setup Utility Item Specification Controller Integrated in the Intel processor Number of DIMM slot 4 Maximum memory 16 GB using four 4 GB modules Data rate 1066 1333 MT s Suppo...

Страница 16: ...721010CLA332 7200 rpm Seagate ST31000528AS 7200 rpm WD WD10EARS 22Y5B1 5400 rpm 1 5 TB Seagate ST31500341AS 7200 rpm WD WD15EARS 22MVWB0 5400 rpm Item Specification Controller Integrated in the Intel H67 chipset Type DVD Super Multi double layer Blu ray Disc combo or Blu ray Disc RW drive option Form factor Slim type Tray height mm 12 7 mm Interface SATA Supported models DVD Super Multi double lay...

Страница 17: ...hicony BC10B 04C1 Version Bluetooth 2 1 EDR Item Specification Controller Realtek ALC662VC 5 1 2 channel high definition audio codec Features Two built in 5W stereo speakers Right panel audio jacks Headphone and microphone jacks Left panel audio jacks Line in line out and microphone jacks Item Specification Resolution 2 0 MP Supported models Chicony CNFA21321004590L Park Orchid C04PL037F Primax W2...

Страница 18: ...ypical 5 ms Display colors 16 7M 6bit A FRC Aspect ratio 16 9 Surface treatment Anti glare 3H Module size W H D 533 2 312 11 5 mm Module weight typical 1900 g Power consumption typical without converter 18 95 W Power supply input voltage typical 5 0 V Temperature Operating Storage shipping 0 to 50 C 90 RH 20 to 60 C 90 RH Touchscreen oneTwo L5860 No oneTwo L5861 Yes Quanta optical touch solution I...

Страница 19: ...Run Setup message to make changes to the BIOS settings The Setup Utility loads the configuration values in a battery backed nonvolatile memory called CMOS RAM This memory area is not part of the system RAM which allows configuration data to be retained when power is turned off The values take effect when the system is booted POST uses these values to configure the hardware If the values and the ac...

Страница 20: ... the Left Right arrow keys to move between the menu screens then press Enter to view that menu tab Use the Up Down arrow keys to move between the menu options then press Enter to execute that option Some options lead to pop up dialog boxes that prompt you to verify that you wish to execute that option Other options lead to dialog boxes that prompt you for information Some options marked with a lea...

Страница 21: ...play all possible entries A parameter that is enclosed in square brackets is user configurable Grayed out parameters are not user configurable for one of the following reasons The field value is auto configured or auto detected The field value is informational only The field is password protected Esc If you press this key On one of the primary menu screens the Exit menu displays On a submenu scree...

Страница 22: ...sor model installed Core Frequency Core frequency of the installed processor Count Multi core factor of the installed processor number of processor cores Memory Size Size of system memory detected during boot up Product Name Official model name of the computer System Serial Number System serial number Asset Tag Number System asset tag number System Date Sets the system date System Time Sets the sy...

Страница 23: ...llaneous system settings Advanced Chipset Configuration Access this submenu to enable or disable various Intel technology functions and configure video memory settings Integrated Peripherals Access this submenu to enable or disable operation modes for the onboard I O controllers PC Health Status Access this submenu to view current level of system processor PCH temperature voltages and fan speed ...

Страница 24: ...ainboard s clock generator pulses the extreme values of the pulses creates EMI electromagnetic interference Set this field to Enabled to reduce this EMI level This reduces interference problems with other electronics in the area Note Remember to disable the Spread Spectrum feature if you are overclocking A slight jitter can introduce a temporary boost in clock speed causing the overclocked process...

Страница 25: ...w Instructions AES NI encryption standard When enabled speed for applications performing encryption and decryption using the AES is improved Disabled Enabled Intel XD Bit Select whether to enable the Intel Execute Disable Bit Technology XD Bit is a hardware based security feature that can reduce exposure to viruses and malicious code attacks and prevent harmful software from executing and propagat...

Страница 26: ...abled any attached USB mouse or USB keyboard can control the system even when there is no USB driver loaded onto the system Disabled Enabled USB Storage Emulation If set to Auto a USB devices with a capacity of equal or less than 2 GB will be emulated as a bootable floppy disk Auto Floppy Hard Disk Onboard Graphics Controller Enables or disables the onboard graphics controller Disabled Enabled Onb...

Страница 27: ...e PECI Mode System Temperature PCH Temperature CPU Fan Speed System Fan Speed CPU Core 1 05V 3 30V 5 00V 12 0V 5VSB VBAT These items lets you monitor the parameters for critical voltages temperatures and fan speeds Smart Fan When enabled fan speed will speed up or slow down depending on the system temperature Disabled Enabled ...

Страница 28: ... power saving mode when an installed PCIe LAN card received an incoming call Disabled Enabled Power On by Onboard LAN Enables or disables the system to wake up from a power saving mode when the onboard LAN controller received a network message Disabled Enabled Wake Up by PS 2 KB Mouse Enables or disables the system to wake up from a power saving mode when a PS 2 keyboard or mouse is used Disabled ...

Страница 29: ...accessible when this password is used to logged in System Date and System Time Exit Without Saving The F9 key Load Default Settings will also be unavailable Change Supervisor Password Press Enter to change the supervisor password Change User Password Press Enter to change the user password Note that this field is only accessible when a supervisor password is set is cleared when the supervisor pass...

Страница 30: ...entry then press Enter You will be prompted to save the new password 5 Press Enter 6 Press F10 to save the password and close the Setup Utility To remove a system password 1 Select Change Supervisor Password or Change User Password then press Enter The password box appears 2 Type the original password then press Enter 3 Press Enter twice without entering anything in the new and confirm password fi...

Страница 31: ...the hard drive Optical Disc Drive Priority Press Enter to set the boot priority for the optical drive Removable Device Priority Press Enter to set the boot priority for a removable USB drive Network Device Priority Press Enter to set the boot priority for a network boot Fast Boot When enabled the system starts up more quickly by eliminating some of the POST routines Disabled Enabled Quiet Boot Whe...

Страница 32: ...s Save all changes made to the Setup utility Discard Changes Discard all changes made to the Setup utility and load the previous configuration settings Load Default Settings Load the factory default settings for all Setup parameters Keyboard shortcut F9 Save as User Default Settings Save the current configuration settings as user default values Keyboard shortcut F8 Load User Default Settings Load ...

Страница 33: ...bly procedure perform the steps listed below 1 Make sure that the optical disc drive and the card reader slot are empty 2 Turn off the power to the computer and all peripherals 3 Unplug the power cord from the computer 4 Unplug the network cable and all connected peripheral devices from the computer 5 Place the computer on a flat steady surface with the rear cover facing upward NOTES To reinstall ...

Страница 34: ...omputer Stand 1 Perform the Pre disassembly Procedure on page 25 2 Use a flat screwdriver to pry off the plastic shells covering the computer stand screws 3 Remove the screws securing the computer stand 4 Remove the computer stand Quantity Color Torque Part Number 6 Black 4 0 4 5 kgf cm 86 00N85 266 ...

Страница 35: ...e Cover 1 Perform the Pre disassembly Procedure on page 25 2 Press the I O cable cover release tab a then remove the I O cable cover b Removing the Rubber Feet 1 Perform the Pre disassembly Procedure on page 25 2 Use a flat screwdriver to pry off the rubber feet from the computer base ...

Страница 36: ...ver to carefully pry loose the rear cover from the front bezel The picture below shows the location of the plastic snaps securing the rear cover to the front bezel 4 Toggle the cover from left to right to loosen its hold on the front bezel then detach the rear cover Removing the I O Cable Plate 1 Remove the rear cover by following the procedure described in the previous section 2 Push the latch to...

Страница 37: ...dure described on page 28 2 Detach the tape securing the WLAN antenna cables to the ODD then pull the cables away from the ODD 3 Remove the screw securing the ODD 4 Slide the ODD outward then disconnect the ODD SATA cable from the drive 5 Remove the ODD from the chassis Quantity Color Torque Part Number 1 Chrome 4 0 4 5 kgf cm 86 00B75 240 ...

Страница 38: ... ODD bezel from the module Removing the Wireless Module 1 Remove the rear cover by following the procedure described on page 28 2 Remove the screw securing the scaler board cover Quantity Color Torque Part Number 1 Chrome 1 3 1 5 kgf cm 86 7A122 4R0 Quantity Color Torque Part Number 1 Chrome 4 0 4 5 kgf cm 86 00B75 240 ...

Страница 39: ...oard cover towards the speaker area to disengage the cover tabs from the chassis then remove the scaler board cover 4 Disconnect the antenna cables from the WLAN module 5 Remove the screw securing the WLAN module Quantity Color Torque Part Number 1 Chrome 1 3 1 5 kgf cm 86 7A122 4R0 ...

Страница 40: ...ide 6 Remove the WLAN module Removing the Scaler Board 1 Remove the rear cover by following the procedure described on page 28 2 Remove the scaler board cover by following steps 2 and 3 of the previous section 3 Disconnect all the cables from the scaler board ...

Страница 41: ...curing the scaler board 5 Remove the scaler board Quantity Color Torque Part Number 3 Chrome 4 0 kgf cm 86 00B75 240 A circuit board that is 10 cm2 has been highlighted with a yellow rectangle as shown in the above image Follow local regulations for disposing this type of circuit board ...

Страница 42: ...procedure described on page 28 2 Remove the screw securing the USB audio board cover 3 Slide the USB audio board cover outward to disengage the cover tabs from the chassis then remove the USB audio board cover 4 Disconnect the two cables from the USB audio board Quantity Color Torque Part Number 1 Chrome 4 0 4 5 kgf cm 86 00B75 240 ...

Страница 43: ...USB audio board 6 Slide the USB audio board out of its tabs Quantity Color Torque Part Number 1 Chrome 4 0 kgf cm 86 00B75 240 A circuit board that is 10 cm2 has been highlighted with a yellow rectangle as shown in the above image Follow local regulations for disposing this type of circuit board ...

Страница 44: ...rear cover by following the procedure described on page 28 2 Remove the screws securing the wall mount plate 3 Slide the wall mount plate towards the HDD area to disengage the plate tabs from the chassis then remove the wall mount plate Quantity Color Torque Part Number 2 Chrome 4 0 4 5 kgf cm 86 00B75 240 ...

Страница 45: ...oving the Side Board Cover 1 Remove the wall mount plate by following the procedure described on the previous section 2 Remove the screw securing the side board cover 3 Remove the side board cover Quantity Color Torque Part Number 1 Chrome 4 0 4 5 kgf cm 86 00B75 240 ...

Страница 46: ...2 Disconnect the TV tuner card cable 3 Remove the screw securing the TV tuner card bracket 4 Disconnect TV tuner card from its expansion slot Quantity Color Torque Part Number 1 Chrome 4 0 4 5 kgf cm 86 00B75 240 A circuit board that is 10 cm2 has been highlighted with a yellow rectangle as shown in the above image Follow local regulations for disposing this type of circuit board ...

Страница 47: ...rews securing the DVI cable to the I O panel cover a then detach the cable from the panel cover b 3 Disconnect the HDMI cable from the graphics card Remove the hex screws securing the DVI cable to the graphics card a then detach the cable from the card b Quantity Color Torque Part Number 2 Chrome 4 5 kgf cm 86 80536 7R2 Quantity Color Torque Part Number 2 Chrome 4 5 kgf cm 86 80536 7R2 ...

Страница 48: ...the screw securing the graphics card bracket 6 Disconnect the graphics card from its riser board Quantity Color Torque Part Number 1 Chrome 4 0 4 5 kgf cm 86 00B75 240 A circuit board that is 10 cm2 has been highlighted with a yellow rectangle as shown in the above image Follow local regulations for disposing this type of circuit board ...

Страница 49: ...ssembly by following the procedures described on page 39 3 Cut the cable tie securing the system cables Make sure you have a replacement cable tie for when you reassemble the machine back 4 Disconnect the system fan cable from the mainboard Quantity Color Torque Part Number 2 Chrome 4 0 4 5 kgf cm 86 00B75 240 A circuit board that is 10 cm2 has been highlighted with a yellow rectangle as shown in ...

Страница 50: ... system fan 6 Remove the system fan from the chassis Removing the Hard Disk Drive 1 Remove the graphics card by following the procedure described on the previous section 2 Disconnect the power and SATA cables from the hard drive Quantity Color Torque Part Number 2 Chrome 1 7 kgf cm 86 7A122 4R0 ...

Страница 51: ... disengage the assembly from the chassis then remove the HDD assembly 4 Remove the screws securing the hard drive to its cage 5 Use a small metal screwdriver to push the hard drive out of its cage a then pull out the drive out b Quantity Color Torque Part Number 4 Chrome 4 0 4 5 kgf cm 86 00J44 C60 ...

Страница 52: ...1 Remove the wall mount plate by following the procedure described on page 36 2 Disconnect the HSF cable from its mainboard connector 3 Loosen the HSF s spring loaded screws in a diagonally opposite pattern an X pattern 4 Remove the HSF assembly Quantity Color Torque Part Number 4 Chrome 4 0 4 5 kgf cm ...

Страница 53: ...g the procedure described on the previous section 2 Disengage the load lever from its latch then rotate it to the open position 3 Open the retention plate to expose the socket body 4 Gently lift the processor out of its socket CAUTION DO NOT lay the processor on its base to avoid bending or damaging the pins underneath it ...

Страница 54: ... power cables from their mainboard connectors a Press the top portion of the cable s retaining latch b Pull the cable straight up from its connector IMPORTANT When installing a processor Note the golden arrow on the corner to make sure the processor is properly oriented over the socket Moisten a soft cloth with isopropyl alcohol and clean the processor die to remove any thermal grease residue Wipe...

Страница 55: ...e Guide 47 3 Disconnect the PSU extension cable 4 Remove the screws securing the PSU bracket 5 Detach the PSU bracket from the power supply unit Quantity Color Torque Part Number 1 2 Black 4 0 kgf cm 86 3AR26 8R0 2 1 and 3 Chrome 4 0 kgf cm 86 00J44 C60 ...

Страница 56: ...cs cards by following the procedures described on pages 38 and 39 3 Remove the system fan by following the procedure described on page 41 4 Remove the hard drive by following the procedure described on page 42 5 Remove the HSF assembly by following the procedure described on page 44 6 Remove the processor by following the procedure described on page 45 7 Remove the memory modules by following the ...

Страница 57: ...tity Color Torque Part Number 6 Chrome 4 0 kgf cm 86 00B75 240 A circuit board that is 10 cm2 has been highlighted with a yellow rectangle as shown in the above image Follow local regulations for disposing this type of circuit board The RTC battery has been highlighted with a yellow circle in the above image Detach the RTC battery and follow local regulations for disposing it ...

Страница 58: ...the previous section 2 Push the I O shield to remove it from the chassis Removing the Converter Board 1 Remove the mainboard by following the procedure described on the previous section 2 Disconnect all cables from the converter board 3 Remove the screws securing the converter board Quantity Color Torque Part Number 2 Chrome 4 5 kgf cm 86 00B75 240 ...

Страница 59: ...emoving the Touchscreen Control Board 1 Remove the mainboard by following the procedure described on page 48 2 Disconnect all cables from the touchscreen control board 3 Remove the screws securing the touchscreen control board Quantity Color Torque Part Number 2 Chrome 4 5 kgf cm 86 00B75 240 ...

Страница 60: ...tooth module 3 Remove the Bluetooth module from the front bezel and turn it over to expose the cable connector underneath it NOTE The succeeding sections on how to remove the Bluetooth module power button assembly speakers and LCD assembly use pictures that show an LCD touchscreen panel with film cables on the bottom side This LCD touchscreen panel model differ from the model used in the Packard B...

Страница 61: ... 53 4 Disconnect the Bluetooth cable from the module Removing the Power Button Assembly 1 Remove the PSU by following the procedure described on page 46 2 Push the tabs securing the power button assembly 3 Remove the power button assembly from the front bezel ...

Страница 62: ...ollowing the procedure described on page 28 2 Remove the optical drive by following the procedure described on page 29 3 Remove the scaler board by following the procedure described on page 32 4 Remove the USB audio board by following the procedure described on page 34 5 Remove the mainboard by following the procedure described on page 48 6 Remove the PSU by following the procedure described on pa...

Страница 63: ...o L5860 L5861 AIO Computer Service Guide 55 7 Disconnect the IR cable from the front bezel 8 Disconnect the light bar cables from the light bars 9 Disconnect the capacitive LED board cable 10 Disconnect the webcam cable ...

Страница 64: ...Service Guide 11 Remove the screws securing the LCD assembly 12 Push back the plastic snaps securing the LCD assembly to the front bezel 13 Detach the LCD assembly from the front bezel Quantity Color Torque Part Number 5 Black 4 0 kgf cm 86 3AR26 8R0 ...

Страница 65: ...cedure described on page 54 2 Disconnect the touchscreen image sensor cables from their connectors located on the corners of the chassis highlighted in below picture 3 Remove the screws securing the chassis to the LCD panel 4 Remove the chassis from the LCD panel Quantity Color Torque Part Number 4 Chrome 4 5 kgf cm 86 00B75 240 ...

Страница 66: ...m their chassis latches 6 Detach the tapes securing the WLAN antennas cables then pry off the antennas from the top corners of the chassis Removing the LCD LVDS Cable 1 Remove the chassis by following the procedure described on page 57 2 Press the two sides of the LCD cable connector then pull to disconnect the cable from the LCD board ...

Страница 67: ...s by following the procedure described on page 57 2 Remove the bracket from the LCD panel Removing the Webcam Module 1 Remove the LCD assembly by following the procedure described on page 54 2 Remove the black tape protecting the webcam module 3 Push the tabs securing the webcam module 4 Remove the webcam module ...

Страница 68: ...5861 AIO Computer Service Guide Removing the Capacitive LED Board 1 Remove the LCD assembly by following the procedure described on page 54 2 Remove the capacitive LED board cover 3 Pry the capacitive LED board from the front bezel ...

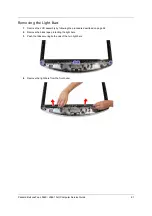
Страница 69: ...ide 61 Removing the Light Bars 1 Remove the LCD assembly by following the procedure described on page 54 2 Remove the black tape protecting the light bars 3 Push the tabs securing both ends of the two light bars 4 Remove the light bars from the front bezel ...

Страница 70: ...62 Packard Bell oneTwo L5860 L5861 AIO Computer Service Guide ...

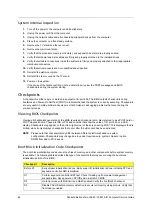
Страница 71: ...e on the next page If the system will not power on do the following Check if the power cable is properly connected to the AC power jack and a functional AC power source Check if the voltage selector switch is set to the correct voltage setting System External Inspection 1 Inspect the power and LED indicators on the front panel Go to Front View section on page 3 for the location and description of ...

Страница 72: ... in debugging problems that occur during the pre boot process Viewing BIOS Checkpoints Viewing all checkpoints generated by the BIOS requires a checkpoint card also referred to as a POST card or POST diagnostic card These are ISA or PCI add in cards that show the value of I O port 80h on a LED display Checkpoints may appear on the bottom right corner of the screen during POST This display method i...

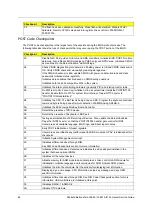
Страница 73: ...tion is stored in memory D9 Store the Uncompressed pointer for future use in PMM Copying Main BIOS into memory Leaves all RAM below 1 MB Read Write including E000 and F000 shadow areas but closing SMRAM DA Restore CPUID value back into register Give control to BIOS POST ExecutePOSTKernel See the POST Code Checkpoints section for more information Checkpoint Description E0 Initialize the floppy cont...

Страница 74: ...Initializes the CPU The BAT test is being done on KBC Program the keyboard controller command byte is being done after Auto detection of KB MS using AMI KB 5 0A Initializes the 8042 compatible Key Board Controller 0B Detects the presence of PS 2 mouse 0C Detects the presence of Keyboard in KBC port 0E Testing and initialization of different Input Devices Also update the Kernel Variables Traps the ...

Страница 75: ...s encountered during POST 85 Display errors to the user and gets the user response for error 87 Execute BIOS setup if needed requested Check boot password if installed 8C Late POST initialization of chipset registers 8E Program the peripheral parameters Enable Disable NMI as selected 90 Late POST initialization of system management interrupt A0 Check boot password if installed A1 Clean up work nee...

Страница 76: ... 2A Initialize different buses and perform the following functions Reset Detect and Disable function 0 Static Device Initialization function 1 Boot Output Device Initialization function 2 Function 0 disables all device nodes PCI devices and PnP ISA cards It also assigns PCI bus numbers Function 1 initializes all static devices that include manual configured onboard peripherals memory and I O decod...

Страница 77: ...t boot from a particular device This message is usually followed by other information concerning the device Invalid Boot Diskette A diskette was found in the drive but it is not configured as a bootable diskette Drive Not Ready The BIOS was unable to access the drive because it indicated it was not ready for data transfer This is often reported by drives when no media is present A Drive Error The ...

Страница 78: ...re IDE ATAPI devices in POST 5th Master Hard Disk Error The IDE ATAPI device configured as Master in the 5th IDE controller could not be properly initialized by the BIOS This message is typically displayed when the BIOS is trying to detect and configure IDE ATAPI devices in POST 5th Slave Hard Disk Error The IDE ATAPI device configured as Slave in the 5th IDE controller could not be properly initi...

Страница 79: ...th IDE controller failed an ATAPI compatibility test This message is typically displayed when the BIOS is trying to detect and configure IDE ATAPI devices in POST 6th Slave Drive ATAPI Incompatible The IDE ATAPI device configured as Slave in the 6th IDE controller failed an ATAPI compatibility test This message is typically displayed when the BIOS is trying to detect and configure IDE ATAPI device...

Страница 80: ... NVRAM Cleared There was an error in while validating the NVRAM data This causes POST to clear the NVRAM data Resource Conflict More than one system device is trying to use the same non shareable resources Memory or I O NVRAM Ignored The NVRAM data used to store Plug n Play PnP data was not used for system configuration in POST NVRAM Bad The NVRAM data used to store Plug n Play PnP data was not us...

Страница 81: ...t responding when the keyboard controller is initialized PS 2 Keyboard not found PS 2 keyboard support is enabled in the BIOS setup but the device is not detected PS 2 Mouse not found PS 2 mouse support is enabled in the BIOS setup but the device is not detected Keyboard Interface Error Keyboard controller failure This may indicate a problem with system hardware Unlock Keyboard PS 2 keyboard is lo...

Страница 82: ...oes not work then replace the heat sink fan Mainboard Processor test failed Processor Mainboard NOTE Normally the processor fan should be operative and the processor clock setting should be exactly set to match its speed requirement before diagnosing any processor problems Mainboard and Memory related Symptoms Symptom Error Action FRU Memory test failed Memory module Mainboard Incorrect memory siz...

Страница 83: ...ally Enter CMOS Setup and load the default settings DIMM Mainboard CD DVD ROM drive LED flashes for more than 30 seconds before LED shutting off Software asks to reinstall disc Software displays a reading CD DVD error CD DVD ROM may have dirt or foreign material on it Check with a known good disc CD DVD ROM is not inserted properly CD DVD ROM is damaged CD DVD ROM drive cannot load or eject when t...

Страница 84: ...ephone application is configured correctly for your modem and set to receive messages and or fax Data fax modem software program invoked but cannot receive send data fax Ensure the modem card is installed properly Fax voice modem software program invoked but has no sound output Data files are received normally voice from modem cannot be produced but system sound feature works normally Ensure the m...

Страница 85: ...m Error Action FRU Pressing the power button does not turn off the system Only unplugging the power cord from electrical outlet can turn off the system Ensure the Soft off by PWR BTTN in CMOS Setup under Power Management is not set to Instant off Power switch cable assembly Pressing the power button does not turn on the system Power switch cable assembly Executing software shutdown from Windows98 ...

Страница 86: ...e mainboard and then LCD assembly one at a time Do not replace a non defective FRU Beep Status Possible Causes One short beep System ready System is OK Continuous one long beep Memory not installed or memory error Something is wrong with the memory installed There is problem accessing the memory i e mainboard problem One long beep then two short beeps and repeat VGA not installed or VGA error The ...

Страница 87: ...e by following the procedure described on page 36 7 Remove the graphics card and HDD assemblies by following the procedures described on pages 39 42 8 If necessary remove any other assemblies or cables that prevent access to the ME_DISABLE jumper 9 Locate the ME_DISABLE jumper on the mainboard 10 Remove the jumper block and set it over the 2 3 pins for 20 to 30 seconds 11 Return the jumper block t...

Страница 88: ...te by following the procedures described on pages 26 28 6 Remove the wall mount plate by following the procedure described on page 36 7 Remove the graphics card and HDD assemblies by following the procedures described on pages 39 42 8 If necessary remove any other assemblies or cables that prevent access to the CMOS clear jumper 9 Locate the CLR_CMOS jumper on the mainboard 10 Remove the jumper bl...

Страница 89: ... be used Creating the BIOS Crisis Recovery Disk 1 Set up a computer running the Windows XP or Windows Vista operating system and connect the BIOS recovery media 2 Copy the target BIOS ROM file to the BIOS recovery media and rename it as amiboot rom 3 Eject the BIOS recovery media from the computer Performing a BIOS Recovery 1 Shut down the BIOS failed computer 2 Connect the BIOS recovery media to ...

Страница 90: ...2 Key in cd dostool Go to BIOS path like A DOSTOOL 3 Disable the ME firmware See page 79 for instructions 4 Key in flash4M bat or flash4M 5 Press Enter to flash the system BIOS and ME firmware 6 Shut down the computer and disconnect the power source 7 Enable the ME firmware See page 79 for instructions 8 Clear the CMOS data See page 80 for instructions 9 Reboot the computer ...

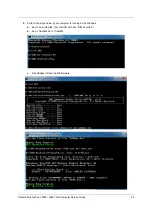
Страница 91: ...running a 32 or 64 bit Windows OS 1 Disable the ME firmware See page 79 for instructions 2 Press the power button to turn on the computer 3 Click Start Command Prompt Run as administrator 4 Perform the steps below if your computer is running 32 bit Windows a Key in cd wintool 32 Go to BIOS path like D WinTool 32 b Key in flash4M bat or flash4M ...

Страница 92: ...84 Packard Bell oneTwo L5860 L5861 AIO Computer Service Guide c Press Enter to flash the ME firmware ...

Страница 93: ...861 AIO Computer Service Guide 85 5 Perform the steps below if your computer is running 64 bit Windows a Key in cd wintool 64 Go to BIOS path like D WinTool 64 b Key in flash4M bat or flash4M c Press Enter to flash the ME firmware ...

Страница 94: ... L5860 L5861 AIO Computer Service Guide 6 Shut down the computer and disconnect the power source 7 Enable the ME firmware See page 79 for instructions 8 Clear the CMOS data See page 80 for instructions 9 Reboot the computer ...

Страница 95: ...87 This chapter shows the block diagram and board layout of the Packard Bell oneTwo L5860 L5861 computer Block Diagram The core subsystems of the Packard Bell oneTwo L5860 L5861 computer are depicted in the following block diagram System Architecture Chapter 5 ...

Страница 96: ...RTC battery 19 DDR3 slot 1 6 ME disable jumper 20 DDR3 slot 2 7 PCI Express 2 0 x16 expansion slot 21 DDR3 slot 3 8 PCI Express 2 0 x1 expansion slot 22 DDR3 slot 4 9 Right side audio jacks connector 23 24 pin ATX power connector 10 Line in line out and microphone jacks 24 SIO ITE 8728F CX chipset 11 USB ports 25 Right side USB ports connectors 12 Left Ethernet port Right USB ports 26 SATA connect...

Страница 97: ...ce Guide The part numbers listed in this Service Guide may differ from those given to regional AUTHORIZED SERVICE PROVIDERS You MUST use the local FRU list provided by your regional office to order FRU parts for repair and service of customer machines Make sure that you are using the most up to date information available on your regional web site or channel when ordering FRU parts NOTE Follow the ...

Страница 98: ...er 14 Side board cover 3 LCD panel 15 Scaler board cover 4 Speakers 16 Mainboard 5 Chassis 17 Wall mount plate 6 HDD cage 18 I O cable plate 7 ODD bracket 19 PSU bracket 8 Optical drive 20 Power supply unit 9 ODD bezel 21 Rear cover 10 Riser board 22 Computer stand 11 Riser board bracket 23 Computer stand shells 12 USB audio board cover 24 LCD panel bracket ...

Страница 99: ...rd CAPACITIVE BUTTON BOARD GALLAPHER TKSTWSGAL001 56 41010 491 CAPACITIVE BUTTON BOARD NS GALLAGHER CY 56 41010 511 Light bars LIGHT BAR BOARD 55 U5R01 004 TV tuner card TV TUNER CARD AVERMEDIA H756 ATSC TU 10500 080 Graphics card VGA CARD ECS 89D386 303408 HD5450 512MB 64BIT DDR3 DVI HDMI VGA LP BRACKET ROHS VG APC54 534 VGA CARD ECS 89D386 469013 NV G315 512MB 64BIT DDR3 DVI HDMI LP BRACKET ROHS...

Страница 100: ...06 USB 3 0 add on card USB 3 0 CARD AIO USED W CABLE PA 14000 044 Webcam module CAMERA 2M 1007 PARKORCHID C04PL037F 56 18022 521 CAMERA 2M CHICONY CNFA21321004590L 56 18009 521 CAMERA 2M PRIMAX 50 704A4WNT8 56 18007 521 Bluetooth module BLUETOOTH BOARD MODULE V2 1 EDR CSR BLUECOR XAVI BC10B 04C1 54 U5R01 001 Wireless LAN module WIRELESS LAN BOARD 802 11BGN REALTEK LITEON RTL8191SU 1TX2R H NI 10200...

Страница 101: ...DR3 1333MHZ 1G ACR128X64D3U1333C9 KN 1GB01 031 MEMORY UNIFOSA DDR3 1333MHZ 1G UNB DIMM GU502203EP0201 LF 128 8 0 065UM KN 1GB0C 010 MEMORY ADATA DDR3 1333MHZ 2G UNB DIMM W O ECC W ELPIDA CHIP KN 2GB0B 029 MEMORY KINGSTON DDR3 1333MHZ 2G UNB ACR256X64D3U1333C9 KN 2GB03 022 MEMORY NANYA UNB DIMM DDRIII 1333 2GB NT2GC64B88B0NF CG LF 256 8 0 055UM KN 2GB0H 009 MEMORY SAMSUNG DDR3 1333MHZ 2G UNB DIMM W...

Страница 102: ...1 Optical drive ODD HLDS SUPER MULTI DRIVE 12 7MM TRAY DL 8X GT31N LF W O BEZEL SATA FOR HF WINDOWS7 KU 0080F 014 ODD PANASONIC BD RW 12 7MM TRLY DL4 4X UJ240A SATA KU 00407 015 ODD PLDS SUPER MULTI DRIVE 12 7MM TRAY PLDS DS 8A5SH LF W O BEZEL SATA FOR HF WINDOWS7 KU 0080D 054 ODD HLDS BD COMBO 12 7MM TRAY DL 4X CT21N LF W O BEZEL 1 00 SATA FOR HF WINDOWS7 KO 00407 004 ODD PANASONIC BD COMBO 12 7M...

Страница 103: ...E MODULE FOOT STAND 60 U5R01 007 I O cable cover WIRE COVER 42 U5R01 004 I O cable plate WIRE HOLDER 42 U5R01 005 Wall mount plate ASSY MB COVER BRACKET PG 60 U5R01 004 Side board cover INVERTER BOARD COVER 60 U5R01 003 Scaler board cover SCALAR COVER BRACKET 33 U5R01 002 USB audio board cover FRONT IO BOARD BRACKET 60 U5R01 001 HDD cage HDD BRACKET 33 U5R01 001 ...

Страница 104: ...2 Cables Power button LED cable POWER LED CABLE 50 3CM01 001 POWER LED CABLE 50 3CM20 001 Light bar capacitive LED function cable FUNCTION KEY CABLE 50 3CM10 001 FUNCTION KEY CABLE 50 3CM29 001 Light bar cable LIGHT BAR CABLE 50 3CM09 001 LIGHT BAR CABLE 50 3CM28 001 IR receiver cable IR RECEIVER CABLE 50 U5M01 001 USB audio board cable USB CABLE 50 3CN04 001 USB CABLE 50 3CN04 011 Microphone jack...

Страница 105: ...D0 VGA26 P01 HDMI cable HDMI CABLE 350MM W O VGA CARD 50 GB901 001 HDMI CABLE 600MM 50 U5R01 024 Power supply unit POWER SUPPLY 220W CHICONYPOWER EPA CPB09 D220E AAGASSI PY 22009 008 POWER SUPPLY 220W CHICONYPOWER PFC CPB09 D220A AAGASSI PY 22009 007 POWER SUPPLY 220W CHICONYPOWER REGULAR CPB09 D220R AAGASSI PY 22009 006 POWER SUPPLY 220W EUP 115VAC 230V NPFC DELTA DPS 220UB A EUP PY 2200F 004 POW...

Страница 106: ... 262 KEYBOARD USB 105 KEY CHICONY KU 0420 BLACK ICELANDIC KB USB03 255 KEYBOARD USB 105 KEY CHICONY KU 0420 BLACK ITALIAN KB USB03 250 KEYBOARD USB 105 KEY CHICONY KU 0420 BLACK NORDIC KB USB03 271 KEYBOARD USB 105 KEY CHICONY KU 0420 BLACK POLISH KB USB03 258 KEYBOARD USB 105 KEY CHICONY KU 0420 BLACK PORTUGUESE KB USB03 249 KEYBOARD USB 105 KEY CHICONY KU 0420 BLACK ROMANIAN KB USB03 266 KEYBOAR...

Страница 107: ...0 BLACK GREEK WITH PB LOGO KB RF403 202 KEYBOARD RF2 4 105 KEY CHICONY WUG0570 BLACK HEBREW WITH PB LOGO KB RF403 196 KEYBOARD RF2 4 105 KEY CHICONY WUG0570 BLACK HUNGARIAN WITH PB LOGO KB RF403 201 KEYBOARD RF2 4 105 KEY CHICONY WUG0570 BLACK ICELANDIC WITH PB LOGO KB RF403 194 KEYBOARD RF2 4 105 KEY CHICONY WUG0570 BLACK ITALIAN WITH PB LOGO KB RF403 189 KEYBOARD RF2 4 105 KEY CHICONY WUG0570 BL...

Страница 108: ... B40 SCREW PAN 6 32 L6 NI BOXER WZS 86 00J44 C60 SCRW M TRUSS M4 8L TB BLACK NI 86 U5R01 003 SCRW M2 CAP L4 NI 86 NBY01 003 SCRW M3 CAP 6L BLK ZN H801 86 U5R01 005 SCRW M4 P07 CAP 6L BLK ZN 86 U5R01 002 Accessory Remote control REMOTE CONTROL PHILIPS RC2604301 01B MSFT CODE PAIR WITH OVU430008 EMEA FOR WINDOWS7 RT 11300 023 REMOTE CONTROL PHILIPS RC2604302 01B MSFT CODE PAIR WITH OVU430008 US FOR ...

Страница 109: ...010 511 Light bars LIGHT BAR BOARD 55 U5R01 004 TV tuner card TV TUNER CARD AVERMEDIA H756 ATSC TU 10500 080 Graphics card VGA CARD ECS 89D386 303408 HD5450 512MB 64BIT DDR3 DVI HDMI VGA LP BRACKET ROHS VG APC54 534 VGA CARD ECS 89D386 469013 NV G315 512MB 64BIT DDR3 DVI HDMI LP BRACKET ROHS VG PCPT3 164 VGA CARD PCPARTNER 288 1E145 A01AC HD5450 512MB SDDR3 64BITS SAMSUNG DVI HDMI W LP BRACKET ROH...

Страница 110: ...uetooth module BLUETOOTH BOARD MODULE V2 1 EDR CSR BLUECOR XAVI BC10B 04C1 54 U5R01 001 Wireless LAN module WIRELESS LAN BOARD 802 11BGN REALTEK LITEON RTL8191SU 1TX2R H NI 10200 041 Wireless antennas WIRELESS ANTENNA MAIN WLAN GALLAGHER ACON 25 91331 001 WIRELESS ANTENNA MAIN WLAN GALLAGHER WNC 25 91344 001 WIRELESS ANTENNA AUX WLAN GALLAGHER ACON 25 91332 001 WIRELESS ANTENNA AUX WLAN GALLAGHER ...

Страница 111: ...X64D3U1333C9 KN 2GB03 022 MEMORY NANYA UNB DIMM DDRIII 1333 2GB NT2GC64B88B0NF CG LF 256 8 0 055UM KN 2GB0H 009 MEMORY SAMSUNG DDR3 1333MHZ 2G UNB DIMM W O ECC W 2G CHIP C DIE 46NM KN 2GB07 002 MEMORY UNIFOSA DDR3 1333MHZ 2G UNB DIMM GU512303EP0202 LF 128 8 0 065UM KN 2GB0C 007 Hard drive HDD 1 5TB 3 5 5400RPM WD WD15EARS 22MVWB0 GP 5 4K KH 15K08 003 HDD 1 5TB 3 5 7200RPM SATA SEAGATE BRINKS ST315...

Страница 112: ...I DRIVE 12 7MM TRAY DL 8X GT31N LF W O BEZEL SATA FOR HF WINDOWS7 KU 0080F 014 ODD PANASONIC BD RW 12 7MM TRLY DL4 4X UJ240A SATA KU 00407 015 ODD PLDS SUPER MULTI DRIVE 12 7MM TRAY PLDS DS 8A5SH LF W O BEZEL SATA FOR HF WINDOWS7 KU 0080D 054 Speakers SPEAKER GALLAGHER LEFT RIGHT 23 U5R01 001 LCD panel Non touchscreen panel CCFL LCD LPL 23 WFHD NONE GLARE LM230WF5 TLC1 LF 300NIT 5MS G8 LK 23008 01...

Страница 113: ...07 I O cable cover WIRE COVER 42 U5R01 004 I O cable plate WIRE HOLDER 42 U5R01 005 Wall mount plate ASSY MB COVER BRACKET PG 60 U5R01 004 Side board cover INVERTER BOARD COVER 60 U5R01 003 Scaler board cover SCALAR COVER BRACKET 33 U5R01 002 USB audio board cover FRONT IO BOARD BRACKET 60 U5R01 001 HDD cage HDD BRACKET 33 U5R01 001 Category Part Name Part Number ...

Страница 114: ...02 Cables Power button LED cable POWER LED CABLE 50 3CM01 001 POWER LED CABLE 50 3CM20 001 Light bar capacitive LED function cable FUNCTION KEY CABLE 50 3CM10 001 FUNCTION KEY CABLE 50 3CM29 001 Light bar cable LIGHT BAR CABLE 50 3CM09 001 LIGHT BAR CABLE 50 3CM28 001 IR receiver cable IR RECEIVER CABLE 50 U5M01 001 USB audio board cable USB CABLE 50 3CN04 001 USB CABLE 50 3CN04 011 Microphone jac...

Страница 115: ...O D SUB CABLE 50 U5R01 025 DVI to VGA dongle connector DVI TO VGA DONGLE CONNECTOR D0 VGA26 P01 HDMI cable HDMI CABLE 350MM W O VGA CARD 50 GB901 001 HDMI CABLE 600MM 50 U5R01 024 Power supply unit POWER SUPPLY 220W CHICONYPOWER EPA CPB09 D220E AAGASSI PY 22009 008 POWER SUPPLY 220W CHICONYPOWER PFC CPB09 D220A AAGASSI PY 22009 007 POWER SUPPLY 220W CHICONYPOWER REGULAR CPB09 D220R AAGASSI PY 2200...

Страница 116: ...3 262 KEYBOARD USB 105 KEY CHICONY KU 0420 BLACK ICELANDIC KB USB03 255 KEYBOARD USB 105 KEY CHICONY KU 0420 BLACK ITALIAN KB USB03 250 KEYBOARD USB 105 KEY CHICONY KU 0420 BLACK NORDIC KB USB03 271 KEYBOARD USB 105 KEY CHICONY KU 0420 BLACK POLISH KB USB03 258 KEYBOARD USB 105 KEY CHICONY KU 0420 BLACK PORTUGUESE KB USB03 249 KEYBOARD USB 105 KEY CHICONY KU 0420 BLACK ROMANIAN KB USB03 266 KEYBOA...

Страница 117: ...70 BLACK GREEK WITH PB LOGO KB RF403 202 KEYBOARD RF2 4 105 KEY CHICONY WUG0570 BLACK HEBREW WITH PB LOGO KB RF403 196 KEYBOARD RF2 4 105 KEY CHICONY WUG0570 BLACK HUNGARIAN WITH PB LOGO KB RF403 201 KEYBOARD RF2 4 105 KEY CHICONY WUG0570 BLACK ICELANDIC WITH PB LOGO KB RF403 194 KEYBOARD RF2 4 105 KEY CHICONY WUG0570 BLACK ITALIAN WITH PB LOGO KB RF403 189 KEYBOARD RF2 4 105 KEY CHICONY WUG0570 B...

Страница 118: ...SS M4 8L TB BLACK NI 86 U5R01 003 SCRW M2 CAP L4 NI 86 NBY01 003 SCRW M3 CAP 6L BLK ZN H801 86 U5R01 005 SCRW M4 P07 CAP 6L BLK ZN 86 U5R01 002 Accessory Remote control REMOTE CONTROL PHILIPS RC2604301 01B MSFT CODE PAIR WITH OVU430008 EMEA FOR WINDOWS7 RT 11300 023 REMOTE CONTROL PHILIPS RC2604302 01B MSFT CODE PAIR WITH OVU430008 US FOR WINDOWS7 RT 11300 022 REMOTE CONTROL PHILIPS RC2604307 01BG...

Страница 119: ...4 0420_PB VGA KIT oTL5860 Sample EMEA002 W7HP64PWW0101 Ci5 2400 2G 2 500G 1 NBDCB4XS D23H GT420 802 11 b g n RF2 4 0420_PB RF2 4 0420_PB VGA KIT Chassis HX093I Base unit EMEA001 EMEA002 Bezel PAIO1023 LCD panel D23FHD Mainboard pElena_AIO EIH67MK_USB3 N _logo Y _Eup Y Processor Ci5 2400 DIMM 1 U2GBIII13 DIMM 2 U2GBIII13 Graphics card Nvidia GT420 1GB DVI HDMI LP Hard drive D500GB7 2KS Optical driv...

Страница 120: ...2M 802 11 b g n KB mouse VGA KIT HX093I_L PAIO10 23_L Ci5 2300 U1GBII I13 D640GB7 2KS NSM8 XS Nvidia 315 512MB HDMI DVI LP N 802 11 b g n mini card USB half size Kit PFC 220W 8 5L EuP USB 0420_PB USB 0420 N PW U6C02 002 EMEA004 oTL5861 CH EMEA004 W7HP64PWW0101 Ci5 2300 2G 2 1500G 1 NBDCB4XS D23H GT420 1G Bluetooth KB RF2 4 0420_PB VGA KIT HX093I_L PAIO10 23_L Ci5 2300 U2GBII I13 D1500GB 5 4KS NBDC...

Страница 121: ...s Headset H300 Motorola Sony Ericsson Stereo Bluetooth Headset HBH DS970 Sony External LCD P243W 24 inch LCD Monitor Acer P244W 24 inch LCD Monitor Acer SP2208WFP 22 inch LCD Monitor Dell UltraSharp 3008WFP 30 inch LCD Monitor Dell 2407FPW 24 inch LCD Monitor Dell UltraSharp E2408WFP 24 inch Widescreen HDMI Dell Earphone Microphone Hawk Stereo Headset 933 Hawk Projector 3300MP Projector Dell SIM C...

Страница 122: ...art C309 CC35A All in One Printer 4x6 photos CD DVD Quick Forms Scanner Copier Fax Port USB2 0 Ethernet PictBridge 802 11g BT HP Photosmart C4580 All in One Printer 4x6 photos Scanner Copier Port USB2 0 802 11g b Memory Card HP Memory Stick High Speed 1 GB Memory Stick Pro Duo Lexar MS PRO Dou 2 GB High Speed Sony MS PRO 2 GB Memory Card Sony SanDisk Memory Stick Micro M2 8GB Card SanDisk Multimed...

Страница 123: ... KC 21201 CI3 Memory A Data DDRIII1333 AD63I1A0823EU KN 1GB0C 010 DDRIII1333 AD63I1B1624EU KN 2GB0C 007 Apacer DDRIII1333 75 073C1 G02 0 065um KN 1GB01 31 Kingston DDRIII1333 ACR128X64D3U1333C9 LF 128 8 0 07um KN 1GB07 002 DDRIII1333 ACR256X64D3U1333C9 LF 128 8 0 07um KN 2GB07 002 Nanya DDRIII1333 NT2GC64B88B0NF CG 256 8 50nm KN 2GB03 022 Samsung DDRIII1333 M378B2873FHS CH9 128 8 46nm KN 1GB0B 036...

Страница 124: ... PCP HD5570 1GB DDR 3 128BITS SAMSUNG DVI HDMI W LP BKT ROHS VG APC55 711 HD5570 1GB 128bits sDDR3 DVI HDMI LP New Hynix 1 2 VG APC55 732 NV 315 512MB 64bits sDDR3 DVI HDMI LP New Hynix 1 2 VG PCPT3 164 HD5450 512MB SDDR 3 64BITS SAMSUNG DVI HDMI W LP BKT ROHS VG APC54 511 HD5450 512MB SDDR 3 64BITS SAMSUNG DVI HDMI W LP BKT ROHS 4 LAYER VG APC54 513 HD5450 512MB 64bits sDDR3 DVI HDMI LP New Hynix...

Страница 125: ...anish Latin KB USB0B 285 USB Godiva Keyboard Lite On SK 9020 USB 105KS Black English Canadian French KB USB0B 286 USB Godiva Keyboard Lite On SK 9020 USB 104KS Black Traditional Chinese KB USB0B 287 USB Godiva Keyboard Lite On SK 9020 USB 104KS Black Thailand KB USB0B 373 USB Godiva Keyboard Lite On SK 9020 USB 109KS Black Japanese KB USB0B 374 USB Godiva Keyboard Lite On SK 9020 USB 109KS Black B...

Страница 126: ...SB0B 387 USB Godiva Keyboard Lite On SK 9020 USB 105KS Black Hebrew KB USB0B 388 USB Godiva Keyboard Lite On SK 9020 USB 105KS Black Polish KB USB0B 389 USB Godiva Keyboard Lite On SK 9020 USB 105KS Black Slovenian KB USB0B 390 USB Godiva Keyboard Lite On SK 9020 USB 105KS Black Slovak KB USB0B 391 USB Godiva Keyboard Lite On SK 9020 USB 105KS Black Russian KB USB0B 392 USB Godiva Keyboard Lite On...

Страница 127: ...s keyboard Lite On RF2 4 Godiva Keyboard Lite On SK 9061 RF2 4 104KS Black US KB RF40B 083 RF2 4 Godiva Keyboard Lite On SK 9061 RF2 4 104KS Black Traditional Chine se KB RF40B 084 RF2 4 Godiva Keyboard Lite On SK 9061 RF2 4 104KS Black Thailand KB RF40B 085 RF2 4 Godiva Keyboard Lite On SK 9061 RF2 4 105KS Black Spanish Latin KB RF40B 086 RF2 4 Godiva Keyboard Lite On SK 9061 RF2 4 107KS Black Br...

Страница 128: ...00 RF2 4 Godiva Keyboard Lite On SK 9061 RF2 4 105KS Black Icelandic KB RF40B 101 RF2 4 Godiva Keyboard Lite On SK 9061 RF2 4 105KS Black Norwegian KB RF40B 102 RF2 4 Godiva Keyboard Lite On SK 9061 RF2 4 105KS Black Hebrew KB RF40B 103 RF2 4 Godiva Keyboard Lite On SK 9061 RF2 4 105KS Black Polish KB RF40B 104 RF2 4 Godiva Keyboard Lite On SK 9061 RF2 4 105KS Black Slovenian KB RF40B 105 RF2 4 Go...

Страница 129: ... RF2 4 105KS Black Nordic KB RF40B 116 RF2 4 Godiva Keyboard Lite On SK 9061 RF2 4 105KS Black Arabic English KB RF40B 117 RF2 4 Godiva Keyboard Lite On SK 9061 RF2 4 105KS Black Arabic French KB RF40B 118 RF2 4 Godiva Keyboard Lite On SK 9061 RF2 4 105KS Black Swiss FR KB RF40B 119 USB mouse Logitech USB P5_PB Logitech Optical mouse USB M U0027 O with PB logo polish cover MS 11200 086 Primax USB ...

Страница 130: ...604301 01B MSFT code EMEA pair with OVU430005 EMEA Win7 WMC RT 11300 023 Philips Remote Controller RC2604302 01B MSFT code US pair with OVU430005 US Win7 WMC RT 11300 022 Philips Remote Controller RC2604701 01B MSFT code Japan pair with OVU430005 US Win7 WMC RT 11300 024 SMK SMK Remote Controller US RRS9003 3406E SMK Quatro Pulse with Battery Pack US Win7 WMC_SMK RT 11300 025 Component Vendor Key ...

Страница 131: ...tion on all Acer notebook desktop All In One AIO and server models including Service guides for all models User s manuals Training materials BIOS updates Software utilities Spare parts lists TABs Technical Announcement Bulletin For these purposes we have included a PDF file to facilitate the problem free downloading of our technical material Also available on this website are Detailed information ...

Страница 132: ...Packard Bell oneTwo L5860 L5861 AIO Computer Service Guide 124 ...

Страница 133: ...board remove 60 function cable part number 96 106 card reader location 4 supported cards 1 chassis part number 96 106 remove 57 checkpoints boot block 64 DIM 68 overview 64 POST 66 CMOS clear 80 CMOS Setup Utility access 12 Advanced Chipset Configuration submenu 17 Advanced menu 15 BIOS Security menu 21 Boot menu 23 Exit menu 24 Integrated Peripherals submenu 18 Main menu 14 Miscellaneous submenu ...

Страница 134: ...aphics card part number 91 101 remove 39 H hard disk drive cage part number 95 105 part number 93 103 remove 42 SATA cable part number 96 106 specifications 8 troubleshooting 75 hardware configuration utility 11 exploded view 90 FRU list 89 information display 14 model configurations 111 specifications 7 troubleshooting 63 HDD see hard disk drive 1 HDMI cable part number 97 107 HDMI port 4 HDMI po...

Страница 135: ...er cord 97 107 Bluetooth cable 97 107 Bluetooth module 92 102 capacitive LED board 91 101 capacitive LED board cover 94 104 chassis 96 106 computer stand 95 105 converter board 91 101 converter board cable 97 107 CRT port dummy cover 96 106 DVI to D Sub cable 97 107 DVI to VGA dongle connector 97 107 front bezel 94 104 graphics card 91 101 hard disk drive 93 103 HDD cage 95 105 HDD SATA cable 96 1...

Страница 136: ... 92 102 remove 45 socket 88 specifications 7 troubleshooting 74 PS 2 keyboard port 4 PS 2 mouse port 4 PSU see power supply unit 46 R rear cover part number 95 105 remove 28 remote control part number 100 110 Return Merchandise Authorization 89 riser board bracket part number 96 106 part number 92 102 RMA see Return Merchandise Authorization 89 RTC battery BIOS error 11 location 88 RTC clock RTC b...

Страница 137: ...mation 123 POST error indicators 68 TV tuner card part number 91 101 card remove 38 location 4 U undetermined problems 78 USB 3 0 add on card part number 92 102 USB ports bootable device 18 left 4 legacy device 18 right 5 USB audio board board part number 91 101 cable part number 96 106 cover part number 95 105 remove 34 user password 21 V ventilation 2 VESA wall mounting 6 VGA port 4 volume contr...

Отзывы: