


10
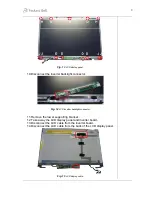
15. Remove the screws (3x D, 1xA) from the left LCD bracket. The same
goes for the right bracket.
Fig. 16
LCD display cable.
16. Take away the top, left and right bracket from the LCD display panel.
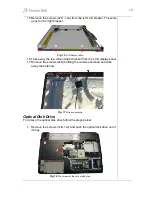
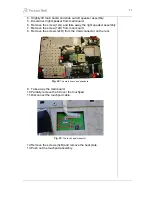
17. Remove the screws (2xD) holding the wireless antenna and take
away the antenna.
Fig. 17
Wireless antenna.
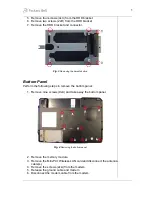
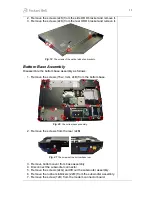
Optical Disk Drive
To remove the optical disk drive follow the steps below:
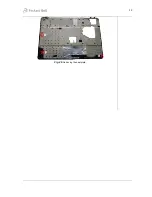
1. Remove the screws (1xB, 1xJ) and push the optical disk drive out of
its bay.
Fig. 18
The screws of the optical disk drive.
Содержание EasyNote W3 Series
Страница 1: ...Packard Bell EasyNote W3 Series Dragon A Disassembly Manual...
Страница 16: ...14 Fig 26 Removing the heat plate...