background image

RETURN TO 

TABLE OF 

CONTENTS

- 7 -

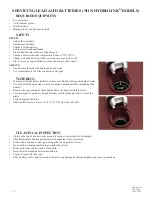
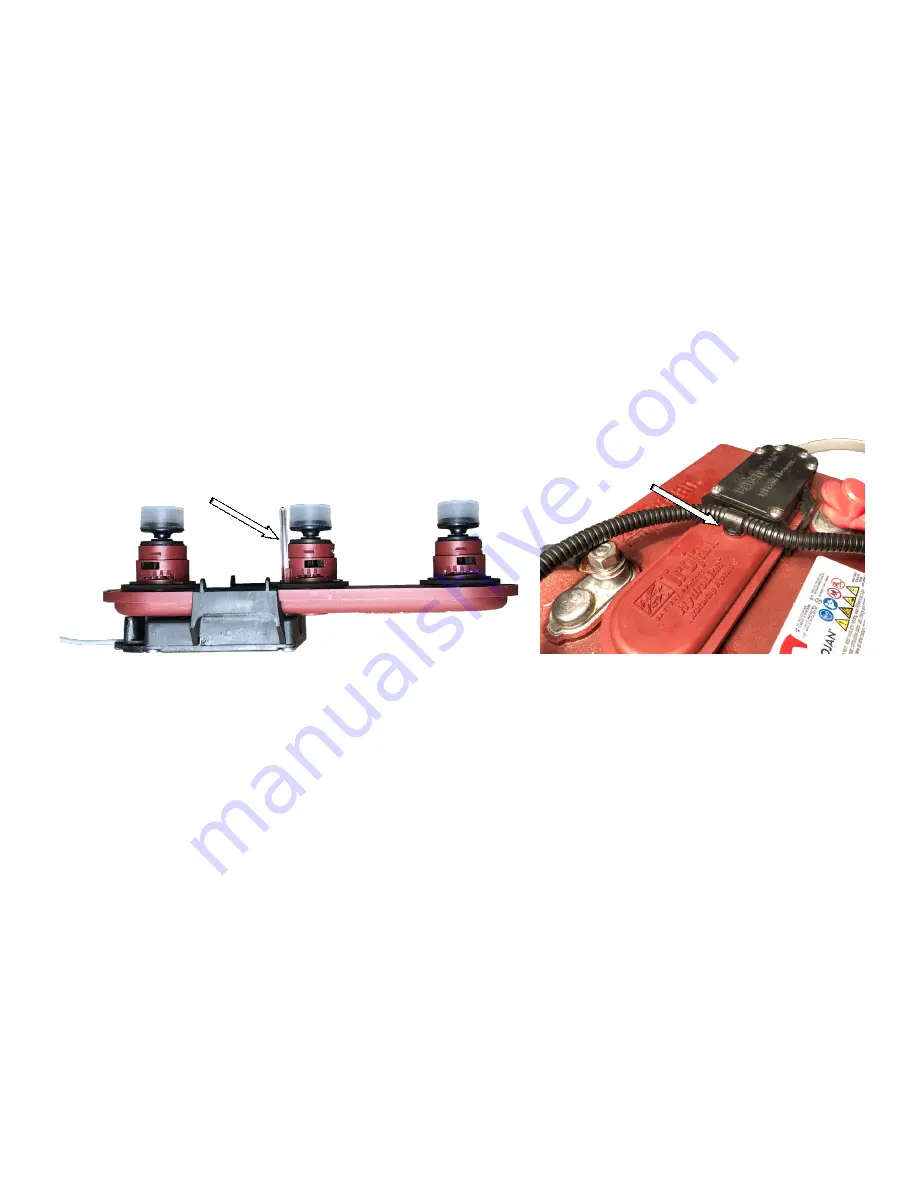
CLEANING THE BATTERYSHIELD

®

 SENSOR LIGHT PIPE

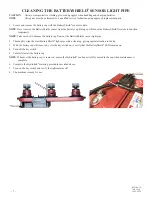
1.  Locate and remove the battery cap with the BatteryShield

®

 sensor module.

NOTE

: Never remove the BatteryShield

® 

sensor from the battery cap. Doing so will cause the BatteryShield® system to function 

improperly.

NOTE

: Take care not to damage the battery cap floats or the BatteryShield

®

 sensor light pipe.

2.  Thoroughly wipe the clear BatteryShield

®

 light pipe with a clean rag, giving special attention to the tip.

3.  With the battery cap still removed, cycle the key switch on to verify that the BatteryShield

®

 LED remains on.

4.  Turn off the key switch.
5.  Carefully install the battery cap.

NOTE

: Whenever the battery cap is removed, ensure the Hydrolink

®

 snake port is fully seated in the cap when maintenance is 

complete.

6.  Complete the Hydrolink

®

 watering procedure described above.

7.  Turn on the key switch and verify the light remains off. 
8.  The machine is ready for use. 

CAUTION

:   Always wear protective clothing, gloves and goggles when handling and charging batteries.

NOTE

:  

All repairs must be performed by a qualified service technician using approved replacement parts.

Содержание S-20

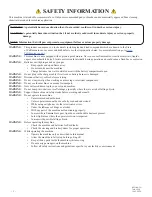
Страница 1: ...aging substances Failure to follow the instructions may result in injury or damage to equipment and property The contents of this manual are based on the latest product information available at the ti...

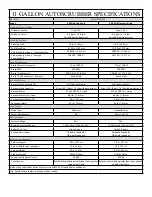
Страница 2: ...chamber 13 gal 49 l 2 gal 7 6 l demisting chamber Vacuum Motor 51 hp 380 W 2 stage 51 hp 380 W 2 stage Vacuum Motor cfm cmm 68 cfm 1 9 cmm 68 cfm 1 9 cmm Vacuum Motor Water Lift 46 in 117 cm 46 in 117...

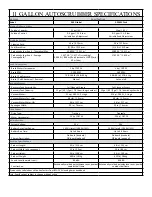
Страница 3: ...gal 7 6 l demisting chamber 13 gal 49 l 2 gal 7 6 l demisting chamber Vacuum Motor 51 hp 380 W 2 stage 51 hp 380 W 2 stage Vacuum Motor cfm cmm 68 cfm 1 9 cmm 68 cfm 1 9 cmm Vacuum Motor Water Lift 46...

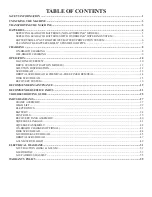
Страница 4: ...TEM TRACTION MODELS 12 SOLUTION DISTRIBUTION 12 SCRUB HEAD 13 ORBITAL SCRUB HEAD CHEMICAL FREE FINISH REMOVAL 14 DISK SCRUB HEAD 15 RECOVERY SYSTEM 16 RECOMMENDED MAINTENANCE 19 RECOMMENDED SERVICE PA...

Страница 5: ...PAGE INTENTIONALLY BLANK...

Страница 6: ...rking near moving or electrical components WARNING Do not use the machine as a means for transport WARNING Never allow children to play on or around machine WARNING Do not bump into shelves or scaffol...

Страница 7: ...han a 12 incline when loading or unloading the machine NOTE Use tie down straps to secure the machine to the truck or trailer during transport NOTE Discontinue use and report machine damage or faulty...

Страница 8: ...achine 5 Raise the scrub head to the transport position 6 Carefully maneuver the machine down the ramp 7 Install the rear squeegee assembly CAUTION Remove the batteries and use mechanical assistance t...

Страница 9: ...a level surface and remove the key CAUTION Always wear protective clothing gloves and goggles when handling and charging batteries NOTE All repairs must be performed by a qualified service technician...

Страница 10: ...ctrolyte sulfuric acid occurs flush with large amounts of water Use only distilled water tap water can contain contaminants that will damage the battery Remove the caps and place them upside down to c...

Страница 11: ...eing over filled Disconnecting the watering system before the flow indicator stops spinning will result in batteries being under serviced and battery life will be reduced 7 Replace the dust cover on t...

Страница 12: ...ion to the tip 3 With the battery cap still removed cycle the key switch on to verify that the BatteryShield LED remains on 4 Turn off the key switch 5 Carefully install the battery cap NOTE Whenever...

Страница 13: ...lashing 2 seconds Charger is set for AGM batteries YELLOW flashing continuous Unsuitable battery connected or output short circuit RED flashing 2 seconds Charger is set for Lead Acid batteries RED fla...

Страница 14: ...ry harness is damaged NOTE Ensure battery charging and storage locations comply with OSHA and any governing agencies standards based on your particular location and application 1 Set the Battery Type...

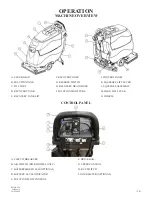
Страница 15: ...CONTROL PANEL K SQUEEGEE LIFT LEVER L SQUEEGEE ASSEMBLY M HEAD LIFT LEVER N WHEELS F RECOVERY HOSE G REVERSE SWITCH H RECOVERY DRAIN HOSE I SOLUTION SIGHT TUBE A CIRCUIT BREAKERS B A B SWITCH DISK MOD...

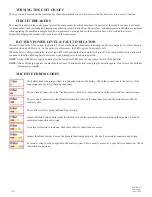
Страница 16: ...store it in a secure location TURNING THE UNIT ON OFF CIRCUIT BREAKERS The circuit breakers on the control panel protect the components from high amp draw In particular the scrub head circuit will dra...

Страница 17: ...tank Excess foam will damage the vacuum motor In addi tion to properly mixed low foam detergent use a small amount of de foaming liquid in the recovery tank Never use pure acids 1 Add water and clean...

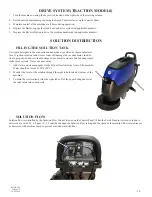
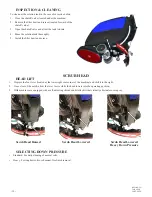
Страница 18: ...l and screen SCRUB HEAD 1 Depress the foot lever located at the lower right rear corner of the machine and shift it to the right 2 Once clear of the notch allow the lever to rise while the head lowers...

Страница 19: ...paration pad is required for chemical free finish removal The standard red scrub pad acts as a backer and compensates for variances in the floor 1 Place the black retainer pad 2 back from the front of...

Страница 20: ...ers center the pad on the driver squeeze the center lock wires inward and press down tab side first Press the pad and release the wires so that they lock in place 1 Turn the key switch on and rotate t...

Страница 21: ...the Recovery Drain Hose squeezing the restriction collar to control the flow 3 As the tank drains lift the Recovery Tank to the open position 4 Using clean water thoroughly clean and rinse out any sed...

Страница 22: ...um Motor to shut off after a 10 second delay This delay ensures all of the recovered water is pulled into the Recovery Tank SQUEEGEE ADJUSTMENT Improper adjustment of the squeegee blades will reduce t...

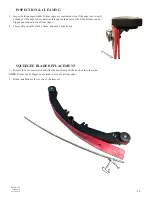
Страница 23: ...through the thickness of the blade Blades can be flipped and rotated to use all four edges 2 Thoroughly clean the blades frame and neck of any debris SQUEEGEE BLADE REPLACEMENT 1 Release the over cent...

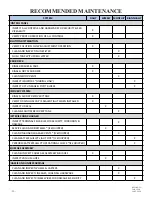
Страница 24: ...E PIVOT BLOCKS X RECOVERY SYSTEM RINSE AIR DRY RECOVERY TANK X VERIFY DRAIN HOSE CAP IS SEALED TIGHT WHEN INSTALLED X INSPECT LID SEAL X CLEAN SANITIZE RECOVERY TANK X BATTERIES AND CHARGER INSPECT TE...

Страница 25: ...20 RETURN TO TABLE OF CONTENTS PAGE INTENTIONALLY BLANK...

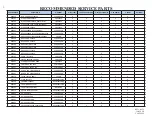
Страница 26: ...N 20 INCH SCRUB HEAD X X 870902 BRUSH POLY 12 INCH SCRUB HEAD X X 850901 BRUSH POLY 20 INCH SCRUB HEAD X X 852401 CABLE LIFT CLEVIS CONTROLS X X X X 911622 CIRCUIT BREAKER 30 AMPS CONTROLS X X X X 852...

Страница 27: ...AD X X 855205 MOTOR VAC 24VDC PERIPH RECOVERY TANK X X X X 555901 PAD 12 BLACK STRIP CASE 5 SCRUB HEAD X X 555941 PAD 12 RED SCRUB CASE 5 SCRUB HEAD X X 555951 PAD 12 WHITE POLISH CASE 5 SCRUB HEAD X...

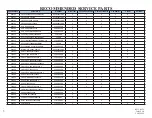
Страница 28: ...OUND ON MOM CONTROLS X X X 911682 SWITCH SNAP BENT LEVER FRAME X X X X 911646 SWITCH SNAP WITH ROLLER CONTROLS X X X X 879002 TUBE PUMP ASSY NOT SHOWN OPTIONAL BATTERIES X X X X X 859003 TUBE SIGHT RE...

Страница 29: ...RETURN TO TABLE OF CONTENTS 24 PAGE INTENTIONALLY BLANK...

Страница 30: ...ID GASKET REPAIR OR REPLACE IF NEEDED DRAIN HOSE CAP IS NOT INSTALLED PROPERLY INSTALL DRAIN HOSE SECURELY LOW BATTERY VOLTAGE CHARGE BATTERIES MACHINE WILL NOT TURN ON FAULTY KEY SWITCH DIAGNOSE AND...

Страница 31: ...G PAD IS TOO AGGRESSIVE FOR APPLICATION CONTACT YOUR LOCAL DISTRIBUTOR FOR RECOMMENDED APPLICATION FAULTY OR SHORTED WIRE REPAIR WEAK CIRCUIT BREAKER CONTACT SERVICE TECHNICIAN TO TROUBLESHOOT AND ISO...

Страница 32: ...008 SCREW HEX M6 X 25 SS PATCH 18 2 857502 RIG CASTER 3INCH WITH AXLE 19 2 859709 WHEEL CASTER 3INCH 20 2 855015 KIT CASTER 3 INCH REPLACEMENT 21 3 980079 WASHER FLAT 5 ZINC 22 2 980019 WASHER 50INCH...

Страница 33: ...W189D SCREW HEX 1 4 20 X 75 SS PATCH 12 2 920011 NUT NYLOCK 1 4 20 ZINC 13 1 224130 9 50 HOSE 1 2 DIA X 9 50 LONG 14 1 853301 FITTING REDUCER BM08 BM04 15 1 204179 17 0 HOSE 1 4 DIA X 12 50 LONG 16 4...

Страница 34: ...3 LABEL GRIP FOOT 8 1 855004 KNOB OVAL 31 18 9 3 980094 WASHER SPLIT LOCK 31 SS 10 2 962265 SCREW BUTTON SOCKET 31 18 X 75 SS 11 1 858303 SPRING EXTENSION 12 1 853801 GUIDE LEVER 13 1 980093 WASHER WA...

Страница 35: ...5 LEVER DOWNPRESSURE DUAL 7 1 855103 LABEL GRIP FOOT 8 1 855004 KNOB OVAL 31 18 9 5 980094 WASHER SPLIT LOCK 31 SS 10 1 962265 SCREW BUTTON SOCKET 31 18 X 75 SS 11 1 858303 SPRING EXTENSION 12 2 85380...

Страница 36: ...1 855103 LABEL GRIP FOOT 8 1 855004 KNOB OVAL 31 18 9 4 980094 WASHER SPLIT LOCK 31 SS 10 2 962265 SCREW BUTTON SOCKET 31 18 X 75 SS 11 1 858303 SPRING EXTENSION 12 2 853801 GUIDE LEVER 13 7 980612 WA...

Страница 37: ...WASHER FLAT 25 5 2 980002 WASHER LOCK SPLIT 25 6 1 223343 FITTING STR BM08 PM08 7 2 853303 FITTING STR BM12 PM08 8 1 859003 TUBE SIGHT REPLACMENT 9 1 S453P CLAMP HOSE WORM 10 4 225670 PAD WIRE TIE 11...

Страница 38: ...70A 6 1 912401 CONTACTOR 24V 100A 7 4 962363 SCREW PAN 10 32 X 50 SS 8 2 W401D WASHER FLAT 10 9 4 980022 WASHER LOCK SPLIT 10 10 2 858501 STAND OFF INSULATED 25 20 11 4 W169D SCREW HEX 25 20 X 50 12 6...

Страница 39: ...N 1 2 851303 BATTERY 12V 155AH LEAD ACID 1 2 841311 BATTERY 12V 140AH AGM 1 2 881350 BATTERY 12V 130AH LEAD ACID 1 2 851302 BATTERY 12V 105AH AGM 2 1 858202 FOAM SPACER BATTERY 3 1 911640 HARNESS CONN...

Страница 40: ...35 RETURN TO TABLE OF CONTENTS CONTROLS S 24XM TRACTION MODELS...

Страница 41: ...ZINC 25 1 855106 LEVER LIFT SQUEEGEE 26 1 855004 KNOB OVAL 31 18 27 1 920038 NUT HEX 31 24 SS 28 1 902050 BEARING ROD END 31 24 29 1 920012 NUT NYLOCK 5 16 18 ZINC 30 1 853802 GUIDE SPACER ROUND 31 1...

Страница 42: ...37 RETURN TO TABLE OF CONTENTS S 20HD CONTROLS...

Страница 43: ...FT SQUEEGEE 26 1 855004 KNOB OVAL 31 18 27 1 920038 NUT HEX 31 24 SS 28 1 902050 BEARING ROD END 31 24 29 1 920012 NUT NYLOCK 5 16 18 ZINC 30 1 853802 GUIDE SPACER ROUND 31 1 962270 SCREW HEX 5 16 18X...

Страница 44: ...CK 6 32 SS 17 3 911646 SWITCH SNAP WITH ROLLER 18 6 962273 SCREW PAN 4 40 X 88 ZINC 19 6 980682 WASHER FLAT 4 ZINC 20 6 W385D NUT NYLOCK 4 40 ZINC 21 1 855106 LEVER LIFT SQUEEGEE 22 1 855004 KNOB OVAL...

Страница 45: ...LAMP WIRE P SHAPED 17 9 W104D WASHER FLAT 25 18 14 980002 WASHER LOCK SPLIT 25 19 8 W189D SCREW HEX 1 4 20 X 75 SS PATCH 20 1 855205 MOTOR VAC 24VDC PERIPH 21 1 850812 BRACKET MTG ISOLATOR 22 4 964224...

Страница 46: ...75 SS PTCH 5 2 858204 SPACER LINK SQUEEGEE 6 1 962075 SCREW HEX 3 8 16 X 1 5 SS 7 1 920035 NUT NYLOCK 38 16 SS 8 4 920036 NUT NYLOCK 5 16 18 SS 9 1 850501 AXLE WHEEL SQUEEGEE 10 2 849709 WHEEL 2 OD 3...

Страница 47: ...REAR 30 INCH 3 1 857201 RETAINER REAR 30 INCH 4 1 850701 BLADE FRONT 30 INCH 5 1 857202 RETAINER FRONT 30 INCH 6 2 852002 CLAMP OVER CENTER BAND 7 4 920034 NUT NYLOCK 6 32 SS 8 2 962465 SCREW SHOULDER...

Страница 48: ...SPLIT 25 4 2 W104D WASHER FLAT 25 5 1 852407 CHARGER 24V ONBRD CULUS 6 4 962186 SCREW PAN 10 32 X 1 0 SS 7 4 W401D WASHER FLAT 10 8 4 920666 NUT NYLOCK 10 32 SS 9 1 920034 NUT NYLOCK 6 32 SS 10 1 W13...

Страница 49: ...980094 WASHER SPLIT LOCK 31 SS 15 1 962466 SCREW HEX M8 1 25 X 25 SS PATCH 16 1 855016 KIT SHROUD REPLACEMENT ITEMS 16 20 17 1 858503 SKIRT BRISTLE 18 1 852302 SHROUD HEAD CUTOUT 19 4 962263 SCREW BU...

Страница 50: ...45 RETURN TO TABLE OF CONTENTS S 20HD DISK SCRUB HEAD...

Страница 51: ...64010 SCREW SET M6 X 30 SS PATCH 6 4 924082 NUT NYLOCK M6X1 0 SS 7 1 850808 BRACKET SUPPORT HEAD 8 4 962221 SCREW HEX 25 20 X 1 0 SS 9 1 854302 HUB DRIVER BRUSH 10 1 853803 GUIDE DRIVER 11 3 962274 SC...

Страница 52: ...4 20 SS 12 8 851101 BUSHING RUBBER 13 4 858205 SPACER RUBBER 14 1 857501 ROLLER PLASTIC 15 1 855204 MOTOR 24V 2200 RPM 75HP 16 1 850906 BRUSH CARBON KIT 4 PC 855204 875201 17 2 856611 PLATE WEIGHT 18...

Страница 53: ...20X 62 SS PATCH 6 8 962278 SCREW SOCKET FLT 31 18X 88 SS PATCH 7 1 962280 SCREW SET 25 20X 5 SS PATCH 8 1 856606 PLATE BALANCE 20 INCH 9 4 855604 MOUNT ISOLATOR 31THD 10 4 980108 WASHER FLAT 31ID 1 2...

Страница 54: ...HEAD 16 6 902035 BEARING 5 ID 1 1875 OD 17 3 876901 PULLEY IDLER 18 3 877302 RING RETAINING INT 1 12 DIA 19 6 878201 SPACER IDLER 20 3 878202 SPACER IDLER PLAIN 21 1 876902 PULLEY MOTOR DRIVE 22 1 980...

Страница 55: ...BO 7 4 920665 NUT NYLOCK 1 4 20 SS 8 8 W104D WASHER FLAT 25 9 1 872305 SHROUD HEAD 24INCH 10 1 858503 SKIRT BRISTLE 11 2 873302 FITTING TEE PM02XBM04 12 2 875901 DRIVER PAD 12INCH BRISTLE 13 1 204179...

Страница 56: ...al BATTERYSHIELD sections of this diagram and the BATTERYSHIELD AUTOMATIC WET BATTERY PROTECTION SYSTEM section prior to proceeding TROUBLESHOOTING TIPS 3 If a yellow LED is flashing on the battery ch...

Страница 57: ...IELD sections of this diagram and the BATTERYSHIELD AUTOMATIC WET BATTERY PROTECTION SYSTEM section prior to proceeding TROUBLESHOOTING TIPS 3 If a yellow LED is flashing on the battery charger verify...

Страница 58: ...sections of this diagram and the BATTERYSHIELD AUTOMATIC WET BATTERY PROTECTION SYSTEM section prior to proceeding TROUBLESHOOTING TIPS 3 If a yellow LED is flashing on the battery charger verify cont...

Страница 59: ...ctions of this diagram and the BATTERYSHIELD AUTOMATIC WET BATTERY PROTECTION SYSTEM section prior to proceeding TROUBLESHOOTING TIPS 3 If a yellow LED is flashing on the battery charger verify contin...

Страница 60: ...verify continuity between the charger and the battery pack 2 A circuit breaker is designed to prevent over loading a component system If a circuit breaker continues to trip verify the system is not be...

Страница 61: ...RETURN TO TABLE OF CONTENTS 56 PAGE INTENTIONALLY BLANK...

Страница 62: ...RETURN TO TABLE OF CONTENTS 57 DATE MAINTENANCE LOG...

Страница 63: ...58 RETURN TO TABLE OF CONTENTS DATE MAINTENANCE LOG...

Страница 64: ...Head Isolators Isolator replacement parts on the Orbital Scrub Head will be covered for 5 years or 5000 hours whichever comes first when diagnosed and determined to be faulty by an Authorized Service...

Страница 65: ...D ALL APPLICABLE INFORMATION FOR THE S 20HD MISC CORRECTIONS 2020 2 13 ADDED MISSING SQUEEGEE ASSEMBLY PART NUMBERS PAGE 42 2020 2 20 UPDATE PART NUMBERS PAGES 48 50 UPDATE WARRANTY INFORMATION 2020 7...

Страница 66: ...www pacificfloorcare com...

Отзывы: