19
Fig. # 39
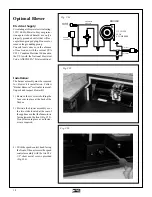
Fig. # 38
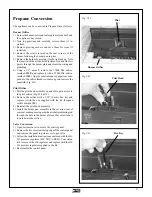
4) Run the power cord to the outside of the
appliance through the foremost 1-1/2" grom-
met located on the right side of the firebox
support and casing side.
5) Fasten the thermo-switch through the two
holes in the rear of the firebox with the two #8
- 1/2" sheet metal screws provided. Ensure
that the thermo switch will contact the fan
cover when replaced (Fig. #37).
6) Slide 1/2" grommet with wires into the key-
hole provided on the fan cover (Fig #38).
Note:
Ensure that wires are not touching the
bottom of the burner, as damage could occur.
7) Replace fan cover, burner and glass assem-
bly.
8) TO TEST: Place the speed control assembly
rocker switch to the ON position and the
variable speed control to the low, medium or
high position. The fan should now be pow-
ered and controlled only by the speed control.
*When the ON/OFF rocker switch is in the
OFF position, the fan will be actuated by the
thermo-switch.
Fig. # 37


