


5.2 Replace the Primary Special Enrollment
Step 1
Enter the Admin Code
0000
, the the display will show
Step 2
Enter the Magic Code (Password)
0000
, then press the screen will show
Step 3
Press twice and the screen will show
Step 4
Then Press and the screen will show
Step 5
Enter an existing 5-digit user ID to be edited then press the screen will show
Step 6
Press to replace, the screen will show
and the finger print scanner turn red and ready to scan your finger print. The system will time out in
10 seconds if no finger print is detected and the screen will show
Step 7
Place your finger properly on top of the finger scanner, the display will show
Step 8
Enter the user name up to 15 characters using the keypad.
See table 4.1 for Keypad key correlation
table.
The screen will show
Step 9
Repeat Step 4 if you need to program another user’s finger print otherwise press to exit from
programming mode.
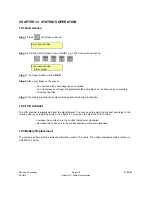
Password:_
ACS-BIO Setup
Set Parameter 1
ACS-Bio Setup
Special Enrollment 3
New Enrollment
User ID:_
1. Replace
2. AddNew C. Abort_
Place Finger
Please Wait...
Enrollment
TIME OUT
Enter Name
_
Enter Name
SUCCESSFULLY
Pach and Company
Page 23
07/28/04
AFGR9
Chapter 5. Special Enrollment


