


OPERATION (cont.)
8
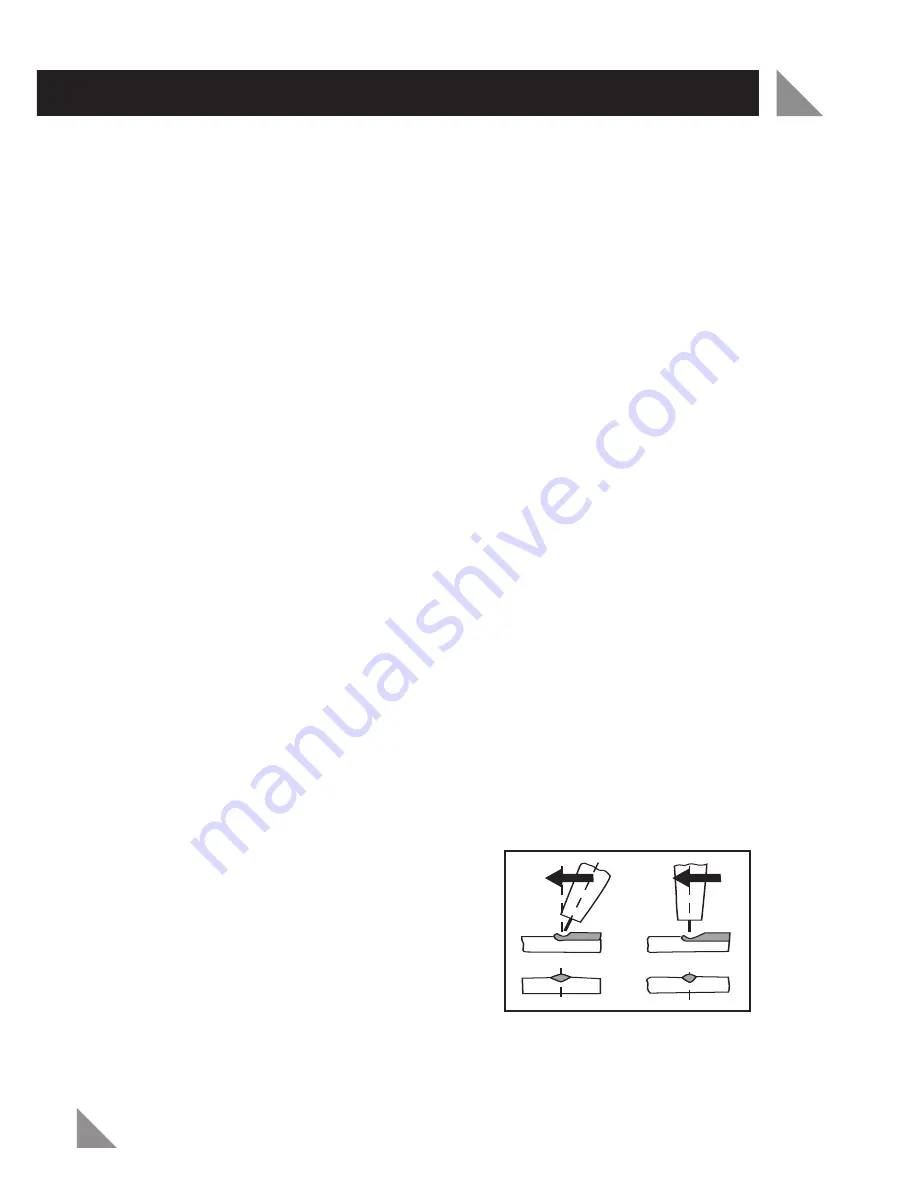
Fig 1
9. Take your welding tip and thread over the wire and screw onto the gun. Take
your shroud and screw over the welding tip. Using pliers to cut flush with
shroud end.
•
Position the two pieces of metal you wish to join.
•
Hold the mig torch approximately 2 cm away from the desired join area. Lower
or hold the welding mask over your face. Using the mig torch, proceed to
strike the wire tip against the desired join area on the work piece as if you are
striking a match. This is the correct strike up method.
Note:
Hitting the electrode on the work piece can damage the electrode and
make strike up difficult.
1. The welding power source has two main control settings. These are the wire
speed control and the current (amps) control.
2. The combination of these settings requires alteration depending on the
material and other conditions that affect the weld. It is advisable to practice
on scrap pieces of material to clarify which settings are going to give you the
best weld.
3. The wire speed and current control needs to be set at the correct speed and
power for a smooth and a consistent weld. There are many variables that
affect the weld including the style, speed of the operator, the material being
welded and the diameter of the wire.
4. When welding with large diameter wire it is advisable to use the high amps
setting selector on the front of the welder.
5. When welding with thinner diameter wire it is advisable to use the low amps
setting selector on the front of the welder.
If the Wire Speed is set too fast “stubbing” will occur as the wire dips into the
molten pool and does not melt. Welding in there conditions normally produces a
poor weld due to lack of fusion. If however the welding speed is too slow, large
drops will form on the end of the electrode wire, causing splatter. The correct
setting of wire speed can be seen in the shape of the weld deposit and heard by a
smooth regular are sound.
3.
Postion of MIG Torch
The angle of MIG
torch to the weld has an effect on the
width of the weld run. Refer to Fig 1.
4.
Distance from the MIG Torch Nozzle to
the Work Piece
The electrode stick out
from the MIG Torch nozzle should be
between 2.0mm to 5.0mm. This distance
may vary depending on the type of joint
that is being welded.
Forehand
Vertical