background image

5

6

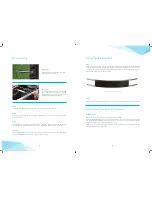
Handy Hint

Attach the more tightly curled end of the springs 

to the D-rings on the jump mat.

Handy Hint

You will need to use the Spring Tool to attach the 

springs to the frame. Hook the spring tool onto the 

end of a spring, and pull until the spring can be 

slotted into the correct slot in the frame.

Mat Assembly

Step 1

Lay the Jump Mat inside the frame of the trampoline with the centre logo facing upwards.

Step 2

Next locate the four D-rings with the white stitching. Attach these in the 12, 6, 3 and 9 0’clock positions directly 

opposite each other.

Step 3

Finish by attaching the remainder of the springs. Do this by attaching a few springs on one side, then going to 

the other side of the trampoline to attach a few more. This evens out the tension on the mat and springs.

Important

During assembly it may look like the mat won’t fit. It will however stretch to the correct size when attaching the 

springs and this may take a little force. You cannot overstretch a spring.

Step 2

Go round the entire frame attaching the remaining panels in the same way until your retaining wall is complete.

Placing the Trampoline into the Hole

Installation Time

With two people you should allow approximately 60 minutes for this stage.

When you have finished digging your hole, lift the frame (complete with wall, mat and springs) into the hole and 

onto the ledge you’ve created. Check the levels are correct - you may want to remove the whole trampoline 

to make any adjustments to the height that the frame is sitting.

Filling In:

 Fill in the outside of the trampoline with the topsoil you’ve saved from your hole and compact the soil. 

Then re-lay the turf around the trampoline.

Fitting the Retaining Wall

Step 1 

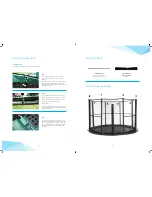
It is now time to fit the retaining wall to the frame. Take one Wall Panel and lay it against the frame between the 

upright sections. There are four corner holes in the frame and four holes in the wall panel. Insert (using either 

a cordless drill or cross-head screwdriver) and tighten the four Screws to attach the Wall Panel to the frame. 

Ensure the wall is as flush to the frame as possible. 

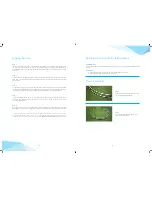
Example of how to attach the Wall Panels

Содержание Round In-Ground Trampoline

Страница 1: ......

Страница 2: ...ng parts Also ensure parts are safe and securely attached 3 Supervise children and inexperienced jumpers at all times taking extra care with younger children 4 Bare feet are the best and safest way to jump on a trampoline mat as they provide grip and avoid slipping 5 Jumping in the middle of the trampoline is the best and safest place to bounce 6 Always use safety padding on the frame to avoid inj...

Страница 3: ...gging then allow a full day for 2 4 people to dig the hole assemble the trampoline and do the finishing landscaping Every hole construction will vary in respect of size of trampoline soil conditions and drainage requirements Equipment needed For the smaller size trampolines it s a relatively easy task to hand dig the hole For the larger sizes it s quicker and easier to hire a mini digger and opera...

Страница 4: ...eed to consider any further drainage For less porous soil or clay we suggest you put in a soak away at the bottom of the inner hole or connect it to your storm water pipe where possible Step 5 We suggest you line the hole with a weed matting to prevent weeds growing The weed matting needs to be permeable to allow water to soak through The matting can be anchored on the ledge under the bottom frame...

Страница 5: ...etch a spring Step 2 Go round the entire frame attaching the remaining panels in the same way until your retaining wall is complete Placing the Trampoline into the Hole Installation Time With two people you should allow approximately 60 minutes for this stage When you have finished digging your hole lift the frame complete with wall mat and springs into the hole and onto the ledge you ve created C...

Страница 6: ... the wall panel and frame From underneath insert the toggle into the loop and rotate to secure Repeat for all ties Handy Hint To create a gap between the wall and frame you may need to insert your flat head screwdriver and rotate to create a gap Step 3 To finish installing your pads remove a single spring underneath where each pad section joins the next one Then insert the spring through the loop ...

Страница 7: ...y with the enclosure now half assembled and upright insert the remaining poles into the sleeves in positions 3 4 7 and 8 and then into the enclosure sockets The bottom of the net runs along the vented pads and is not tied off in anyway Half Enclosure Assembly Step 1 Take the Enclosure Net complete with foam inserts and lay flat on the trampoline mat Step 2 Insert all enclosure poles into the sleev...

Страница 8: ......

Страница 9: ... 21 Leather St Breakwater VIC 3219 Hours Monday Friday 9am 5pm or by appointment Free Delivery Australia Wide Easy Returns Long Warranties Largest Range of Parts in Oz High Quality Built to Last Easy Claim Warranty Service Friendly Advice 7 Days a Week Round Oval and Inground Trampolines Trampolines and Replacement Parts Lay by Available ...

Отзывы: