


04
USAGE
2.1 INSTALLATION
IMPORTANT NOTE: Note: this card is susceptible to invisible damage if not protected during installation.
For proper grounding, we recommend using a grounding strap. Work in a clean, static-free area, and avoid
wearing clothing that retains static charges. Please visit this URL for more information:
1.
Before installing the 10GbE Network Card into a computer,
properly shut down, unplug the power source, and disconnect
any attached devices from your host.
Before installing into a Thunderbolt PCIe expansion chassis,
properly unmount and disconnect any chained devices, then unplug
the power source.
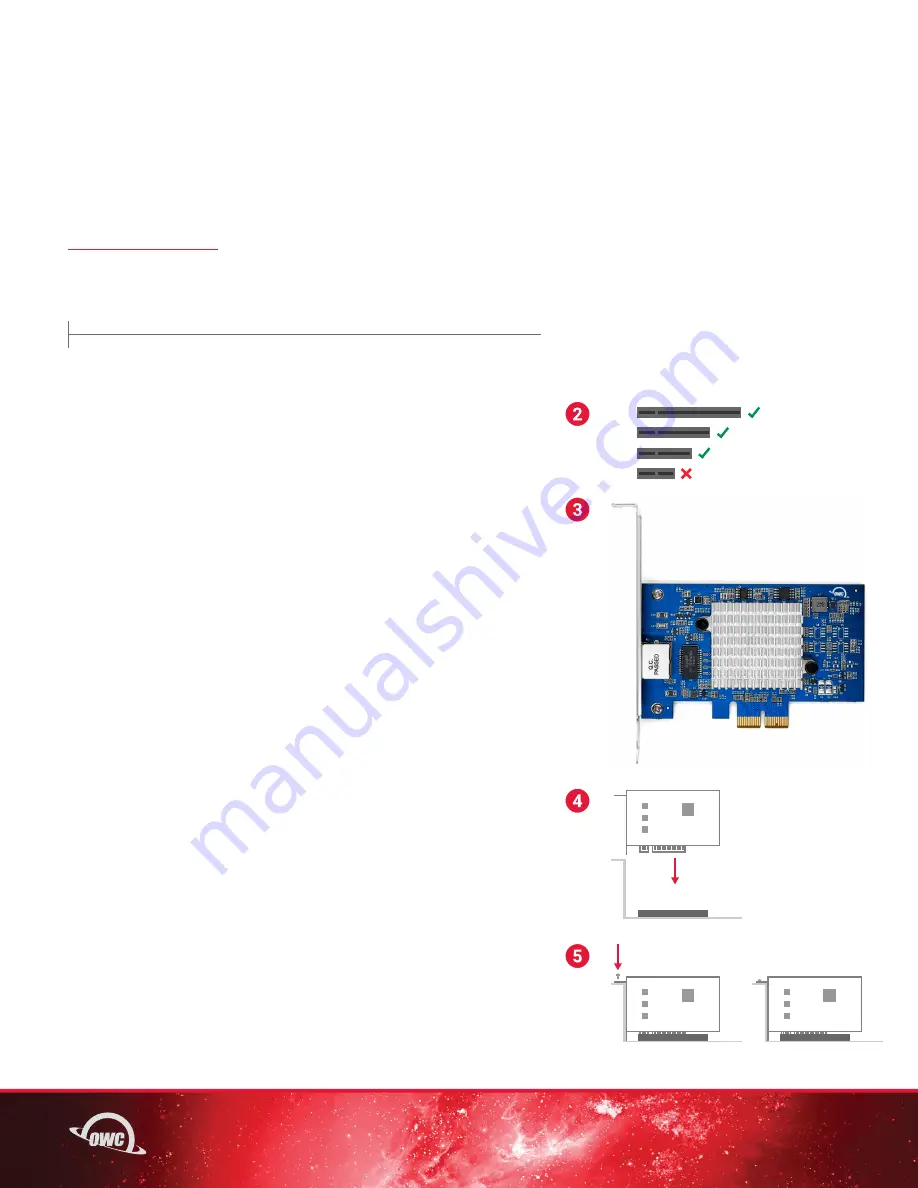
2.
Open the host so that the compatible PCIe slot is visible
and accessible. Unscrew and remove the slot cover if present.
Place the screw to the side as it will be used to secure the
installed 10GbE Network Card.
3.
Determine if your host requires a low-profile bracket. If it does,
replace the pre-installed full-profile mounting bracket with the
included low-profile mounting bracket.
-Use a Phillips Head Screwdriver to remove
the bracket screws (2) from the Network Card.
-Remove the full-profile bracket.
-Line up the low-profile bracket with the bracket
holes on the back of the Network Card.
-Insert the bracket screws (2) that were removed
and carefully tighten to secure the bracket.
4.
Align the PCIe connector on the 10GbE Network Card with
the compatible slot, then carefully seat the card into the slot
(highlighted). If there is resistance, do not force the card
into the slot. Remove it, re-align the card’s connector, and
try again.
5.
Once the card is fully seated, affix the screw to the bracket as
shown. Notes: no special power connectors or other attachments
are required to use this card.
x8
x16
x1
x4
USAGE
OR