


OWC Mercury Elite Pro Dual
Table of Contents
1 INTRODUCTION
1.1 SYSTEM REQUIREMENTS
1.1.1 Mac® Requirements
1.1.2 PC Requirements
1.2 PACKAGE CONTENTS
1.3 ABOUT THIS MANUAL
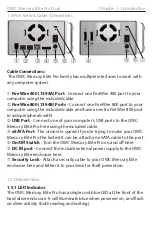
1.4 PORT VIEW & CABLE CONNECTIONS
1.5 DETAILED VIEW
1.5.1 Front Activity Light View
2 SYSTEM SETUP
5 APPENDIX
6 CUSTOMER SERVICE
6.1 BEFORE CONTACTING CUSTOMER SERVICE
6.2 CONTACT INFORMATION
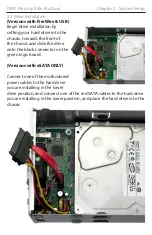
2.1 COVER REMOVAL
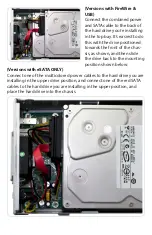
2.2 DRIVE INSTALLATION
2.3 RAID CONFIGURATION (FW/USB/ESATA MODEL ONLY)
2.4 FINAL ASSEMBLY
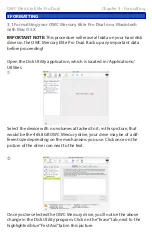
3 FORMATTING
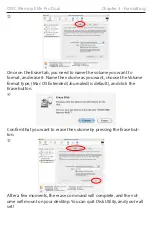
3.1 MACINTOSH FORMATTING
3.2 REMOVING AN EXISTING GUID PARTITION
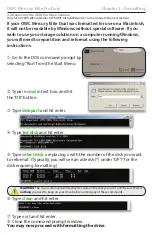
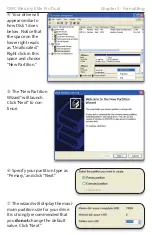
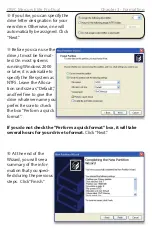
3.3 WINDOWS FORMATTING
4 TROUBLESHOOTING & TIPS
4.1 TROUBLESHOOTING
4.2 USAGE TIPS
5.1 FAQ
5.2 ABOUT DATA PROTECTION
Thank you for purchasing the OWC Mercury Elite Pro Dual!
We’re confident that it will provide years of high performance
service for your storage and backup needs. This manual contains
information on how to install the drives of your choice into the
enclosure, set the desired RAID level (quad interface models only),
format and connect your new storage solution to your computer.
Should you require additional support after reading this manual
along with helpful tips and FAQs, please see the inside back page
for OWC customer support options.


