5
4
1.0
Quick Start Guide
Congratulations! You are now the proud owner of a Swift Enduro Camera from Outdoor Cameras Australia. We want to
ensure you capture the exact images and videos you need, while also enjoying using your camera.
To help you do this, we offer the best support we can. If you are having any difficulties with your camera, or find
yourself struggling with the manual, please call us from 9am-5pm Monday to Friday. We are here to help! Our website
also features some great set-up videos that are very easy to follow.
The first few pages of this manual give you a Quick Start Guide as an introduction to the Swift Enduro. However, for
more detailed and important camera instructions, please see Part 3.
1.1 What’s in the Box
•
Camera
•
Instruction manual
•
USB cable
•
Mounting strap
•
Antenna (3G Model Only)
1.2 Let’s Get Started
Your camera will be good to go in just three simple steps:
a. Insert the batteries
Open the camera housing (with the latch on the right hand side) and insert the batteries in accordance with the
+ and - marked in the battery case.
Note: 12AA alkaline, rechargeable Ni-MH, or lithium batteries are recommended. For better performance, please
select the correct battery type you are using in the “Battery Type” section (you can do this later)
b. Insert the SD card
Note: SD cards sized from 8-32GB are recommended. Do not use cards that are larger or smaller than this (they
may work for a small number of images but then stop and deplete the camera of battery life quite quickly). Please
insert the SD card in the same direction/position as marked on the camera above the SD card slot. It will go in
smoothly and easily and click into position. If it is not going in easily, do not force it as the SD card slot can be
permanently damaged if the card is forced inside. Try turning the card around.
c. Mount the Antenna & Insert SIM card (for 3G Model Only)
When you attach the antenna screw it on firmly but be careful not to over tighten it.
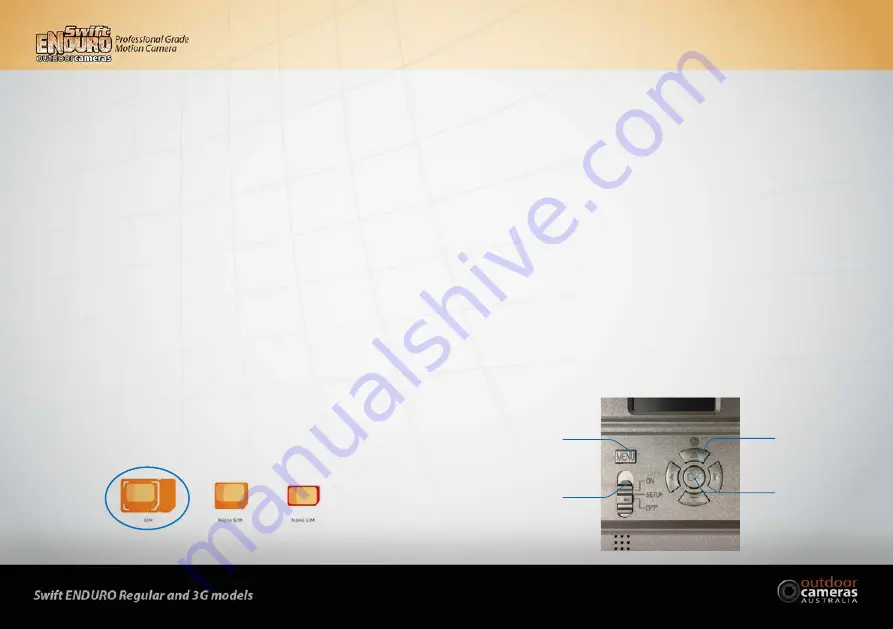
The SIM card must be the standard SIM size. These are the largest of the 3 SIM cards. Be careful not to insert sim
cards that are too small (they can fall into the SIM slot and then be irretrievable). Insert the SIM into the slot in
the same direction as directed on the camera above the slot. It will click into place. Ensure you have activated your
SIM card and that it has credit on it.
1.3 How to Setup the Enduro
Now it’s time to configure your Swift Enduro camera for your unique situation.
1. Power on the Camera
Switch the Power switch to
ON
; The camera is now functional and ready to work upon movement (the screen will
not light up upon “ON”). You will not hear or see it activating and taking images. You can mount it to start taking
images now but it will be in default settings. Please refer to page3 below for default settings in red letters. The
following steps will take you through changing the settings to your preferences.
2. Configure Camera Settings
Switch the Power switch to
SETUP
. The screen will light up with the Enduro logo briefly and then you will be able
to see what the camera can see. Press the
MENU
button. You will enter the menu to view & change settings. Press
the arrow buttons (located around the OK button) for navigation and
OK
button to confirm settings.
Note: Switch the camera to
ON
to enable the camera to activate after you have changed your preferred settings.
The screen will turn off and the light on the front of the camera will flash for a few seconds. The camera is now
active (even though it may seem like nothing is happening).
SIM is the correct sized SIM card.
Menu
Button
Arrow
Button
OK
Button
Power
Switch


