11
1
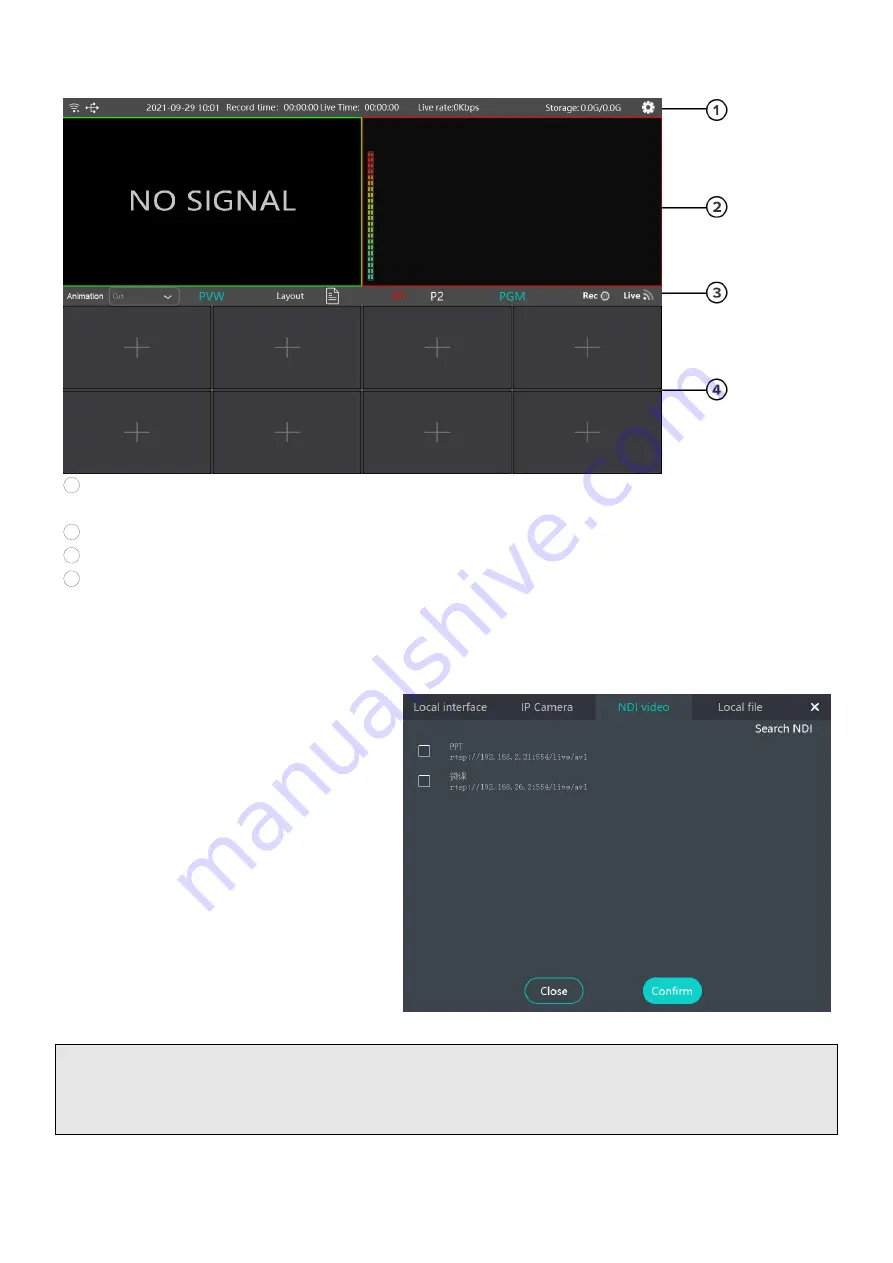
Status Display - Network status, USB Drive connecting status, time, recording status, stream bit rate,
USB drive capacity, setting
2
Preview and program display
3
Status Display - Drop list for transition effects, PIP layout, Recording status, network status
4
Input channels
Connecting NDI|HX Sources
First of all, you need a network switch to connect multiple NDI|HX sources like cameras or NDI encoders.
Connect all your NDI|HX sources to the
LAN port of network switch using
Ethernet cable
Connect the network switch to LAN port
at the rear of Geek N8 using Ethernet
cable
Press or click the [+] of input channel
section on multi-view to see a list of
available sources. If N8 doesn’t detect
NDI sources automatically you can click
search [NDI Video] on the upper right
corner. NDI|HX sources are grouped
under [NDI Video]heading, click the
check box to assign NDI signal.
Tips:
If your cameras are not NDI|HX or NDI licensed, you can connect an NDI|HX encoder in between the camera
and network switch for controlling. (it might have compatibility issues sometimes)


