manualshive.com logo in svg
background image

English-5

CHOPPING ATTACHMENT

THE CHOPPING BLADES HAVE VERY SHARP EDGES. TAKE CARE WHEN 

HANDLING OR CLEANING THEM.
NEVER PLACE THE CHOPPING BLADE ASSEMBLY ON THE MOTOR BODY 

BY ITSELF.
DO NOT OPERATE USING THE CHOPPING ATTACHMENT CONTINUOUSLY 

FOR MORE THAN 30 SECONDS (20 SECONDS ON HARD FOOD) WITHOUT 

GIVING IT A REST PERIOD OF ONE MINUTE. THE CHOPPING ATTACHMENT 

IS NOT SUITABLE FOR PROCESSING HOT FOOD.

Position the chopping bowl on a dry flat surface close to the mains supply socket.

1.  Place the chopping blade into the chopping bowl.

2.  Add the ingredients to the chopping bowl.

3.  Fit the chopping bowl lid to the chopping bowl.

4.  Twist the lid to lock it to the chopping bowl. Ensure that the lid is correctly 

assembled and securely locked in position.

5.  Squeeze and hold the two buttons on the side of the motor together.

6.  Line up the two cut outs (one on each side) on the chopping bowl lid and push 

the motor unit and bowl lid together. Release the two buttons. Ensure that they 

are correctly assembled and securely locked in position.

7.  Press the ON button 

“I”

. You can adjust the speed of your stick mixer using 

the variable speed control. Use the TURBO button when processing tougher 

ingredients. Your stick mixer will operate until the button is released.

WHISKING ATTACHMENT

DO NOT OPERATE USING THE WHISKING ATTACHMENT CONTINUOUSLY FOR 

MORE THAN 2 MINUTES WITHOUT GIVING IT A REST PERIOD OF  

ONE MINUTE.

Use the whisking attachment for beating eggs, mixing batter, ready-mix desserts, etc. 

The stainless steel whisk can be removed from the whisk collar for cleaning. Assuming 

the whisk has been removed from the whisk collar, assemble the whisking attachment 

as follows:

1.  Squeeze and hold the two buttons on the side of the motor together. Line up the 

two cut outs (one on each side) of the whisk collar with the buttons q. Release 

the two buttons. Ensure that the motor unit and the whisk collar are correctly 

assembled and securely locked in position.

2.  Push the whisk into the whisk collar until it clicks into place w.

3. 

Holding the unit firmly in your hand, press the ON button 

“I”

. You can adjust the 

whisking speed using the variable speed control. Guide the whisk through the food, 

moving it from side to side.

Содержание FPSTHB5103B

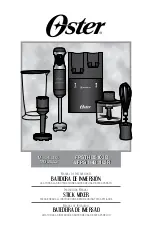
Страница 1: ...INSTRUCCIONES ANTES DE USAR ESTE APARATO Instruction Manual STICK MIXER PLEASE READ ALL INSTRUCTIONS BEFORE USING THIS APPLIANCE Manual de Instru es BATEDEIRA DE IMERS O LEIA TODAS AS INSTRU ES ANTES...

Страница 2: ...y o gases inflamables 10 Esta batidora de inmersi n NO debe ser utilizada cerca de agua como por ejemplo una ba era lavamanos piscinas etc donde exista el peligro de inmersi n o salpicaduras 11 Ap gu...

Страница 3: ...un temporizador externo ni un sistema de control remoto 26 Este artefacto ha sido dise ado para uso dom stico o para aplicaciones similares tales como reas de cocina del personal de tiendas oficinas y...

Страница 4: ...idor 6 Tapa del picador 7 Cuchilla del picador 8 Recipiente para picar 9 Tapa del vaso para batir medir 10 Vaso para batir medir 11 Mango del accesorio para batir claras 12 Accesorio para batir claras...

Страница 5: ...ANTE M S DE 60 SEGUNDOS SIN HACER PAUSAS DE UN MINUTO 1 Apriete y mantenga presionados simult neamente los dos botones situados a los lados de la unidad del motor 2 Alinee las dos muescas del eje bati...

Страница 6: ...se el bot n de encendido I Puede ajustar la velocidad de la batidora empleando el control de velocidad variable Utilice el bot n TURBO al procesar ingredientes duros La batidora seguir funcionando has...

Страница 7: ...redientes y pulse el Bot n de Velocidad Baja ajuste el Dial de Control de Velocidad en la parte superior de la Carcasa del Motor para una velocidad precisa Mezcle 100 g de papas cocidas cortadas en 4...

Страница 8: ...os pur s de frutas pueden prepararse f cilmente empleando la batidora y el vaso Utilice el picador para cortar cebollas de forma r pida sencilla y sin l grimas Tambi n puede picar y batir hierbas fres...

Страница 9: ...esponja con agua jabonosa caliente PRECAUCI N Las cuchillas son filosas Tenga extremo cuidado cuando las lave Aseg rese de que todas las piezas est n completamente secas antes de usar la batidora nuev...

Страница 10: ...outlet while not in use before putting on or taking off parts and before cleaning Remove by grasping the plug DO NOT pull on the cord 12 Avoid contact with moving parts Keep hands hair clothing as wel...

Страница 11: ...ents THIS PRODUCT IS FOR HOUSEHOLD USE ONLY SAVE THESE INSTRUCTIONS SHORT POWER SUPPLY CORD INSTRUCTIONS A short power supply cord is provided to reduce the risk resulting from becoming entangled in o...

Страница 12: ...TURBO Button 4 Motor Housing 5 Stick Mixer 6 Chopper Attachment Lid 7 Chopping Attachment Blade 8 Chopping Bowl 9 Blending Measuring Cup Lid 10 Blending Measuring Cup 11 Whisk Attachment Collar 12 Whi...

Страница 13: ...IT A REST PERIOD OF ONE MINUTE 1 Squeeze and hold the two buttons on the side of the motor together 2 Line up the two cut outs one on each side of the blending shaft with the buttons Release the two b...

Страница 14: ...and securely locked in position 7 Press the ON button I You can adjust the speed of your stick mixer using the variable speed control Use the TURBO button when processing tougher ingredients Your sti...

Страница 15: ...placed the ingredients and push the Low Speed Button adjust the Speed Control Dial on top of the Motor Housing for precise speed 5 Blend 100g cooked potato cut into 4 pieces for 1 minute 6 When desir...

Страница 16: ...be made easily using the blender attachment Use your chopping attachment to chop onions quickly and easily without the tears You can also chop and blend fresh herbs and spices to create tasty sauces a...

Страница 17: ...nd with mild soap and water Wash lid by hand using warm soapy water with a cloth or sponge CAUTION Blades are sharp Handle carefully Make sure all parts are completely dry before attempting to use aga...

Страница 18: ...presen a de explosivos ou gases inflam veis 11 Esta batedeira de imers o N O deve ser usada perto da gua tal como uma banheira pia piscina etc onde exista o perigo de imers o 12 Desligue e tire da tom...

Страница 19: ...senvolvido para o uso dom stico ou em aplica es semelhantes tais como reas de cozinha de funcion rios de lojas escrit rios e outros ambientes de trabalho clientes de hot is mot is e outros ambientes d...

Страница 20: ...Eixo batedor de a o inoxid vel 6 Tampa do acess rio para picar 7 L mina do acess rio para picar 8 Recipiente para picar 9 Tampa do copo para bater medir 10 Copo para bater medir 11 Base do acess rio...

Страница 21: ...A DE UM MINUTO 1 Aperte e mantenha apertados os dois bot es na lateral do motor 2 Alinhe as ranhuras do acess rio da batedeira um em cada lado com os bot es Solte os dois bot es Certifique se de que a...

Страница 22: ...elocidade pode ser ajustada utilizando o controle de velocidade vari vel Utilize o bot o da fun o TURBO quando processar ingredientes mais duro O aparelho funcionar at que o bot o seja solto Para melh...

Страница 23: ...no recipiente e pressione o bot o da velocidade baixa ajuste o controle da velocidade que fica o topo do aparelho para selecionar a velocidade ideal 5 Esprema 100 g de batata cortadas em 4 peda os po...

Страница 24: ...os Prepare batidas espessas e cremosas ou pur s de fruta usando o copo e a batedeira Utilize o acess rio para picar para cortar f cil e rapidamente cebolas sem l grimas Corte e misture tamb m ervas fr...

Страница 25: ...m ser lavados a m o com um detergente suave e gua Lave a tampa a m o usando um pano ou esponja com gua quente ensaboada CUIDADO As l minas s o afiadas Tome muito cuidado ao lavar Certifique se de que...

Страница 26: ...n mero entre 0 e 9 ou qualquer letra entre A e Z FPSTHB5103B XXX FPSTHB5103R XXX 2016 Sunbeam Products Inc Todos los derechos reservados Distribuido por Sunbeam Latin America LLC 5200 Blue Lagoon Driv...

Отзывы: