


70
3) Upload the sketch to Arduino. Finally, click the Serial monitor window in
upper right corner of Arduino IDE, you will see following result:
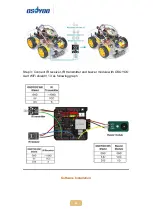
4) In this mode, your will see an IP address which is our LAN IP address
assigned by my router. Please write down this IP address and click Setting to
set up robot IP address and set this IP address to your APP Setting section
(no need change default port 80 in APP).
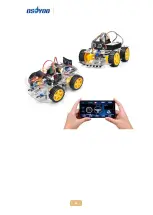
Now your Robot car is connected to your LAN, you can use Mobile phone
under same LAN to control the robot car. If your APP is in WAN, you need to
go to your Router Control Panel, forward Port 80 to Robot car LAN IP
address, then you can use Router IP to control the car. This feature makes
our robot car A REAL INTERNET OF THING device
B) AP mode
Sometimes we do not have a LAN or Wifi Router. In order to control the car,
we need to use AP mode.
When working in AP mode, our robot car itself will become a Wifi Hot Spot.
Содержание V2.1
Страница 28: ...27 ...
Страница 39: ...38 Step 4 Fix the screws on copper pillars to connect upper chassis to lower chassis ...
Страница 41: ...40 Step 4 Choose corresponding board port for your project upload the sketch to the board ...
Страница 58: ...57 Step 4 Choose corresponding board port for your project upload the sketch to the board ...
Страница 60: ...59 as per link Ultrasonic sensor servo initial direction alignment ...
Страница 73: ...72 Note F1 F6 are further development functions in the future ...
Страница 81: ...80 ...
Страница 86: ...85 ...