MECHANICAL INSTALLATION
Ventilators
MODEL
ODD-ERV-80 | ODD-ERV-120
Instruction Manual
1-888-543-6473
1-888-541-6474
13376 Comber Way
Surrey BC V3W 5V9
[email protected]
www.ortechindustries.com
375 Admiral Blvd
Missis
s
auga
,
ON L5T 2N1
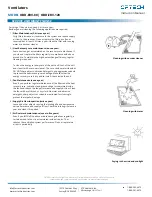
When moving the unit during or after unpacking, make sure to lift it by holding its hanger brackets.
DO NOT exert any pressure on other parts, especially duct connecting collars.
Please purchase the installation accessories before starting installation.
Selecting Installation Site
Select an installation site where the following conditions are fulfilled
and that meet with your customer's approval.
•
Install in a place which has sufficient strength
and stability
(Beams, ceiling and other locations capable of
fully supporting
the weight of the unit)
.
Insufficient strength is dangerous. It may also
cause vibration and unusual operating noise
•
Where nothing blocks air passage
•
Where sufficient clearance for maintenance
and service can be ensured
Precaution
•
Install the unit, power supply wiring and
transmission wiring at least 40" away from
televisions or radios in order to prevent image
interference or noise (Depending on the radio
waves, a distance of 40" may not be sufficient
enough to eliminate the electric noise)
•
The bellows may not be used in some districts, so
exercise caution (Contact your local government
office or fire department for details)
•
Use suspension bolts for installation. Check
whether the ceiling is strong enough to support the
weight of the unit or not. If there is a risk, reinforce
the ceiling before installing the unit
Preparations Before Installation
The units are designed for ceiling mounting.
While installing the unit, ensure convenient
access for subsequent maintenance and repair.
Keep the recommended minimum distances to
the walls for all mounting variants as shown in
Fig.2 on the right
Fig.2
MECHANICAL INSTALLATION
(CEILING MOUNT)
The fasteners are not included in the delivery set and must
be purchased separately. While selecting appropriate
fasteners, consider the material of the mounting surface as
well as the weight of the unit, refer to the technical data.
Fasteners selection and unit mounting should be done by
service technicians.
To mount the unit to the ceiling, use belts rigidly fixed to a
horizontal surface or threaded rods and expansion anchors.
The belt, threaded rods and expansion anchors are not
included in the delivery set.
To attain the best performance of the unit and to minimize
turbulence-induced air pressure losses while mounting
connect a straight air duct section on both sides of the unit.
Minimum straight air duct length:
•
Equal to 1 air duct diameter on intake side
•
Equal to 3 air duct diameters on outlet side
If the air ducts are not connected or the connected air ducts are too
short, protect the unit parts from ingress of foreign objects by
covering the spigots with a protecting grille or other protecting
device with mesh width not more than 1/2" to prevent
uncontrollable access to the fans. Prior to commissioning of the unit,
make sure it contains no object.
Fig.3


