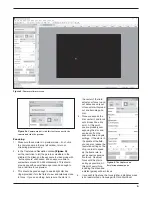


Figure 10.
A 120 second dark frame. Note the amp glow on the
upper right side, this is standard for the ICX294 chip, and is removed
from light images during dark frame subtraction.
9
Vignetting
Vignetting in a telescope reveals edge-darkening in the astro-
image. Vignetting is more apparent when the telescope’s illu-
minated field is not large enough to illuminate the full area of
the chip. As a result, more light is detected in the center of the
image compared to the edge.
Dust and Particles
Dust and particles will inevitably show up in your raw astro-
images. Large particles on the camera optical window some-
times look like unfocused circles or doughnuts in your images.
It’s too late to clean your camera if you are already imaging in
the field at night. And even when the camera is clean, dust usu-
ally finds a way to show up in your images.
Telescope Artifacts
Very large particles or other artifacts in your telescope can
affect your astro-images. Insufficient telescope baffling or poor
collimation can also cause unsymmetrical field illumination in
your images.
To take a flat field image:
1. Ensure that the telescope is focused and ready for astro-
imaging.
2. Point the telescope at a uniform and featureless light
source, like the sky at dusk or dawn, or a blank white
sheet of paper. Make sure the camera orientation
is exactly the same as it is or was for astro-imaging
(Although the telescope is pointing at a featureless
surface, the focus and orientation must be set as it
normally would be for astro-images.)
3. Set the Frame Type in your imaging control program to
Flat Field for correct meta data flagging in the fits header.
4. Set the exposure to result in a histogram which has a
hump at around 1/3 to 1/2 of full exposure.
Import your Darks and Flats into the programs mentioned above
for full image calibration of your astro-photos.
Image Processing
It’s not uncommon to use 3-4 programs to tweak the astro-
images you’ve taken to get the best possible final result. Please
delve into the manuals for the other programs listed above,
along with output for Photoshop, Lightroom, or other standard
image processing programs. The images taken for this manual
and on telescope.com were all taken using a combination of
StarShoot Image Capture, SharpCap, DeepSkyStacker, and
PhotoShop.
Color Conversion
It was mentioned previously to save the images in the RAW
.fit format, for later processing in 3rd party software. RAW is
a “black and white” format with a “screen door effect” laid over
the image. This screen door is the Bayer Matrix, and contains
the color data. When you convert the RAW format to a color
format, the screen effect disappears and you’re left with a full
color image. The preview window in StarShoot Image Capture
shows a color image, but if you set the saved file type to RAW,
you will save an unconverted black and white image in the .fit
format.
To convert to color, see the instructions included with the 3rd
party software packages, but you’ll have to also determine the X
and Y offset, in order to reproduce correct colors. This is differ-
ent in each software program and usually requires experiment-
ing in order to correctly convert. Color balance may also have
to be adjusted to correctly display the image from a chip that is
most sensitive in Green, and less sensitive in blue. For exam-
ple, in DeepSkyStacker, we found the best setting was “generic
RGGB” for the Bayer matrix filter, and “Bi-linear Interpolation”.
After that, color balance could be used to rebalance the back-
ground levels to a neutral color.
ASCOM Driver
The ASCOM driver allows the G10 to be used with any of the
programs listed above, along with any others that support
ASCOM cameras. Please download the ASCOM platform from
ascom-standards.org and make sure to install the G10 ASCOM
driver from Orion’s website. When in 3rd party camera con-
trol programs, the G10 gain settings can be controlled in the
ASCOM setting window for the camera. Open the ASCOM cam-
era settings, adjust the gain, and experiment with exposures as
detailed above. Remember, low gain results in low noise but
a longer exposure. High gain boosts the chips sensitivity so
the result is a more sensitive camera in a given exposure, at
the cost of higher noise. Since stacking reduces noise, it can
be beneficial to have a bit more noise in the image, if it helps
keep the exposure times down. One last thing to note, some
programs may use a percentage for gain, others may use the
actual gain numbers. If the gain range is 0-100, it’s using a
percentage of total gain.
Содержание StarShoot G10 Color
Страница 11: ...11...


