16
17
imager, you may choose to skip this
step for the time being.
Vignetting
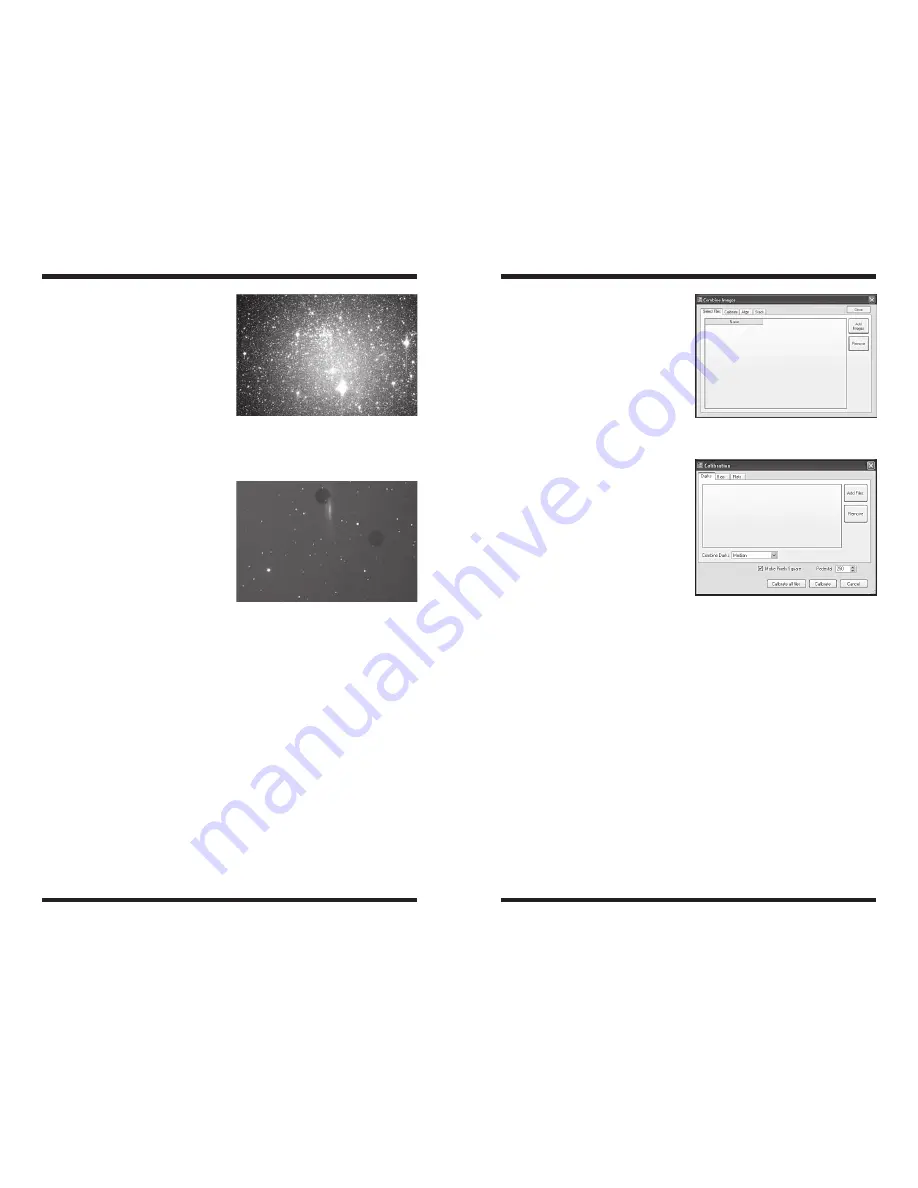
Vignetting (Figure 15.1) in a
telescope reveals edge-darkening in
the astroimage. The sensitive CCD
chip can easily detect vignetting
through a telescope, even specialized
astrographs. Vignetting is more
apparent when the telescope’s
illuminated field is not large enough
to illuminate the full area of the CCD
chip. As a result, more light is detected
in the center of the image compared to
the edge. In general, vignetting should
not be a problem on the ½" format
CCD inside the G3.
Dust and Particles
Dust and particles (Figure 15.2)
will inevitably show up in your raw
astroimages. Large particles on the
CCD optical window sometimes look
like unfocused circles or doughnuts in
your images. It’s too late to clean your
camera if you are already imaging in
the field at night. And even when the
camera is clean, dust usually finds a
way to show up in your images.
To take a flat field image:
1. Ensure that the telescope is focused and ready for astro-imaging.
2. Point the telescope at a uniform and featureless light source, like the sky
at dusk or dawn, or a blank white sheet of paper. Make sure the camera
orientation is exactly the same as it is or was for astro-imaging (Although
the telescope is pointing at a featureless surface, the focus and orientation
must be set as it normally would be for astro-images.)
3. Set the
Exposure Type to Flat in the Capture tab. Or if you are taking a
sequence of images, set the
Type in the Sequence window to Flat, this will
also assign a “F” suffix to your saved file name so you can easily identify
your flats later.
4. Set the
Exposure value to 0.1 seconds for now and click Start or Run
Sequence. Looking at the Global section of the Analysis window, you want
the
Maximum to read somewhere
around 10,000-15,000. Adjust the
exposure time as needed until the
Maximum is close to this range.
It’s a good idea to take several flat
frames and try different exposure
times until you find the correct
exposure. If you are taking your
flats near dusk or dawn, the sky
brightness will change rapidly.
5. Image
Processing
After you have captured your astro-
images (with or without dark frames),
you will need to:
1. Calibrate Raws
2. Convert to Color (only applicable
to StarShoot G3 Color)
3. Align
4. Combine
If you are using the StarShoot G3
Monochrome, all of these steps can
be performed in the
Combine Images
window (Figure 16). For StarShoot
G3 Color users, the calibration and color conversion should be done separately
before proceeding to align and stack.
Calibrate Raws
1. Open your saved astro-images. They should be saved as
Raw to enable the
following steps. Do not convert your raws to color yet.
2. Go to the
Process menu and select Calibrate. The Calibration window will
appear (Figure 17).
3. Click
Add Files and select your saved dark frames and flat fields if
applicable.
4. Click
Calibrate all files, and you will notice most of the hot pixels and noise
should disappear from your images.
Figure 16.
The Combine Images window
allows StarShoot G3 Monochrome users to
calibrate, align, all in a streamlined task.
Figure 17.
The Calibration window
lets you select your darks and flats (if
applicable). Bias frames are not typically
needed if you have dark frames.
Figure 15.1.
Larger format CCD cameras
like the Parsec reveal vignetting through
most telescopes. Vignetting occurs when
the edge of the image plane has less
illumination than the center.
Figure 15.2.
Dust or other particles on
the camera’s optical window can show up
as distracting dark shapes in your images.


