18
4. Click
Calibrate all files, and you
will notice most of the hot pixels
and noise should disappear from
your images.
Convert to Color (For the StarShoot
G4 Color only)
1. With your calibrated images still
open, goto the
Process menu
and select
Color, then CMYG
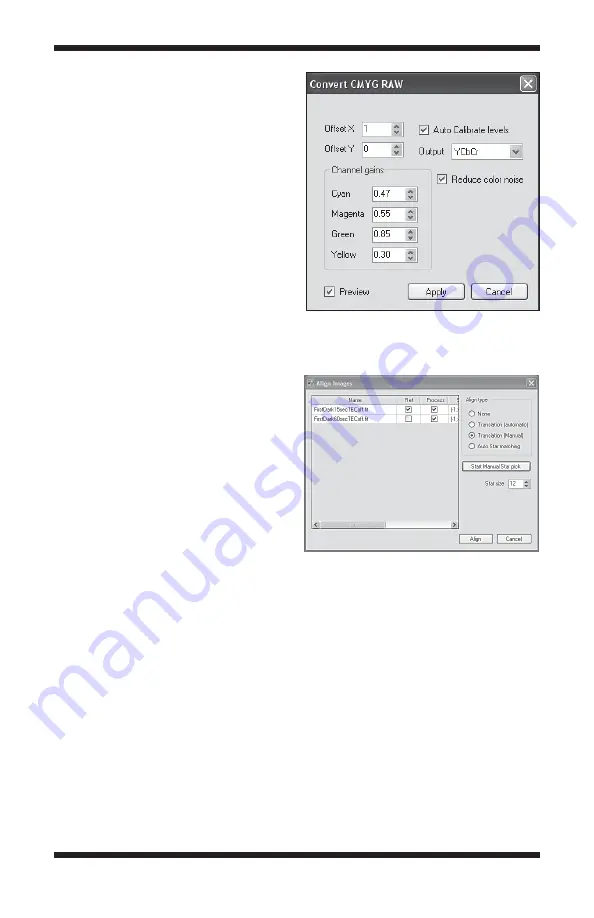
Raw conversion. We recommend
using the default values (
Figure
18), but you may adjust them to
your liking.
2. Click apply to complete the
color conversion. Repeat color
conversion for all open files. Color
conversion can alternatively be
done after combining images
by using the “Convert to color”
checkbox.
Note: All files must be in same color
format in order to align and combine.
Note: If using RAW files within
other processing software such
as MaximDL select convert
color‑>Generic CMYG to convert the
RAW file to color.
Align
1. With your images still open, goto
the
Process menu and select
Align. The Align Images window
will appear.
2. Select
Auto Star matching and click Align. The images should
automatically align. If they do not appear to align correctly when they are
combined later, you can manually align the images by selecting
Translation
(Manual) and select a star in each image to align to by clicking Start
Manual Star Pick (Figure 19).
Combine
1. With your images still open, goto the
Process menu and select Combine.
The
Combine Images window will appear (Figure 16).
2. Since you have already calibrated and aligned your images, proceed to the
Stack tab. Remember that if you are using the StarShoot G4 Monochrome,
Figure 19.
Manual Star Pick can be used
if you have difficulty aligning your images
with the automatic methods.
Figure 18.
For G4 Color users: Convert
CMYG Raw is the best way to convert raw
images to color.


