Oregon Scientific DS 9541 Скачать руководство пользователя страница 16


Connaître votre appareil photo .............................................................................. 1 

Fonctions ........................................................................................................ 1 
Caractéristiques ............................................................................................. 1 
Conditions d'exploitation................................................................................. 2 

Pièces fonctionnelles ............................................................................................. 2 
Détails des paramètres de l’appareil photo ........................................................... 4 

SET-Capture................................................................................................... 4 
SET-Paramètres ............................................................................................. 5 

Explication des icônes de statut ............................................................................ 6 
Utilisation de l’appareil photo................................................................................. 7 

Installation des piles....................................................................................... 7 
Insertion de la carte mémoire ........................................................................ 8 
Formatage de la carte mémoire ou carte SD ................................................. 8 
Paramétrer la résolution................................................................................. 8 
Prendre des photos........................................................................................ 8 
Zoom avant et arrière..................................................................................... 9 
Prendre des photos à l'aide de la fonction de déclenchement retardé .......... 9 
Enregistrement de clips vidéos .................................................................... 10 
Lecture des photos  ..................................................................................... 10 
Lecture de clips vidéo .................................................................................. 10 
Enregistrement vocale ................................................................................. 10 
Supprimer les photographies et les clips vidéo............................................ 10 

Installer les pilotes de l'appareil photo................................................................. 11 

Désinstaller les anciens pilotes et dispositifs ............................................... 11 
Installation des pilotes pour 

Windows XP/ Windows Vista............................12


Connectez l'appareil..................................................................................... 12 

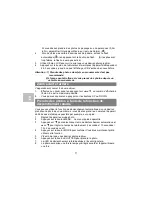
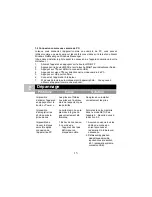
Dépannage .......................................................................................................... 13 
 

5.0 Mega Pixels Digital Camera (DS9541) 

Guide De Demarrage Rapide


Table des matières 

FR


Содержание DS 9541

Страница 1: ...Model DS 9541 Quick Start Guide Guide De Demarrage Rapide Gu a De Inicio R pid...

Страница 2: ...card 7 Setting the resolution 7 Taking photographs 8 Zoom in and out 8 Taking photographs using self timer function 8 Recording video clips 9 Playback photographs 9 Playback video clips 9 Recording v...

Страница 3: ...els 4032x3024 Hardware Interpolation 8 0 Mega pixels 3264x2448 Hardware Interpolation 5 0 Mega pixels 2560x1920 3 1 Mega pixels 2048x1536 1 3 Mega pixels 1280x960 Image resolution 300K pixels 640x480...

Страница 4: ...WAV Self timer 2 10 10 2 seconds PC interface USB 1 1 TV out NTSC PAL Power source 2xAAA alkaline batteries Rechargeable battery is not recommended Windows XP Vista or above Operating System Mac 9 x...

Страница 5: ...Dirt and fingerprints will affect the quality of the picture 10 LCD screen Display photographs video clips camera setting and menu 11 Busy LED When the indicator is lit the camera is busy 12 Left dis...

Страница 6: ...ance Fluorescent White balance selected for fluorescent surrounding ISO Auto Default 100 200 Sensitivity select Color Standard Default Vivid Sepia Monochrome Color setting Saturation Normal Default Hi...

Страница 7: ...5 min if no operation Sys Reset Execute cancel Restore default setting 50Hz Main European electricity frequency Light Frequency Flicker 60Hz Main American electricity frequency NTSC American and Japan...

Страница 8: ...of balance picture can be taken Video mode Balance of recording time in second Playback mode The No of pictures or video clips 6 Selected Resolution 12M 4032 x 3024 8M 3264 x 2448 5M 2560 x 1920 3 1M...

Страница 9: ...direction to insert the SD memory card into the slot Do not force the card into the slot or else it may damage both the camera and the SD memory card Note The SD memory card must be formatted before...

Страница 10: ...6 Press Shutter button and hold the camera steadily for 2 to 3 sec until the LCD display turn on again Caution 1 Taking picture for fast moving object is not recommended 2 Image may be distorted when...

Страница 11: ...ress OK and then press or to shift the image 4 Press MENU to select SLIDE SHOW and then press OK to confirm The pictures saved in your camera or your SD card will be displayed in sequence automaticall...

Страница 12: ...when starting Windows and then select Safe Mode from the menu which will be displayed 2 Click on Start Settings Control Panel and double click on Add Remove Programs icon 3 Find all the programs for...

Страница 13: ...press RIGHT key to select the Setup setting 3 Press button to set USB connection 4 Press or button to choose the Disk Drive mode 5 Press OK to confirm 6 Connect the camera to the computer 7 Windows w...

Страница 14: ...1 Make sure all cable connections are secured and restart the computer if necessary 2 Set the camera to removable disk mode refer to section 6 3 1 system setting USB connection Flash does not work Ba...

Страница 15: ...set to PC cam mode properly 1 Remove any other camera driver completely from your system Sometimes you have to re install your system 2 Set the camera to PC cam mode refer to section 6 3 2 system sett...

Страница 16: ...trer la r solution 8 Prendre des photos 8 Zoom avant et arri re 9 Prendre des photos l aide de la fonction de d clenchement retard 9 Enregistrement de clips vid os 10 Lecture des photos 10 Lecture de...

Страница 17: ...olation mat rielle 8 0 M ga pixels 3264x2448 Interpolation mat rielle 5 0 M ga pixels 2560x1920 3 1 M ga pixels 2048x1536 1 3 M ga pixels 1280x960 R solution de l image 300K pixels 640x480 Objectif F...

Страница 18: ...PEG Vid o AVI Voix WAV D clencheur retardement 2 10 10 2 secondes Interface PC USB 1 1 Sortie TV NTSC PAL Source d alimentation 2 piles alcalines AAA les piles rechargeables ne sont pas Windows XP Vis...

Страница 19: ...e cette connexion vous pouvez t l charger des photos et des vid os sur un ordinateur 8 Port AV Pour connecter l appareil une t l vision 9 Objectif Enregistre l image prendre Remarque Veillez ce que l...

Страница 20: ...tion Auto par d faut Balance des blancs automatique Lumi re du jour Balance des blancs s lectionn e pour les sc nes en lumi re de jour Nuageux Balance des blancs s lectionn e pour les sc nes en condit...

Страница 21: ...es Anglais par d faut chinois traditionnel chinois simplifi Fran ais allemand itali en espagnol portugais S lectionnez la langue d affichage Auto power off 1 2 5 min et off Arr t automatique en 1 2 pa...

Страница 22: ...tos R glage pour l enregistrement de vid o 3 Estampille temporelle Affiche la date jour mois ann e 4 Indicateur de la carte m moire ou carte SD Indique la carte m moire ou la carte SD Images enregistr...

Страница 23: ...Aucun flash Le flash est d sactiv 8 Qualit de l image La qualit est bonne par d faut La qualit est standard La qualit est conomique 9 Alerte de luminosit Une alerte pr vient l utilisateur pour qu il t...

Страница 24: ...onner en utilisant la touche Up et Down 4 Appuyez sur Ok pour formater la carte m moire Vous pouvez param trer la cam ra sur diff rentes r solutions 1 Appuyez sur MENU pour param trer la r solution d...

Страница 25: ...hera l cran 8 x est le maximum possible 2 Vous pouvez zoomer en appuyant sur les boutons UP ou DOWN Vous pouvez utiliser la fonction de d clenchement automatique si vous d sirez prendre une photo de v...

Страница 26: ...W DIAPORAMA puis appuyez sur OK pour confirmer Les images enregistr es dans votre cam ra ou votre carte SD seront automatiquement affich es en s quence 1 Lorsque les clips sont affich s appuyez sur OK...

Страница 27: ...me un cam ra de PC uniquement T l chargement de photos les vid os n ont pas besoin de pilotes Il peut y avoir un conflit entre les nouveaux pilotes et les pilotes existants sur l ordinateur Dans ce ca...

Страница 28: ...logiciel 2 L assistant d installation du logiciel appara tra 3 S lectionnez la langue que vous d sirez utiliser pour l installation 4 Cliquez sur Installez les pilotes pour commencer l installation d...

Страница 29: ...s pouvez utiliser cet appareil comme une web cam Impossible d allumer l appareil en appuyant sur le bouton Power Les piles sont faibles Les piles sont ins r es mais ne respectent pas les polarit s Rem...

Страница 30: ...ez un bip 2 Nettoyez l objectif avec un tissu doux et sec Vous obtenez un message d avertissement L appareil de prise de vue n a pas t d tect lors de l ouverture de la cam ra de PC 1 Conflit avec un a...

Страница 31: ...a resoluci n 8 C mo tomar fotograf as 8 Acercar y alejar el zoom 9 C mo sacar fotograf as con la funci n de auto temporizador 9 Grabaci n de v deos 10 Reproducci n de fotograf as 10 Reproducci n de v...

Страница 32: ...4 Interpolaci n de hardware 8 0 Megap xeles 3264x2448 Interpolaci n de hardware 5 0 Megap xeles 2560x1920 3 1 Megap xeles 2048x1536 1 3 Megap xeles 1280x960 Resoluci n de la imagen 300K p xeles 640x48...

Страница 33: ...de hasta 2GB Formato del archivo Imagen JPEG V deo AVI Voz WAV Auto temporizador 2 10 10 2 segundos Interfaz de PC USB 1 1 Salida de TV NTSC PAL Fuente de alimentaci n 2 pilas alcalinas AAA No se reco...

Страница 34: ...argar fotograf as y v deos a un ordenador 8 Puerto AV Para conectar a una televisi n 9 Lente Graba la imagen que se va a fotografiar Nota Mantenga la lente limpia La suciedad y las marcas de dedos afe...

Страница 35: ...na Auto Predeterminado Deporte Noche Retrato Paisaje Contraluz Escena fijada Valor de exposici n 2 5 3 4 3 2 3 1 3 1 0 Predeterminado Nivel de exposici n Auto predeterminado Balance de blanco autom ti...

Страница 36: ...r hasta 3 fotograf as seguidas en 10 segundos Formato Ejecutar cancelar Formatear la tarjeta de memoria Idioma Ingl s Predeterminado Chino tradicional Chinosimplificado Franc s Alem n Italiano Espa ol...

Страница 37: ...mar fotograf as Configuraci n para grabar v deos 3 Indicaci n de fecha Muestra la fecha d a mes a o 4 Indicador de memoria o tarjeta SD Indica si se utiliza memoria o tarjeta SD Im genes almacenadas e...

Страница 38: ...lash Flash autom tico La c mara determina si se utilizar flash o no Flash desactivado El flash est desactivado 8 Calidad de imagen La calidad es n tida Predeterminado La calidad es est ndar La calidad...

Страница 39: ...te Configuraci n pulsando el bot n derecho 3 Elija con las teclas de desplazamiento hacia arriba o hacia abajo y pulse OK para confirmar 4 Pulse OK para formatear la tarjeta o la memoria La c mara pue...

Страница 40: ...el zoom pulsando el bot n o En la pantalla aparecer un n mero El zoom m ximo es 8 0 2 Puede acercar el zoom pulsando los botones ARRIBA o ABAJO Puede utilizar la funci n de auto temporizador si quiere...

Страница 41: ...APOSITIVAS y luego pulse OK para confirmar Las im genes que tenga almacenadas en la c mara o la tarjeta SD se mostrar n autom ticamente en una secuencia 1 Al mostrar v deos pulse OK para reproducir y...

Страница 42: ...web Descargar imagen v deo no requiere controladores Es posible que el nuevo controlador y el que tenga instalado en su ordenador entren en conflicto En tal caso es mejor borrar el viejo antes de inst...

Страница 43: ...are 2 Aparecer el instalador de software 3 Elija el idioma que quiera usar para la instalaci n 4 Haga clic en Instalar controlador para iniciar la instalaci n del controlador de la c mara 5 Siga las i...

Страница 44: ...pila est casi gastada La pila est mal colocada las polaridades no coinciden Reemplace la pila o inst lela correctamente Las fotograf as no se pueden guardar La tarjeta de memoria o la memoria interna...

Страница 45: ...ave seco Aparece un mensaje de aviso No se ha detectado dispositivo de captura al intentar abrir la c mara web 1 Hay un conflicto con otra c mara o dispositivo de v deo 2 El modo de la c mara no est c...

Отзывы: