background image

DS 61190 IN 


15 


9.


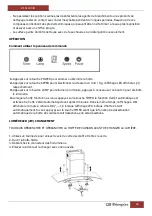
Open the aluminum filters and find 2 holes, mark on the wall. Remove the hood and drill 2 holes in last 
marks. Put the drywall anchors into the holes, place the cooker hood in its place and screw the 2 screws 
with their washer.


10.


Put the glass in the lead way, use four screws (4x25cm) with glass washer and rubber washer to fix the 
glass. The screws and the washers should be installed as shown.


11.


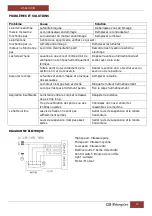
Place the inner tube into the outer tube and screw the platen section as below picture shows. Then 
place the tube on the cooker hood and adjust the inner tube to the height of U-shaped section and 
screw the tube to the platen section.


Vent inside 
 

If you do not have an outlet to the outside, the exhaust pipe is not required and the installation is similar to 
the one shown in the “INSTALLATION (VENT OUTSIDE)” section but you have to install carbon filter (not 
included) in the motor. To put the carbon filter, place on the side of motor and turn until fit it. 

Содержание 8436044536144

Страница 1: ...mejores resultados y la m xima seguridad de uso Read this manual carefully before running this appliance and save it for reference in order to obtain the best results and ensure safe use Veuillez lire...

Страница 2: ...sin supervisi n 2 Se deber supervisar a los ni os para asegurarse de que no juegan con este aparato 3 Mantenga el aparato y su cable fuera del alcance de los ni os menores de 8 a os 4 PRECAUCI N Para...

Страница 3: ...o de posibles heridas Solicite a un t cnico que realice el montaje Para asegurar un funcionamiento correcto la campana y el filtro deben limpiarse con regularidad No manipular el filtro con la campana...

Страница 4: ...anual de instrucciones 2 La instalaci n debe llevarla a cabo un instalador cualificado y competente 3 El fabricante declina toda responsabilidad por cualquier da o material o personal derivado del inc...

Страница 5: ...s agujeros de 8mm de di metro 4 Coloque los tacos de fijaci n en los agujeros y fije el gancho apretando los tres tornillos 5 Calcule la altura final de la pletina en forma de U haga dos agujeros de 8...

Страница 6: ...las se ales marcadas Coloque los tacos de fijaci n ponga la campana en su lugar y atornille los tornillos con su arandela 10 Coloque el cristal a trav s de la gu as y f jelo con los cuatro tornillos...

Страница 7: ...r cambiados cada 6 meses Para retirar los filtros simplemente tiene que girarlos y tirar de ellos Despu s coloque los nuevos Limpieza de la campana El acero inoxidable es uno de los materiales m s f c...

Страница 8: ...pantalla LED mostrar 1 2 3 respectivamente 3 Pulse el bot n LAMP para encender la luz p lselo de nuevo y la luz se apagar 4 Cuando la campana est funcionando si pulsa el bot n TIMER activar la funci...

Страница 9: ...pana se mueve El ventilador est da ado y causa vibraciones Cambie el ventilador El motor no est firmemente colgado Coloque bien el motor La campana no est firmemente colgada Ajuste firmemente la campa...

Страница 10: ...ductos para recordar al consumidor la obligaci n de separarlos para la recogida selectiva El consumidor debe contactar con la autoridad local o con el vendedor para informarse en relaci n a la correct...

Страница 11: ...ut supervision 2 Children should be supervised to ensure that they do not play with the appliance 3 Keep the appliance and the cable cord out of the reach of children less than 8 years old 4 WARNING I...

Страница 12: ...he cooker hood and its filter mesh should be clean regularly in order to keep in good working order Do not attempt to check the filters while the hood is in operation Do not obstruct the ventilation s...

Страница 13: ...lly before use 2 The installation work must be undertaken by a qualified and competent fitter 3 The manufacturer disclaims all liability for any damage or injury caused as a result of not following in...

Страница 14: ...screwing the 3 screws 5 Calculate the final height of the U shaped section drill 2 holes of 8mm of diameter ensure that it is placed in line with hook 6 Place the drywall anchors into the holes and fi...

Страница 15: ...uld be installed as shown 11 Place the inner tube into the outer tube and screw the platen section as below picture shows Then place the tube on the cooker hood and adjust the inner tube to the height...

Страница 16: ...needed Use a damp cloth with this water Then rinse it with damp cloth only with water To avoid water marks dry the cooker hood with a soft cloth For discolorations or deposits that persist use a non s...

Страница 17: ...ted and the cooker hood will turn off automatically after 9 minutes At the same time the LED display will show the countdown 9 8 7 1 0 when LED display shows 0 cooker hood will turn off automatically...

Страница 18: ...ith soap or Paint Shake of the body The leaf damage and causes shaking Replace the leaf The motor is not tightly hanged Lock the motor tightly The body is not tightly hanged Fixed the body tightly Ins...

Страница 19: ...ecycling of the materials they contain and reduce the impact on human health and the environment The crossed out wheeled bin symbol on the product reminds you of your obligation that when you dispose...

Страница 20: ...ffectu s par des enfants sans surveillance 2 Les enfants doivent tre surveill s afin de s assurer qu ils ne jouent pas avec cet appareil 3 Gardez l appareil et le c ble la port e des enfants de moins...

Страница 21: ...s 14 AVERTISSEMENT En cas de mauvaise utilisation de l appareil il y a un risque de blessure Veuillez demander un technicien de r aliser l assemblage La hotte et son filtre doivent tre nettoy s r guli...

Страница 22: ...ite La r glementation en mati re d vacuation d air doit tre respect e AVERTISSEMENT 1 Merci d avoir choisi notre hotte Veuillez lire attentivement ce mode d emploi avant toute utilisation 2 L installa...

Страница 23: ...sson pour un meilleur effet 3 Apr s avoir d termin la hauteur de la hotte placez le crochet au centre et marquez 3 trous Percer 3 trous de 8mm 4 Placez les ancrages dans les trous et fixez le crochet...

Страница 24: ...arques Placez les ancrages dans les trous placez la hotte sa place et vissez les 2 vis avec leur rondelle 10 Placez le verre en avance utilisez quatre vis 4x25cm avec rondelle en verre et rondelle en...

Страница 25: ...our les enlever vous devez les tourner et les tirer Apr s cela placez les nouveaux Nettoyage de la hotte L acier inoxydable est l un des mat riaux les plus faciles nettoyer Les soins occasionnels aide...

Страница 26: ...yez sur le bouton LAMP pour allumer le luminaire appuyez nouveau sur ce bouton pour teindre le luminaire 4 Lorsque la hotte fonctionne si vous appuyez sur la touche TIMER la fonction d arr t automatiq...

Страница 27: ...tirer la section en U et sceller avec du savon ou de la peinture Secourer le corps Le feuille est endommag e et provoque des secousses Remplacer la feuille Le moteur n est pas bien accroch Bloquer le...

Страница 28: ...usages ne soient pas jet s dans le flux normal des d chets municipaux Les appareils usag s doivent tre collect s s par ment afin d optimiser le taux de r cup ration et le recyclage des mat riaux qui...

Страница 29: ...utilizador a crian as sem vigil ncia 2 As crian as dever o ser supervisionadas para se assegurar de que n o brincam com a unidade 3 Mantenha o aparelho e o seu cabo fora do alcance de crian as menore...

Страница 30: ...sonifer sonifer es 14 ATEN O Em caso de utiliza o incorreta do aparelho h um risco de poss veis les es Pe a a um t cnico para efetuar a montagem O exaustor e a rede do filtro devem ser limpos regularm...

Страница 31: ...tos sobre a evacua o de ar devem ser respeitados AVISOS 1 Obrigado por ter escolhido o nosso exaustor Leia o manual de instru es cuidadosamente antes de utiliz lo 2 O trabalho de instala o deve ser ef...

Страница 32: ...Depois de decidir a altura do exaustor coloque o gancho no centro e marque 3 furos Fa a 3 furos de 8mm 4 Coloque as ncoras de drywall nos orif cios e fixe o gancho aparafusando os 3 parafusos 5 Calcul...

Страница 33: ...e drywall nos orif cios coloque o cap do fog o em seu lugar e parafuso os 2 parafusos com a sua arruela 10 Coloque o vidro no caminho de chumbo use quatro parafusos 4x25cm com lavadora de vidro e arru...

Страница 34: ...stor O a o inoxid vel um dos materiais mais f ceis de manter limpo Cuidados ocasionais ajudar o a preservar sua apar ncia fina Dicas de limpeza gua quente com sab o ou detergente tudo o que normalment...

Страница 35: ...do o exaustor estiver a funcionar se premir o bot o TIMER a fun o de desactiva o autom tica ser activada e o exaustor desligar se automaticamente ap s 9 minutos Ao mesmo tempo o mostrador LED mostrar...

Страница 36: ...che com sab o ou tinta Agita o do corpo A folha danifica e causa agita o Substitua a folha O motor n o est firmemente enforcado Bloquear firmemente o motor O corpo n o fortemente enforcado Corrigido o...

Страница 37: ...res duos s lidos urbanos Os aparelhos desatualizados devem ser recolhidos separadamente para otimizar a taxa de recupera o e reciclagem dos materiais que os comp em e impedir potenciais danos para a...

Отзывы: