background image


a  minimum  contact  separation  of  3  mm.  on  all 

poles. 

2.


Make  sure  that  when  the  fan  is  fitted  in  the 

chosen  position,  there  is  no  possibility  of  the 

rotating  blades  coming  into  contact  with  any 

object.  Blades  should  be  at  least  2.30  m  from 

floor when fan is hung. 

3.


If  you  are  installing  more  than  one  ceiling  fan 

make  sure  that  you  do  not  mix  fan  blade  sets, 

even though they are from the same ceiling fan 

model. 

4.


Before beginning, disconnect power by removing 

fuse or turning off circuit breaker. 

5.


Once  fan  installation  is  completed  make  sure 

that  all  connections  are  secure  to  prevent  fan 

from falling. 

6.


Fan  must  be  turned  off  and  stopped  before 

reversing fan direction. 

7.


Check  that  the  means  of  fitting  the  fan  to  the 

ceiling is capable of supporting the weight of the 

fan when in operation. (Minimum 50Kg.). 

          WARNING: In case of misuse, there is a risk of possible 

                injury.


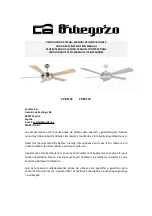
CP 73132  CP 74 132 

CP 81132  CP 82 132 

Содержание 8436044530661

Страница 1: ...obtener los mejores resultados y la m xima seguridad de uso Read this manual carefully before running this appliance and save it for reference in order to obtain the best results and ensure safe use V...

Страница 2: ...ibo de pago y si es posible tambi n el cart n de embalaje con el embalaje interior En caso de dejar el aparato a terceros tambi n entregue el manual de instrucciones GENERALES 1 Este aparato pueden ut...

Страница 3: ...nico o cualquier otro profesional cualificado 6 No desconecte nunca tirando del cable 7 No lo ponga en funcionamiento si el cable o el enchufe est n da ados o si observa que el aparato no funciona cor...

Страница 4: ...encima del suelo una vez instalado 3 Si va a instalar m s de un ventilador aseg rese de no mezclar las palas de las h lices de distintos ventiladores aunque sean del mismo modelo 4 Antes de empezar a...

Страница 5: ...da de las arandelas planas de las arandelas de resorte de los tornillos de fijaci n y de las juntas murales vendidos por separado 4 Conecte los cables de alimentaci n al bloque de terminal Aseg rese d...

Страница 6: ...s electrodom sticos viejos no pueden ser arrojados en los contenedores municipales habituales tienen que ser recogidos selectivamente para optimizar la recuperaci n y reciclado de los componentes y ma...

Страница 7: ...th the internal packing If you give this device to other people please also pass on the operating instructions General Safety Instructions 1 This appliance can be used by children aged from 8 years an...

Страница 8: ...t use the unit with a damaged cord or plug or if it is not working properly 8 Do not handle the appliance with wet hands 9 Never immerse the appliance in water or any other liquid 10 Make sure the app...

Страница 9: ...sets even though they are from the same ceiling fan model 4 Before beginning disconnect power by removing fuse or turning off circuit breaker 5 Once fan installation is completed make sure that all co...

Страница 10: ...shers the lock washers the set screws and the wall washers sold separately 4 Connect the lead wires to the terminal block Make sure that the connections are done properly and that no wires stand out o...

Страница 11: ...crew it in clockwise 4 Put the power supply on again and switch on Important The bulbs for this fan must be E27 60W x2 CLEANING Clean with a soft dry cloth Never use scouring pads abrasive or chemical...

Страница 12: ...nterieur Si vous remettez l appareil a des tiers veuillez le remettre avec son mode d emploi Conseils generaux de securite 1 Cet appareil peut tre utilis par des enfants 8 ans ou plus et des personnes...

Страница 13: ...on ou la fiche sont ao mes ou si vous remarquez que l appareil ne fonctionne pas correctement 8 Ne pas manipuler l appareil les mains mouill es 9 Ne jamais placer l appareil pr s dans l eau ou autre l...

Страница 14: ...sieurs ventilateurs doivent tre install s prendre soin de ne pas m langer les pales des h lices des diff rents ventilateurs m me s ils sont identiques 4 Avant d installer et de raccorder le ventilateu...

Страница 15: ...des rondelles plates des rondelles lastiques des vis de fixation et des joints muraux vendus s par ment 4 Connectez les c bles d alimentation au bo tier de raccordement Assurez vous que les connexions...

Страница 16: ...composants lectriques Enl vement des appareils m nagers usag s La directive europ enne 2002 96 EC sur les D chets des Equipements Electriques et Electroniques DEEE exige que les appareils m nagers us...

Страница 17: ...on ou la fiche sont ao mes ou si vous remarquez que l appareil ne fonctionne pas correctement 8 Ne pas manipuler l appareil les mains mouill es 9 Ne jamais placer l appareil pr s dans l eau ou autre l...

Страница 18: ...N o mergulhe o aparelho em agua nem em nengum outro liquido 10 Antes de efectuar a sua limpeza comprob que o aparelho est desligado 11 O aparelho deve ser instalado de acordo com a regulamenta o naci...

Страница 19: ...mo modelo 4 Antes de come ar a instala o na rede el ctrica retire os fus veis ou desligue o interruptor principal do alimentador el ctrico 5 Depois de instalar o ventilador certifique se que todas as...

Страница 20: ...anilhas planas das anilhas de pl stico dos parafusos de fixa o e das juntas de parede vendidos separadamente 4 Ligue os cabos de alimenta o ao bloco de terminal Certifique se de que as liga es est o...

Страница 21: ...icos n o devem ser escoados no fluxo normal dos res duos s lidos urbanos Os aparelhos desatualizados devem ser recolhidos separadamente para otimizar a taxa de recupera o e reciclagem dos materiais qu...

Отзывы: