5
es to a separate monitor. You’ll need a mini-AV to RCA Video
cable (sold separately and available at most electronic stores)
in order to display the live image on another device.
Capturing Images
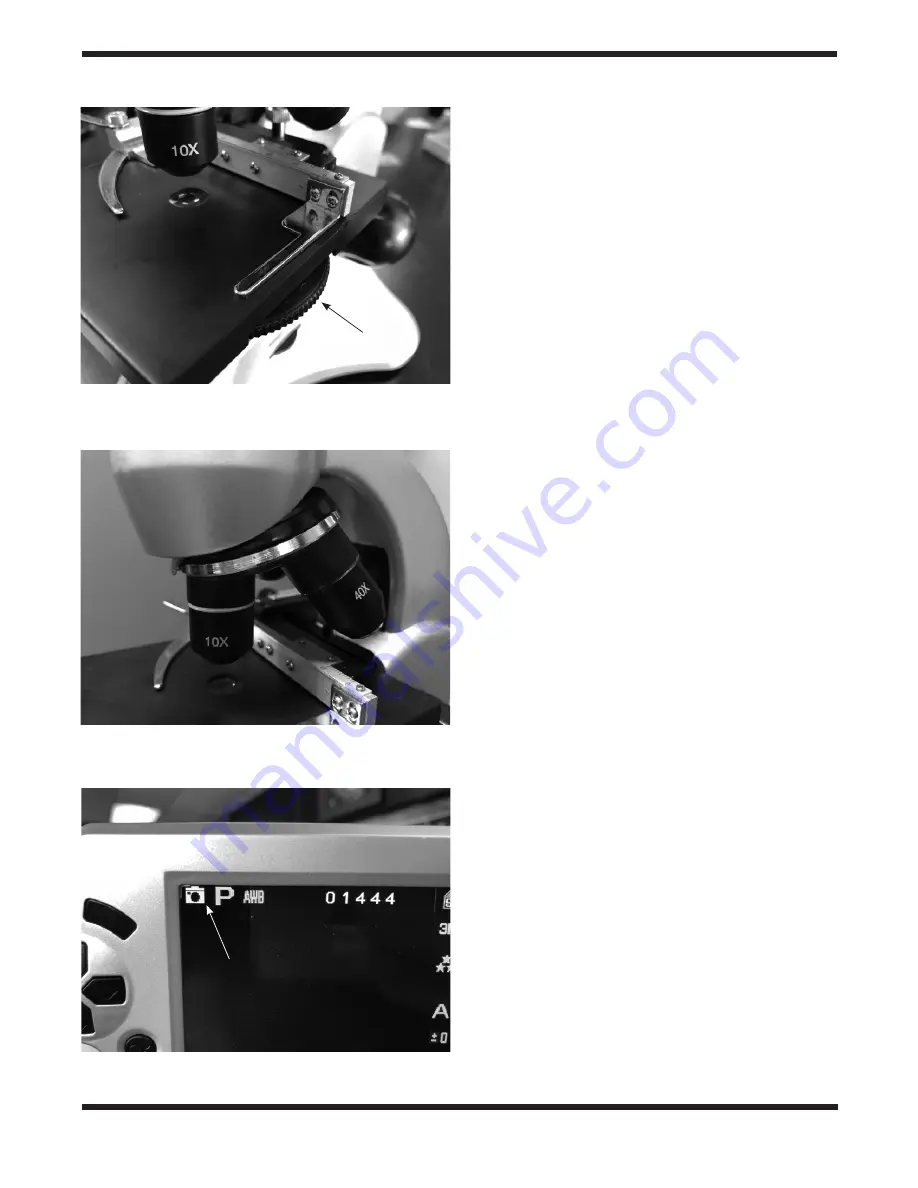
1. Press the Mode button a few times until the microscope is
in Camera mode, indicated by a small picture of a camera
in the top left corner
(Figure 8)
.
2. Press the SNAP button to take a single image, which will
save to the SD card.
Camera mode settings
Pressing the Menu button while in Camera Mode will bring
up adjustable settings for the camera. Cycle through the set-
tings with the left and right buttons, choose the desired setting
with the up/down buttons and click OK to set. Scenes adjust
through various presets, and use standard photography scene
names for the different presets. The MP menu allows for dif-
ferent resolutions to be set for the camera. Anti-Shake helps
minimize vibrations present in video, and finally the Setup menu
allows for adjustment of many functions including exposure,
white balance, sharpness, and quality of the saved images.
This is where you can also adjust the auto power-off setting.
Capturing Video
3. Press the Mode button a few times until the microscope
is in Video mode, indicated by a small picture of a video
camera in the top left corner.
4. Press the SNAP button to start a video, which will be
saved to the SD card when the SNAP button is pressed
again to end the video recording. Elapsed time will be
shown on the top of the screen during a recording.
Video mode settings
Pressing the Menu button while in Video Mode will bring up
adjustable settings for the camera. Cycle through the settings
with the left and right buttons, and choose the desired settings
with the up/down buttons. Click OK to choose any desired set-
ting. White balance can be adjusted with various presets, and
the MP menu allows choice of resolution. Please note that
video resolutions are smaller than the full camera still image
resolution selections.
Memory
An SD-Card icon will be displayed on screen if an SD Card is
recognized in the SD slot. When present, images and movies
will be played back and recorded from the SD Card. Always
power down your Microscope before inserting or removing an
SD Card.
Transferring Images and Movies
Images and movies can be transferred and shared via the
included USB cable or via the SD Card. Place the USB cable
into the spare USB port on the computer and into the mini USB
port, located on the bottom edge of the LCD screen near the SD
Card slot
(Figure 3)
. The microscope will be recognized as
external memory. Images and movies can then be easily trans-
ferred and shared to other devices.
Figure 7.
Objective lenses. 10x objective shown in position to view
through
Figure 8.
Camera Mode active as shown by a picture of a camera
in the top left corner
Camera Mode - Mode button
cycles through Camera, Video,
and SD card mode
Figure 6.
The Filter wheel is beneath the stage - Rotate the edge of
the wheel to change filters
Filter Wheel
Содержание MicroXplore 51856
Страница 7: ...7 This page left blank intentionally...


