-
18
-
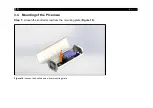
Step 3:
Mounting the PI cameras
Figure 12:
PI 400i/ 450i/ 640i/ 1M/ 08M/
05M attachment
Mount the PI 400i/ 450i/ 640i/ 1M/ 08M/ 05M to the mounting plate using the supplied 1/4 x 3/8 UNC inch
screw and a washer DIN125A-6,4 A2 (
After the camera is fully assembled, the mounting plate can be attached back to the outdoor protective
housing with the provided screw.
Содержание Outdoor protective housing
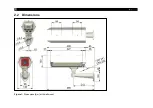
Страница 8: ... 8 2 2 Dimensions Figure 1 Dimensions mm with wall mount ...
Страница 9: ...Technical Data 9 Figure 2 Dimensions for wall mount ...
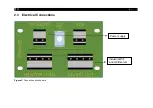
Страница 10: ... 10 2 3 Electrical Connections Figure 3 Connection circuit board Power supply Industrial PIF and USB server ...
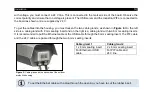
Страница 15: ...Installation 15 The USB server is now ready mounted Figure 9 Figure 9 USB server ready mounted ...
Страница 17: ...Installation 17 Step 2 Carefully remove the mounting plate Figure 11 Figure 11 Remove the mounting plate ...
Страница 26: ... 26 Figure 24 Remove air purge laminar ...
Страница 32: ... 32 Appendix A Declaration of Conformity ...
Страница 33: ......
Страница 34: ...optris Outdoor protective housing MA E2022 10 A ...


