background image

5

AUTOMATIC DIAGNOSTIC CHARGER FOR 12V LEAD-ACID BATTERIES FROM 3Ah TO 
400Ah or 24V LEAD-ACID BATTERIES UP TO 200Ah

DO NOT USE FOR NiCd, NiMH, Li-Ion OR NON-RECHARGEABLE BATTERIES. 

IMPORTANT: READ THE FOLLOWING INSTRUCTIONS BEFORE USING THE CHARGER

This appliance can be used by children aged from 8 years and above and persons with reduced 
physical,sensory or mental capabilities or lack of experience and knowledge if they have been given 
supervision or instruction concerning use of the appliance in a safe way and understand the hazards 
involved. Children shall not play with the appliance. Cleaning and user maintenance shall not be made 
by children without supervision.

SAFETY WARNING AND NOTES:

 Batteries emit EXPLOSIVE GASES - prevent flame or sparks near batteries. 

Disconnect 

AC power supply before making or breaking DC/battery connections. Battery acid is highly corrosive. Wear protective clothing and 
eyewear and avoid contact. In case of accidental contact, wash immediately with soap and water. Check that the battery posts are 
not loose; if so, have the battery professionally assessed. If the battery posts are corroded, clean with a copper wire brush; if greasy 
or dirty, clean with a rag dampened in detergent. 

Use the charger only if the input and output leads and 

connectors are in good, undamaged condition. If the input cable is damaged, it is essential to have it 
replaced without delay by the manufacturer, his authorised service agent or a qualified workshop, to 
avoid danger.

 Protect your charger from acid and acid fumes and from damp and humid conditions both during use and in 

storage. Damage resulting from corrosion, oxidation or internal electrical short-circuiting is not covered by warranty. Distance the 
charger from the battery during charging to avoid contamination by or exposure to acid or acidic vapours. If using it in the horizontal 
orientation, place the charger on a hard, flat surface, but NOT on plastic, textile or leather. Use the fixing holes provided in the 
enclosure base to attach the charger to any convenient, sound vertical surface. 

EXPOSURE TO LIQUIDS: 

This charger is designed to withstand exposure to liquids accidentally spilled or splashed onto the 

casing from above, or to light rainfall.  Prolonged exposure to falling rain is inadvisable and longer service life will be obtained by 
minimizing such exposure. Failure of the charger due to oxidation resulting from the eventual penetration of liquid into the electronic 
components, connectors or plugs, is not covered by warranty.

CONNECTING THE CHARGER TO THE BATTERY 

1. 

Disconnect AC power supply before making or breaking DC / battery connections. 

2.

  If charging a battery in the vehicle or craft with the battery clips, before making connections, first check that the battery clips 

can be safely and securely positioned clear from surrounding wiring, metal tubing or the chassis. Make connections in the 
following order: 

First connect to the battery terminal not connected to the chassis (normally positive), then 

connect the other battery clip (normally negative) to the chassis well away from the battery and 

fuel line. Always disconnect in reverse sequence. 

3. 

When charging a battery out of the vehicle or craft with the battery clips, place it in a well ventilated area. Connect the charger 
to the battery: RED clamp to POSITIVE (POS, P or +) terminal and BLACK clamp to NEGATIVE (NEG, N or –) terminal. Make sure 
the connections are firm and secure. Good contact is important.

4.  If the battery is deeply discharged (and possibly sulphated), remove from the vehicle or craft and inspect the battery 

before connecting the charger for a recovery attempt. 

Visually check the battery for mechanical defects such as a bulging 

or cracked casing, or signs of electrolyte leakage. If the battery has filler caps and the plates within the cells can be seen from 
the outside, examine the battery carefully to try to determine if any cells seem different to the others (for example, with white 
matter between the plates, plates touching). If mechanical defects are apparent do not attempt to charge the battery, have the 
battery professionally assessed. 

5.


If the battery is new

, before connecting the charger read the battery manufacturer’s safety and operational instructions 

carefully. If applicable, carefully and exactly follow acid filling instructions. 

PROCEEDING TO CHARGE

CHARGING TIME

Charge time on a flat but otherwise undamaged battery

a 100Ah 12V / 50Ah 24V battery should take no more than about 24


hours 

to progress to the self-discharge check. 

Deep-discharged batteries may take significantly longer, a full charge may not be achieved within the 72 hour charge safety limit. 

 : The charge voltage is inversely regulated according to ambient temperature i.e. voltage is increased at lower temperature, 

decreased at higher temperature. Adjustment: -0.004V / cell / °C above or below 20°C (68°F). 

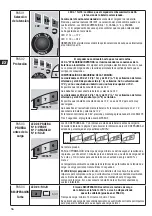
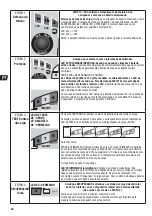
If voltage selection in STEP 1 matches the expected battery voltage and there are no connection errors as 
described in STEP 2, then fully automatic operation starts from STEP 3.

SAFETY

Содержание TM260

Страница 1: ...V 5A Thermally adjusted INSTRUCTIONS FOR USE IMPORTANT Read completely before charging MODE D EMPLOI IMPORTANT à lire avant d utiliser l appareil MODO DE EMPLEO IMPORTANTE a leer antes de utilizar el aparato ANWENDUNGSVORSCHRIFTEN WICHTIG Vollständig vor der Benutzung lesen GEBRUIKSAANWIJZING BELANGRIJK Lees volledig voor gebruik INSTRUÇÕES DE UTILIZAÇÃO IMPORTANTE Ler antes de utilizar ISTRUZIONI...

Страница 2: ...LEDs SELECT TEST LEDs 8 7 6 80 100 60 40 20 AGM 100 80 60 40 STD 8 7 7 6 0 0 12V 12V 24V 24V TEST optimate1 com i 12V 24V 12V 24V Select 1a 1b 2 8 5 4 3 6 7 ...

Страница 3: ...hock or fire 9 To reduce risk of electric shock unplug the charger from outlet before attempting any maintenance or cleaning Turning off controls will not reduce this risk Clean only with slightly moist not wet cloth Do not use solvents 10 WARNING RISK OF EXPLOSIVE GASES a WORKING IN VICINITY OF A LEAD ACID BATTERY IS DANGEROUS BATTERIES GENERATE EXPLOSIVE GASES DURING NORMAL BATTERY OPERATION FOR...

Страница 4: ...off position and or remove AC cord from electrical outlet disconnect the battery clips then reconnect correctly according to the instructions below 15 FOLLOW THESE STEPS WHEN BATTERY IS INSTALLED IN VEHICLE A SPARK NEAR A BATTERY MAY CAUSE BATTERY EXPLOSION TO REDUCE RISK OF A SPARK NEAR BATTERY a Position AC and DC cords so as to reduce risk of damage by hood door or moving engine part b Stay cle...

Страница 5: ...ntual penetration of liquid into the electronic components connectors or plugs is not covered by warranty CONNECTING THE CHARGER TO THE BATTERY 1 Disconnect AC power supply before making or breaking DC battery connections 2 If charging a battery in the vehicle or craft with the battery clips before making connections first check that the battery clips can be safely and securely positioned clear fr...

Страница 6: ...ery If nominal voltage is 12V disconnect battery and select 12V If nominal voltage is 24V push and hold finger on SELECT pushbutton After 3 seconds program will proceed to STEP 3 STEP 3 TEST before charge TEST LEDs 6 GREEN 7 YELLOW 8 RED TEST 8 6 7 TEST LEDs 6 7 8 indicate the battery condition prior to charging Consult the table below to match TEST LED indication to an estimated state of charge p...

Страница 7: ...0 AGM 100 80 60 40 STD 8 7 7 6 0 0 Consult the EARLY WARNING OF BATTERY PROBLEMS table on page 2 to match TEST LED indication to an estimated state of charge percentage SOC More information is provided in the section NOTES ON TEST RESULTS STEP 8 OptiMATE smart MAINTAIN LED 6 7 8 ON TEST 8 6 7 For batteries with a good state of health LED 6 green will remain on Exception STD wet cell batteries with...

Страница 8: ...tery from the OptiMate After at least 48 hours reconnect and observe the result during the TEST BEFORE CHARGE MAINTAINING A BATTERY FOR EXTENDED PERIODS The OptiMate will maintain a battery whos basic condition is good for months at a time At least once every two weeks check that the connections between the charger and battery are secure and in the case of batteries with filler caps on each cell d...

Страница 9: ...NLEVER LES BOUCHONS DES CELLULES LORS DU CHARGEMENT DE LA BATTERIE ET LES TAUX DE CHARGEMENT RECOMMANDÉS i SI LE CHARGEUR COMPORTE UN SÉLECTEUR DE TENSION DE SORTIE CONSULTER LE MANUEL DE L USAGER DE LA VOITURE POUR DÉTERMINER LA TENSION DE LA BATTERIE ET POUR S ASSURER QUE LA TENSION DE SORTIE EST APPROPRIÉE SI LE CHARGEUR N EST PAS MUNI D UN SÉLECTEUR NE PAS UTILISER LE CHARGEUR À MOINS QUE LA T...

Страница 10: ...ÉE AU CHÂSSIS ET EN DERNIER LIEU CELLE RACCORDÉE À LA BATTERIE n SUIVRE LES ÉTAPES SUIVANTES LORSQUE LA BATTERIE EST À L EXTÉRIEUR DU VÉHICULE UNE ÉTINCELLE PRÈS DE LA BATTERIE POURRAIT PROVOQUER L EXPLOSION DE CETTE DERNIÈRE POUR RÉDUIRE LE RISQUE D ÉTINCELLE À PROXIMITÉ DE LA BATTERIE i VÉRIFIER LA POLARITÉ DES BORNES DE LA BATTERIE LE DIAMÈTRE DE LA BORNE POSITIVE POS P EST GÉNÉRALEMENT SUPÉRIE...

Страница 11: ...s les composants électroniques bloc connecteurs ou fiches ne sera pas couverte par la garantie BRANCHEMENT DU CHARGEUR A LA BATTERIE 1 Débranchez l alimentation secteur avant d effectuer un branchement CC batterie ou de le débrancher 2 Si vous chargez une batterie installée dans le véhicule avec les pinces pour batterie avant les branchements vérifiez d abord que les pinces pour batterie peuvent ê...

Страница 12: ...rie de 24 V complètement déchargée Action vérifiez la batterie Si la tension nominale est de 12 V déconnectez la batterie et sélectionnez 12 V Si la tension nominale est de 24 V appuyez et maintenez le doigt sur le bouton SELECT Après trois secondes le programme se poursuit à l ÉTAPE 3 ÉTAPE 3 TEST avant la charge LED TEST Nº 6 VERTE Nº 7 JAUNE Nº 8 ROUGE TEST 8 6 7 LES LED DE TEST 6 7 8 indiquent...

Страница 13: ...n temps réel en fonction de la tension mesurée sur la batterie 8 7 6 80 100 60 40 20 AGM 100 80 60 40 STD 8 7 7 6 0 0 Reportez vous au tableau AVERTISSEMENTS ANTICIPÉS DES PROBLÈMES DE BATTERIE à la page 2 pour obtenir les indications des LED TEST qui correspondent à un pourcentage de l état de charge estimé de l état de charge SOC Pour de plus amples informations reportez vous à la section NOTES ...

Страница 14: ...récision TestMate 12V Deep Cycle MAINTENANCE D UNE BATTERIE DURANT DES PÉRIODES PROLONGÉES L OptiMate maintiendra une batterie dont l état est bon en toute sécurité durant plusieurs mois Vérifier au moins une fois par quinzaine la sécurité des connexions entre chargeur et batterie Dans le cas de batteries équipées de bouchons de remplissage sur chaque cellule déconnecter la batterie du chargeur vé...

Страница 15: ...stes resultado de la oxidación debida al ataque eventual de líquidos en los componentes electrónicos los conectadores o enchufes no se cubren por la garantía CONEXIÓN DEL CARGADOR A LA BATERÍA 1 Desconecte la alimentación CA antes de efectuar o deshacer las conexiones en la batería 2 Si se va a cargar una batería montada en el vehículo con las pinzas compruebe primero que las pinzas se pueden colo...

Страница 16: ...V pero esté muy descargada Qué debe hacer revise físicamente la batería Si la tensión nominal es de 12 V desconecte la batería y seleccione 12 V Si la tensión nominal es de 24 V presione y mantenga presionado el botón SELECT Tras 3 segundos el programa pasará al PASO 3 PASO 3 PRUEBA antes de la carga LED DE PRUEBA N º 6 VERDE N º 7 AMARILLO N º 8 ROJO TEST 8 6 7 Los LED DE PRUEBA 6 7 y 8 indican e...

Страница 17: ...8 7 7 6 0 0 La PRUEBA se interrumpirá si se ilumina el LED n º 8 rojo Existe un problema importante si la batería no puede retener suficiente carga durante la prueba de retención de tensión Consulte la tabla ADVERTENCIA PRECOZ DE PROBLEMAS CON LA BATERÍA en la página 2 para asociar la indicación de los LED de PRUEBA al estado de porcentaje de carga estimado SOC Se proporciona más información en la...

Страница 18: ...vez cada dos semanas compruebe que las conexiones entre el cargador y la batería está correctas y en el caso de baterías con un tapón en cada celda desconecte la batería del cargador compruebe el nivel de electrolito y si es necesario rellene las celdas con agua destilada NO ácido y vuelva a conectarla Al manipular baterías o junto a las mismas tenga en cuenta las ADVERTENCIAS DE SEGURIDAD mencion...

Страница 19: ... vida útil mais longa As falhas do carregador devido à oxidação resultante de uma eventual penetração de líquidos nos componentes electrónicos conectores ou fichas não são cobertas pela garantia LIGAÇÃO DO CARREGADOR À BATERIA 1 Desligue a fonte de alimentação CA antes de estabelecer ou desligar as ligações de CC à bateria 2 Se estiver a carregar a bateria no interior do veículo utilizando os term...

Страница 20: ...ndos o programa irá prosseguir para a ETAPA 3 ETAPA 3 TESTE antes da carga LED DE TESTE 6 VERDE 7 AMARELO 8 VERMELHO TEST 8 6 7 Os LED de TESTE 6 7 8 indicam o estado da bateria antes de iniciar a carga Consulte o quadro na página 2 para obter a correspondência entre a indicação do LED de TESTE e a estimativa do estado em percentagem de carga SOC 8 7 6 80 100 60 40 20 AGM 100 80 60 40 STD 8 7 7 6 ...

Страница 21: ...tensão medida da bateria 8 7 6 80 100 60 40 20 AGM 100 80 60 40 STD 8 7 7 6 0 0 O TESTE será interrompido caso o LED 8 vermelho se acenda Existe um problema significativo se a bateria não conseguir reter carga suficiente durante o período de teste Consulte o quadro AVISO ANTECIPADO DE PROBLEMAS COM A BATERIA na página 2 para obter a correspondência entre a indicação do LED de TESTE e a estimativa ...

Страница 22: ...STE DE PRÉ QUALIFICAÇÃO MANUTENÇÃO DE UMA BATERIA POR PERÍODOS PROLONGADOS O OptiMate mantém uma bateria cuja condição básica seja boa durante vários meses seguidos Pelo menos uma vez em cada duas semanas verifique se as ligações entre o carregador e a bateria estão seguras e no caso das baterias com tampas de enchimento em cada célula desligue a bateria do carregador verifique o nível do electról...

Страница 23: ...se verschütteten oder verspritzten Flüssigkeiten sowie leichtem Regen stand Von einem längeren Aufenthalt im Regen ist abzuraten Je weniger das Gerät Regen und sonstigen Flüssigkeiten ausgesetzt ist desto länger wird seine Betriebsdauer Ein Ausfall des Ladegeräts durch Oxidation aufgrund des Eindringens von Flüssigkeiten in die elektronischen Bauteile Stecker oder Anschlüsse ist nicht durch die Ga...

Страница 24: ...e Batterie mit einer Spannung von weniger als 18V ist angeschlossen Die angeschlossene Batterie kann eine 12V Batterie sein oder es kann sich um eine tiefentladene 24V Batterie handeln Aktion Batterie physikalisch prüfen Wenn die Nennspannung 12V beträgt Batterie abklemmen und 12V wählen Wenn die Nennspannung 24V beträgt drücken und halten Sie den Finger auf die SELECT Taste Nach 3 Sekunden Progra...

Страница 25: ... 6 80 100 60 40 20 AGM 100 80 60 40 STD 8 7 7 6 0 0 Der TEST wird unterbrochen wenn LED 8 rot leuchtet Es besteht ein erhebliches Problem wenn die Batterie im Testzeitraum keine Spannung aufrechterhalten kann Siehe Tabelle FRÜHWARNUNG BEI BATTERIEPROBLEMEN auf Seite 2 um die Anzeige der TEST LED einem geschätzten Ladezustand in Prozent SOC anzupassen Weitere Informationen finden Sie im Abschnitt H...

Страница 26: ...tiMate trennen Die Batterie frühestens nach 48 Stunden wieder anschließen und das TEST Ergebnis während des VORQUALIFIKATIONSTESTS beobachten ERHALTUNG EINER BATTERIE ÜBER LÄNGERE ZEITRÄUME HINWEG Das OptiMate erhält eine Batterie im gutem Grundzustand über Monate hinweg Prüfen Sie alle zwei Wochen die Anschlüsse zwischen Ladegerät und Batterie Bei Batterien mit Verschlussdeckeln für jede Zelle tr...

Страница 27: ...n regen bloot te stellen met het oog op een langere levensduur Defecten aan de lader door oxidatie die het gevolg is van eventuele insijpeling van vloeistoffen in de elektrische onderdelen aansluitingen of stekkers vallen niet onder de garantie DE LADER AANSLUITEN OP DE ACCU 1 De stekker van de lader mag niet in het stopcontact zitten wanneer gelijkstroom accuverbindingen gemaakt of verbroken word...

Страница 28: ...erd en er wordt een accu aangesloten met een spanning lager dan 18 V De aangesloten accu kan 12 V of een sterk ontladen 24 V accu kan zijn Instructie Controleer de gegevens van de accu Als de nominale spanning 12 V is koppel dan de accu los en selecteer 12 V Is de nominale spanning 24 V houd dan de SELECT knop ingedrukt Na 3 seconden gaat het programma naar STAP 3 STAP 3 TEST vor het laden TEST LE...

Страница 29: ...gemeten accuspanning 8 7 6 80 100 60 40 20 AGM 100 80 60 40 STD 8 7 7 6 0 0 De test wordt onderbroken wanneer led 8 rood brandt Er is sprake van een ernstig probleem als de accu niet in staat is om voldoende lading vast te houden gedurende de testperiode Raadpleeg de tabel VROEGE TEKENEN VAN ACCUPROBLEMEN op pagina 2 voor een vergelijking van de gegevens van de testleds met de geschatte laadstatus...

Страница 30: ...n een overmatige zelfontlading veroorzaken die niet kan worden opgespoord tijdens de testperiode van 12 uur Koppel de accu los van de OptiMate Wacht minstens 48 uur voordat u de lader opnieuw aansluit en houd de TESTresultaten tijdens de PREKWALIFICATIETEST in de gaten DE ACCU ONDERHOUDEN VOOR LANGERE PERIODEN De OptiMate onderhoudt een accu waarvan de basistoestand goed is gedurende maanden aan e...

Страница 31: ...uale di liquido nei componenti elettronici nei connettori o nelle spine non è coperto da garanzia CONNESSIONE DEL CARICABATTERIE ALLA BATTERIA 1 Scollegare l alimentazione CA prima di effettuare o di eliminare delle connessioni alla batteria CC 2 Se si carica la batteria del veicolo con i morsetti della batteria prima di effettuare le connessioni verificare che i morsetti della batteria possano es...

Страница 32: ...ia a 24 V completamente scarica Azione controllare fisicamente la batteria Se la tensione nominale è 12 V scollegare la batteria e selezionare 12 V Se la tensione nominale è 24 V premere e tenere premuto il pulsante sul pulsante SELECT Dopo 3 secondi il programma passerà alla fase 3 FASE 3 TEST prima della carica LED DI TEST 6 VERDE 7 GIALLO 8 ROSSO TEST 8 6 7 I LED di PROVA 6 7 e 8 indicano lo st...

Страница 33: ...reale in base alla tensione misurata della batteria 8 7 6 80 100 60 40 20 AGM 100 80 60 40 STD 8 7 7 6 0 0 Se il LED 8 rosso si accende il TEST verrà interrotto Se la batteria non è in grado di mantenere una carica sufficiente per il periodo di test il problema è grave Consultare la tabella SEGNALAZIONE TEMPESTIVA DEI PROBLEMI DELLA BATTERIA a pag 2 per abbinare l indicazione del LED DI TEST a uno...

Страница 34: ...caricamento eccessivo che non viene rilevato entro il periodo di test di 12 ore Scollegare la batteria dal OptiMate Attendere almeno 48 ore quindi ricollegarla e osservare il risultato del TEST DI PREQUALIFICAZIONE MANTENIMENTO DELLA BATTERIA PER PERIODI PROLUNGATI OptiMate terrà in vita per mesi una batteria che si presenti fondamentalmente in buone condizioni Almeno una volta ogni due settimane ...

Страница 35: ...en som ett resultat av oxidering orsakad av att vätska trängt in i de elektroniska komponenterna kontaktdonen eller stickpropparna täcks inte av garantin ANSLUTA LADDAREN TILL BATTERIET 1 Koppla ifrån spänningsförsörjningen växelström innan du ansluter eller lossar likströms eller batterianslutningar 2 När ett batteri laddas i fordonet med batterikabelskor måste du innan du ansluter kontrollera at...

Страница 36: ...d spänning under 18 V ansluts Det anslutna batteriet kan vara på 12 V eller också kan det vara ett djupurladdat 24 V batteri Åtgärd Kontrollera batteriet fysiskt Om den nominella spänningen är 12 V koppla bort batteriet och välj 12 V Om nominell spänning är 24V tryck och håll fingret på SELECT knappen Efter 3 sekunder fortsätter programmet till steg 3 STEG 3 TESTA före laddning TEST lysdiod 6 GRÖN...

Страница 37: ...ätt batterispänning Testet avbryts om lysdiod 8 röd tänds Ett allvarligt problem föreligger om batteriet inte kan behålla tillräcklig laddning under testperioden 8 7 6 80 100 60 40 20 AGM 100 80 60 40 STD 8 7 7 6 0 0 Använd tabellen TIDIG VARNING FÖR BATTERIPROBLEM på sidan 2 för att tolka lysdiodernas signaler för den beräknade laddningsgraden SOC Mer information finns i avsnittet INFORMATION OM ...

Страница 38: ...täcks inom testperioden på 12 timmar Koppla bort batteriet från OptiMate laddaren Återanslut batteriet när det gått minst 48 timmar och läs av resultatet under FÖRBEDÖMNINGSTESTET LÅNGSIKTIGT BATTERIUNDERHÅLL OptiMate kan bevara ett batteri i gott skick i flera månader i taget Du bör kontrollera att kopplingen mellan laddaren och batteriet är korrekt minst varannan vecka och om det är ett batteri ...

Страница 39: ...TING NOTICE NOTICE DE MONTAGE NOTA PARA EL MONTAJE NOTA DA MONTAGEM WANDMONTIERUNG MUURBEVESTIGING NOTA DEL MONTAGGIO VÄGGMONTERING 4x 4 5mm L 20mm 2m 7ft max EXTEND OPTIONS O 3 1 8m 6ft O 13 O 23 4 6m 15ft ...

Страница 40: ... accesorios en optimate1 com Descubra toda a nossa gama de acessórios em optimate1 com Entdecken Sie unser komplettes Zubehörsortiment auf optimate1 com Ontdek ons volledig gamma toebehoren op optimate1 com Scoprite la nostra gamma completa di accessori su optimate1 com Se vårt kompletta sortiment av tillbehör på optimate1 com C H A RGE C O N NECTO R C O N NECTO R P O W ER P O W ER ...

Отзывы: