


Guide of Main Menu
- 56 -
Guide of Main Menu
- 57 -
1.6
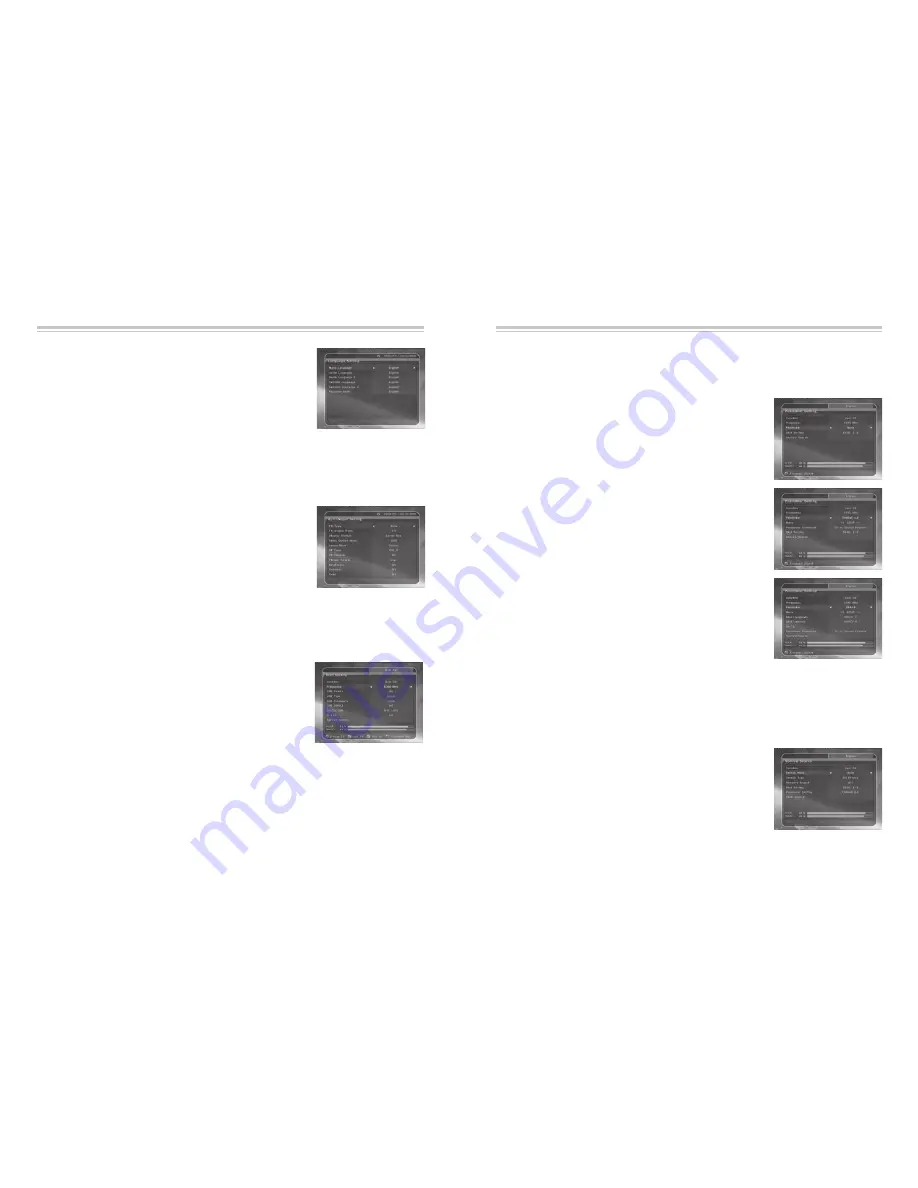
A/V Output Setting
q
TV Type :
Select the TV types.(PAL/NTSC/Auto) In Auto mode, the STB is automatically selected as NTSC
or PAL according to the service played.
w
TV Aspect Ratio :
Select the aspect ratio of TV which is connected to STB.(4:3/16:9)
e
Display Format :
Select the format which the video is to be displayed
on screen. (Letter Box/Pan Scan) In case of 16:9 mode, this option is not available.
r
Video Output Mode :
When you use a SCART cable to watch TV,
you can select the video output mode.
(CVBS or RGB)
2
.
2
Positioner Setting
q
Satellite :
Select the satellite what you want to search the service.
w
Frequency :
Select frequency what you want to check the signal.
e
Positioner :
Select the positioner.
r
Dish Setting :
Press
OK
button to move to Dish Setting menu directly.
t
Sound Mode :
Set the audio mode which is output from the RCA jack.
(Stereo/Mono/Left/Right)
y
RF Type :
Select the RF type. (PAL G/I/K)
u
RF Channel :
Select a RF channel. (21~69)
2.
Installation
2
.
1
Dish Setting
Select the antenna and LNB settings for service search. The values that are set in this menu will be available
for selection in other service searching menus.
q
Satellite :
Select the satellite what you want to search the service.
-
Press the
LEFT/RIGHT
button to select the satellite.
- Select the wanted satellite name.
- If the desired satellite name is not listed then select User Defined.
w
Frequency
: Select frequency what you want to check the signal.
e
LNB Power
: Select the LNB power.
r
LNB Type :
Select the LNB type.
t
LNB Frequency :
Select the L.O. frequency that is set to antenna.
y
LNB 22 KHz:
When you use a dual LNB or two antennas connected to a 22 KHz tone switch box, make
22 KHz tone switch enable or disable to select LNB or antenna.
u
DiSEqC 1.0 :
If you use a DiSEqC 1.0 switch, select one of the DiSEqC inputs.
i
DiSEqC 1.1 :
If you use a DiSEqC 1.1 switch, select one of the DiSEqC inputs.
O
o
0 / 12v :
Select the 12v on / off.
-
Press the
LEFT/RIGHT
button to select the satellite.
- Select the wanted satellite name.
- If the desired satellite name is not listed then select User Defined.
-
Move :
To move the dish, press
LEFT/RIGHT
button.
-
Positioner Command :
To use various positioner command, press
OK
button.
Then, available positioner commands will appear.
Using DiSEqC 1.2
-
Move
: To move the dish, press
LEFT/RIGHT
button.
-
Dish Longitude
: Enter the longitude using the
NUMERIC
buttons.
-
Dish Latitude
: Enter the latitude using the
NUMERIC
buttons.
-
Go To
: Press
OK
button to rotate the dish to the configured position.
Using USALS
t
Service Search :
Press
OK
button to move to Service Search menu directly.
2
.3 Service Search
q
Satellite :
Select the target satellite for search.
w
Search Mode :
Select the following search mode.
-
Satellite :
Press OK button to select multiple satellites.
-
Search Type
: Select the search type.
-
Network Search
: You can select
Off
or
On
. When you select '
On
',
you can find more transponders using the home network. As it
refers to NIT during searching, if there is the frequency information
of other transponder, it searches the other transponder besides the
transponder that the user inputs.
-
Dish Setting
: Press
OK
button to move to Dish Setting menu directly.
-
Positioner Setting
: Press OK button to move to Positioner Setting menu directly.
-
Start Search
: Press
OK
button to start search.
Auto Search Mode
i
Picture Adjust :
Adjust brightness, contrast and color of screen.
-
Use the
LEFT/RIGHT
buttons to select the LNB frequency.
- If the required LNB frequency is not listed, then enter the frequency manually using the
NUMERIC
buttons.
- When you select Universal in LNB type, both 9750 and 10600 are supported at the same time. And LNB
22KHz setting is disabled.
None
(No Positioner)
w
Audio Language :
Select the default language for audio when
changing services. If no language is provided, then the default
language of current service will be automatically selected.
e
Subtitle Language :
Select the default language for subtitle
when changing services.
a
Service Search :
Press
OK
button to move to Service Search menu directly.
Содержание tscx pvr ready
Страница 4: ......


