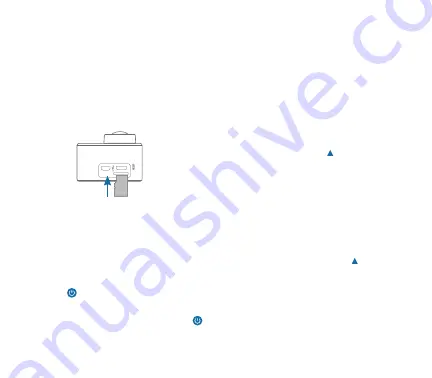
2. Using the Micro SD card
Push the Micro SD card into the slot until it
clicks into place. The label will face the rear
of the camera. To remove the Micro SD card,
press the tail of the storage card inward softly
and it will eject from the camera.
Note:
Please use Class 10 - U1 / U3 Micro SD
cards up to 128GB only. Please turn off the
camera prior to plugging-in or pulling-out the
memory card.
3. Power On/Off
Power On:
Press and hold the Power/Mode
button for 3 seconds, the screen will turn
on and the camera will be ready for use.
Power Off:
Hold the Power/Mode button
for 3 seconds, when the camera is in the idle
state, to turn it off.
4. Busy Indicator
The Busy Indicator light will flicker blue when
the camera is recording videos, shooting
photos and etc. When not busy the indicator
light will be solid blue with no flicker.
5. WiFi Connection
To connect to WiFI on the camera, press and
hold the WiFi Up button for 3 seconds. A
WiFi information window will appear on the
screen and the WiFi Indicator will flash orange.
Go into the WiFi settings on your smart
device and search for the WiFi SSID. Once
you have selected the WiFi SSID, enter the
password that is listed on the camera’s WiFi
information screen.
Important Note:
To quit the WiFi information
screen press the WiFi Up button .
OPERATING INSTRUCTIONS
Содержание SAFARI 5
Страница 1: ...by OPTEX ACCESSORIES 1 2 SUPER SMOOTH BUILT IN STABILIZATION...
Страница 2: ......
Страница 19: ......
Страница 20: ...Distributed in Canada by Gentec International gentec intl com by OPTEX safaricam ca...


