Eco Online™ Solar Pool Heating System -- Installation Manual
© Copyright 2012 Optex Solar Pty Ltd. All rights strictly reserved.
Page 37
Collector Plastic Contraction
– Collectors can relax and contract by
10mm in length over the initial first few years. It should be checked that
the stainless steel straps or fixings have not become too tight as a result.
If required straps will need to be loosened slightly. This check should be
carried out when the collectors are cool (water flowing).
X
Debris Accumulation
– Inspect the inner of the collectors. Depending on
conditions collectors may need to be flushed with a suitable cleaning
agent for debris accumulation after many years of use.
X
26.1
Collector Puncture Repair Procedure
Drill out the puncture using a sharp drill bit (being careful not to drill into the opposite wall). Inject chlorine resistant
pool silicon into the collector inner to create a ~10cm inner silicon disk plug. Wait one day before re-pressurizing.
27
Important Installation Check List
Your installation must have the following elements.
The top header pipe was installed with a 1 to 2° slope toward the outlet, or at the least perfectly level.
Aluminium channel was laid top and bottom of each row or maximum two rows.
The stainless steel strapping was installed with sufficient play to allow for collector contraction.
Ultimate uplift wind loadings were considered and panels secured appropriately.
A hot spot check was performed. All collectors are cool during full sun exposure (top of panels may be warmer).
Smooth flow is achieved; no air bubbling is present after initial purging.
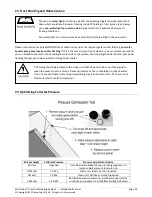
The pressure optimization procedure was carried out.
Collectors and PVC plumbing lines were laid at such an angle so that all water drains from them.
A fast opening vacuum release valve MUST be installed on the roof on the return line.
A non-return valve was installed (with a small 6mm hole drilled in the flap).

