background image

Optelec 


ClearNote

+

 Manuale utente


Italiano  


Page 8 de 12 

Luce esterna 

Sull’estremità superiore del braccio è presente un interruttore con 

questo simbolo: l’interruttore attiva e disattiva la luce esterna. 

L’accensione della luce esterna è associata ad un breve segnale 

acustico. Questa luce può essere attivata solo se Cl è 

acceso. 


Modalità di visualizzazione 

Premendo in successione questo tasto, è possibile scegliere tra 3 

diverse modalità di visualizzazione. 


1. 

Modalità fotografica colore pieno 

Modalità per visualizzare oggetti e immagini con colori naturali. 


2. 

Modalità lettura in positivo


Questa modalità aumenta il contrasto del colore di sfondo e del 

testo. L’immagine può essere visualizzata sotto forma di testo nero 

su sfondo bianco ed esistono una serie di combinazioni di colori 

selezionabili con il tasto Combinazioni colori (si veda in seguito).  


3. 

Modalità lettura in negativo 

Questa modalità inverte le combinazioni di colore ad elevato 

contrasto fra sfondo e primo piano. 


Opzioni di visualizzazione della telecamera 

La telecamera di Cl salva automaticamente le vostre 

impostazioni preferite quando viene puntata verso un oggetto distante o 

verso il piano di lettura. Per esempio quando spostate la telecamera 

rapidamente dalla lavagna al piano di lettura, le impostazioni scelte 

vengono automaticamente applicate. Si possono memorizzare 3 gruppi 

di impostazioni: verso il basso, davanti e dietro all’utente. 


Combinazione colori 

Questa funzione è attiva solamente in modalità lettura. Premendo 

questo pulsante in successione, si ottengono 10 diverse 

combinazioni di colore fra sfondo e testo. Potete scegliere di 

visualizzare il testo nei due colori che meglio si adattano a voi. 


Modifica della luminosità


(solo in modalità lettura) 

Aumento luminosità: tenere premuti i pulsanti Luce e Zoom +. 

Diminuzione luminosità: tenere premuti i pulsanti Luce e Zoom -. 


Содержание ClearNote+

Страница 1: ...ClearNote User manual Gebruikershandleiding Bedienungsanleitung Manual d emploi Manuale utente...

Страница 2: ...learNote Manuel d emploi pour ClearNote Manuale utente per ClearNote User manual version 7 2 Copyright 2006 by Optelec The Netherlands All rights reserved Optelec P O Box 399 2990 AJ Barendrecht The N...

Страница 3: ...the Optelec website at www optelec com for extensive information about Optelec products and services All rights in particular the rights of reproduction as well as translation are reserved No parts o...

Страница 4: ...ClearNote box contents 4 4 Installing the camera arm 5 5 Installing the software 6 6 Internal rechargeable batteries 7 7 Operation of the ClearNote 7 8 Operation from a computer keyboard 9 9 ClearNot...

Страница 5: ...n combination with a PC the ClearNote can also be controlled from the keyboard Read this manual thoroughly before setting up and using the ClearNote Keep this manual in a safe place for future referen...

Страница 6: ...e unit to extreme or rapid changes in temperature or humidity Do not place the ClearNote near a radiator or heater or where it will be exposed to direct sunlight Do not use the ClearNote in humid area...

Страница 7: ...the ClearNote camera arm is positioned with the camera directly above the Base plate Connect the power adapter to the ClearNote Connect the adapter to a nearby wall socket The internal batteries are n...

Страница 8: ...er and click Next Select components Select your software magnification program which you run on your PC If none of these is applicable select default installation Select Start menu folder Click Next S...

Страница 9: ...arm Switch the ClearNote on The green LED light on the camera arm indicates the ClearNote is switched on It takes approximately 5 seconds for the camera to initialize During this time no buttons shou...

Страница 10: ...will automatically be applied 3 sets of settings can be stored looking down looking away and looking behind you Semi colours This function is active when in reading mode only Pressing this button cyc...

Страница 11: ...Zoom and Mode this camera can be switched on and off 8 Operation from a computer keyboard During installation a ClearNote icon can be placed on the desktop and start menu You can start the ClearNote...

Страница 12: ...ed and moved anywhere on your screen Other application s are automatically adjusted To make use of this function you need a Dolphin magnifying application like Lunar or Supernova version 7 01 or highe...

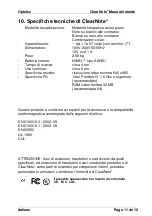
Страница 13: ...th video resolution of 640 x 480 PC specifications Intel Pentium IV 1 6Ghz or higher recommended 32 MB video RAM minimum 64 recommended This product complies with the safety and EMC requirements of th...

Страница 14: ...ines and directives EMC 89 336 EU of the European Community This EU declaration of conformity is based on tests according to the directives EN 61000 6 3 2002 08 EN 61000 6 1 2002 08 and EN 60950 1 200...

Страница 15: ...pen bij hun dagelijkse activiteiten Bezoek de Optelec website op www optelec com voor een overzicht van alle Optelec producten en diensten Alle rechten van deze handleiding zijn voorbehouden Deze hand...

Страница 16: ...4 3 Inhoud van de verpakking 4 4 Installatie van de camera arm 5 5 Installatie van de software 6 6 Interne oplaadbare batterijen 7 7 Bediening van de ClearNote 7 8 Bediening via een PC toetsenbord 9 9...

Страница 17: ...rect worden bediend op de camera arm Wanneer u uw ClearNote gebruikt in combinatie met een Windows PC geen Macintosh dan is de ClearNote tevens te bedienen via het PC toetsenbord en heeft u de beschik...

Страница 18: ...ik de ClearNote alleen binnen Stel het apparaat niet bloot aan extreme of snel veranderende temperaturen of vochtigheid Plaats de ClearNote niet naast een warmtebron of in direct zonlicht Gebruik de C...

Страница 19: ...de camera unit recht boven de onderplaat te plaatsen Sluit de netadapter aan op de ClearNote zoals onderaan deze pagina aangegeven Steek de adapter stekker in een stopcontact De interne batterijen wor...

Страница 20: ...ngspakket waarmee u werkt op uw PC Indien dit niet van toepassing is selecteert u default Select menu Start map klik op volgende Select extra taken Selecteer Install the camera driver Kies ook welke i...

Страница 21: ...9 In en uitschakelen De aan uit schakelaar is geplaatst aan de bovenzijde van de camera standaard Een groen LED lampje geeft aan dat de ClearNote is ingeschakeld Het duurt ongeveer 5 seconden voordat...

Страница 22: ...sch de laatste beeldinstellingen van drie camerastanden wanneer deze wordt gericht op een object op afstand een object op het bureau of op uzelf Bijvoorbeeld wanneer u de camera draait van het schoolb...

Страница 23: ...wisselen tussen twee verschillende beelden De externe camera moet een 60Hz NTSC type zijn De video connector van deze externe camera kan worden aangesloten op de tulp connector van de ClearNote Door...

Страница 24: ...n kan op iedere gewenste vergroting worden aangepast Om optimaal gebruik te maken van deze functie heeft u een Dolphin vergrotingspakket nodig zoals Lunar Lunar Plus of Supernova versie 7 01 of hoger...

Страница 25: ...5 uur Monitor aansluiting Minimaal compatible met resoluties van 640 x 480 Pc specificaties Intel Pentium IV 1 6Ghz of hoger aanbevolen 32 MB video RAM minimum 64 MB aanbevolen Dit product voldoet aa...

Страница 26: ...heids richtlijn en de richtlijn voor EMC 89 336 EU van de Europese Unie Deze EU conformiteit verklaring is gebaseerd op tests volgens de richtlijnen EN 61000 6 3 2002 08 EN 61000 6 1 2002 08 en EN 609...

Страница 27: ...auf unserer Webseite www optelec com Kein Teil dieser Dokumentation darf ohne schriftliche Genehmigung von Optelec weder in elektronischer noch in mechanischer Form reproduziert oder weitergegeben we...

Страница 28: ...herheitsinformationen 4 3 ClearNote Lieferumfang 4 4 Aufbau der Kamera 5 5 Installation der Software 6 6 Der eingebaute Akku 7 7 Bedienung des ClearNote 7 8 Bedienung ber die PC Tastatur 9 9 ClearNote...

Страница 29: ...n bedient werden In Verbindung mit einem PC kann das ClearNote auch ber dessen Tastatur gesteuert werden Diese Bedienungsanleitung enth lt Informationen ber Aufbau Bedienung und Pflege des Ger tes Bit...

Страница 30: ...ich Setzen Sie das Ger t weder hohen Temperaturen noch hoher Luftfeuchtigkeit aus Stellen Sie das ClearNote nicht in die N he eines Heizk rpers noch an einen Ort an dem es direktem Sonnenlicht ausgese...

Страница 31: ...en wollen sollte die Kamera ber der Grundplatte stehen Verbinden Sie den Netzadapter mit der Stromversorgungsbuchse Der eingebaute Akku wird nun geladen Verbinden das ClearNote mit einem VGA Monitor V...

Страница 32: ...ie den Ziel Ordner aus und klicken auf Weiter Komponenten ausw hlen W hlen Sie ihrem Software Vergr erungs Paket womit Sie arbeiten am PC Indem keinen installiert sind w hlen Sie default Startmen Ordn...

Страница 33: ...Schalter Schalten Sie das ClearNote ein in dem Sie den Schalter nach oben bewegen Wenn Ihr ClearNote eingeschaltet ist wird dies durch eine gr ne LED signalisiert Es dauert ca 5 Sekunden bis die Kamer...

Страница 34: ...chreibtisch schwenken Semicolor Falschfarbdarstellung Diese geht nur im Lesemodus Dr cken Sie diese Taste um zwischen 10 verschiedene Vorder und Hintergrundkombinationen umzuschalten Sie k nnen sich f...

Страница 35: ...e angeschlossen und mit der Tastenkombination Vergr erung und Modus ein und ausgeschaltet 8 Bedienung ber die PC Tastatur W hrend der Installation kann auf dem Desktop und dem Startmen ein Programm Sy...

Страница 36: ...ungsfenster werden automatisch verschoben Sie ben tigen daf r die Programmversion 7 01 oder h her von Dolphin Lunar Lunar Plus oder Supernova oder Version 9 04 oder h her von Zoomtext Wichtig Starten...

Страница 37: ...ntium IV 1 6Ghz oder h her empfohlen 32 MB Video RAM mindestens 64 MB empfohlen Dieses Produkt erf llt die Anforderungen der folgenden Richtlinien in Bezug auf Sicherheit und elektromagnetische Vertr...

Страница 38: ...ur Angleichung der Rechtsvorschriften der Mitgliedsstaaten ber die elektromagnetische Vertr glichkeit EMV Richtlinie 89 336 EWG bereinstimmt Diese EU Konformit tserkl rung basiert auf den Pr fungen mi...

Страница 39: ...s leur vie de tous les jours Visitez le site web de Optelec sur www optelec com pour d couvrir toute la gamme de produits et de services de Optelec Tous les droits de ce manuel sont r serv s Ce manuel...

Страница 40: ...3 Contenu de l emballage 4 4 Installation 5 5 Installation du logiciel 6 6 Batteries internes rechargeables 7 7 Fonctionnement de ClearNote 7 8 Commande partir d un clavier de PC 10 9 ClearNote et le...

Страница 41: ...puis le bras de la cam ra Lorsque vous utilisez votre ClearNote en combinaison avec un PC Windows pas Macintosh le ClearNote peut aussi se piloter l aide du clavier de l ordinateur et vous pouvez en p...

Страница 42: ...rieur N exposez pas l appareil des temp ratures externes ou rapidement variables ni l humidit Ne placez pas ClearNote c t d une source de chaleur ou la lumi re directe du soleil N utilisez pas ClearNo...

Страница 43: ...e la cam ra droite au dessus de la base Raccordez l adaptateur de courant ClearNote tel qu indiqu en bas de la page Branchez l adaptateur dans une prise de courant Les batteries internes sont maintena...

Страница 44: ...logiciel d agrandissement Si vous n utilisez pas de logiciel selectionnez default S lectionnez le dossier du menu d marrer Cliquez sur suivant S lectionnez T ches suppl mentaires S lectionnez Installe...

Страница 45: ...ote ClearNote s utilise par la cam ra et aussi le clavier du PC pour emploi par un PC voir chapitres 8 et 9 Allumer et teindre L interrupteur off on est situ sur la face sup rieure du bras de la cam r...

Страница 46: ...ri re plan Le contraste entre l avant plan et l arri re plan est galement augment M moire de la cam ra dans les diff rents modes La cam ra ClearNote conserve automatiquement les derniers r glages d im...

Страница 47: ...e une lumi re LED rouge est visible En r appuyant sur cette touche vous mettez fin au blocage Emploi de la lentille Close up La lentille close up peut tre vis e devant l objectif de la cam ra Ceci est...

Страница 48: ...ans C Program files ClearNote 9 ClearNote et le logiciel d agrandissement ClearNote peut tre utilis en m me temps avec les programmes d agrandissement Lunar Lunar Plus Supernova et Zoomtext A c t d un...

Страница 49: ...ur e d utilisation de batterie 5 heures Connexion du moniteur Au minimum compatible avec les r solutions de 640 x 480 Sp cifications du PC Intel Pentium IV 1 6Ghz ou plus conseill 32 Mo de RAM vid o m...

Страница 50: ...la directive pour EMC 89 336 EU de l Union europ enne Cette d claration de conformit EU se base sur des tests effectu s selon les directives EN 61000 6 3 2002 08 EN 61000 6 1 2002 08 et EN 60950 1 20...

Страница 51: ...oni sui prodotti e i servizi Optelec Tutti i diritti in particolare i diritti di riproduzione e di traduzione sono riservati Nessuna parte del presente manuale pu essere rielaborata in qualsiasi forma...

Страница 52: ...confezione di ClearNote 4 4 Installazione del braccio della telecamera 5 5 Installazione del software 6 6 Batterie ricaricabili interne 7 7 Funzionamento di ClearNote 7 8 Funzionamento con PC 10 9 Cle...

Страница 53: ...re controllate utilizzando i pulsanti presenti sul braccio della telecamera Se si usa ClearNote con un PC possibile utilizzarlo tramite tastiera Leggete attentamente questo manuale prima di configurar...

Страница 54: ...lizzare ClearNote solo in ambienti chiusi Non esporre l unit a rapide variazioni di temperatura e umidit Non posizionare ClearNote accanto ad un calorifero o a una fonte di calore n esporlo alla luce...

Страница 55: ...ortatile assicurarsi che il braccio della telecamera ClearNote sia fissato in modo che quest ultima si trovi direttamente sulla piastra Collegare l alimentatore a ClearNote Collegare l alimentatore a...

Страница 56: ...llato sul vostro PC Se non fosse tra quelli indicati selezionate installazione default Selezione della cartella nel Menu di Avvio Start Cliccare su Avanti Selezione processi addizionali Selezionate In...

Страница 57: ...Note ClearNote pu essere controllato sia dal braccio di sostegno della telecamera che dalla tastiera del PC si vedano anche i capitoli 8 e 9 Accensione spegnimento L interruttore On Off si trova all e...

Страница 58: ...lori si veda in seguito 3 Modalit lettura in negativo Questa modalit inverte le combinazioni di colore ad elevato contrasto fra sfondo e primo piano Opzioni di visualizzazione della telecamera La tele...

Страница 59: ...messa a fuoco automatica sufficiente premere di nuovo questo pulsante Lente per visualizzazione da vicino La posizione della telecamera pu essere regolata per la visualizzazione sul piano di lettura...

Страница 60: ...o il file nella cartella ClearNote ini in C Programmi ClearNote 9 ClearNote ed il software di ingrandimento ClearNote pu essere utilizzato insieme ai software di ingrandimento Lunar Supernova e Zoomte...

Страница 61: ...uzione video minima 640 x 480 Specifiche PC Intel Pentium IV 1 6 Ghz o superiore raccomandato RAM video minima 32 MB raccomandata 64 Questo prodotto conforme ai requisiti per la sicurezza e la compati...

Страница 62: ...MC 89 336 UE della Comunit Europea La presente dichiarazione di conformit UE si basa sui test ai sensi delle direttive EN 61000 6 3 2002 08 EN 61000 6 1 2002 08 ed EN 60950 1 2001 da parte di un entit...

Страница 63: ...ictorin Longueuil QC J4G 1Y9 Canada T 1 0 450 677 1171 www optelec ca Tieman GmbH Fritzlarer Strasse 25 34613 Schwalmstadt Germany T 49 0 6691 96170 www tieman de Optelec Nederland BV Breslau 4 2993 L...

Отзывы: