Optelec Clear View C Скачать руководство пользователя страница 12

Optelec 

ClearView C 


Page 12 

English  

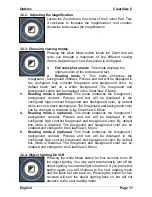
3.2.5. Overview function (position locator) 

The overview function provides you with a quick overview 
of  the  text,  which  helps  you  to  easily  locate  the  part  of  a 
document which is of interest.  
Press  the  blue  square  Overview  button  to  activate  the 
overview  function.  When  the  overview  function  is 
activated, the  ClearView  C  will  automatically  zoom out  to 
the  minimum  magnification,  and  will  display  a  crosshair 

target to indicate the center of the screen. Position the text you wish to read 
in the crosshair’s target by moving the reading table. Once the document has 
been positioned, press the button once again to zoom in on the selected text 
in your previous magnification setting. 
 

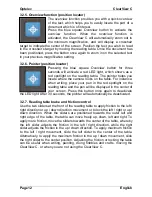
3.2.6. Pointer (position locator) 

Pressing  the  blue  square  Overview  button  for  three 
seconds  will  activate  a  red  LED  light,  which  shows  as  a 
red  spotlight  on  the  reading  table.  The  pointer  helps  you 
locate where the camera looks on the table. For instance: 
when  writing,  place  your  pen  in  the  red  spotlight  on  the 
reading table and the pen will be displayed in the center of 
your  screen.  Press  this  button  once  again  to  deactivate 

the LED light. After 30 seconds, the pointer will automatically be deactivated. 
 

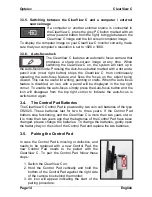
3.2.7. Reading table brake and friction control 

Use the two sliders at the front of the reading table to apply friction to the left / 
right direction or up / down direction movement or to lock the left / right or up / 
down  direction.  When  the  sliders  are  positioned  towards  the  outer  left  and 
right edge  of the table, the table can move freely up, down, left and right. To 
apply more friction, move the sliders towards the center of the table, whereby 
the  left  slider  adjusts  the  friction  in  the  left  /  right  direction,  while  the  right 
slider adjusts the friction in the up / down direction. To apply maximum friction 
to  the  left  /  right  movement,  slide  the  left  slider  to  the  center  of  the  table. 
Alternatively, to apply the maximum friction to the up / down movement, slide 
the right slider to the center position. Adjusting the friction or locking the table 
can  be  useful  when  writing,  painting,  doing  hobbies  and  crafts,  moving  the 
ClearView C, or when you are not using the ClearView C.  

Содержание Clear View C

Страница 1: ......

Страница 2: ......

Страница 3: ...on 1 0 Copyright 2014 Optelec the Netherlands All rights reserved Optelec P O Box 399 2993 LT Barendrecht The Netherlands Telephone 31 0 88 6783 444 Fax 31 0 88 6783 400 E mail info optelec nl Website...

Страница 4: ...brake and friction control 12 3 3 The Advanced Control Pad 13 3 3 1 Adjusting the image control 13 3 3 2 Activating line markers window shades 13 3 3 3 Positioning lines markers windows shades 13 3 3...

Страница 5: ...Optelec ClearView C English Page 5 Appendix A Troubleshooting 23 Appendix B Safety and Regulatory Notices 24 Appendix C Specifications 26 Optelec offices worldwide 28...

Страница 6: ...alities The unique design of the ClearView C ensures a comfortable reading posture and fits your home s interior perfectly 1 1 About this manual This manual will help you to become familiar with the C...

Страница 7: ...et for switching the table setup Optional The Comfort table tray If any of these items are missing from your package please contact your Optelec distributor 1 3 Getting to know your ClearView C The fo...

Страница 8: ...ug the power cord into the power socket Press the On Off button at the left side of the Electronic Box 2 1 Switching the table setup Compact setup Comfort setup The ClearView C has two table setups th...

Страница 9: ...he middle 8 Hold the table and pull the arm out until you hear a click 9 Slide the table top to the right and secure the black knob To switch back to the Compact setup 1 Remove the cap from the top of...

Страница 10: ...imply rotate the Control Pad so five rectangular buttons are facing you 3 2 The Basic Control Pad The Basic Control Pad is correctly placed in the reading table when the Optelec logo is facing you and...

Страница 11: ...nd color by default white text on a black background The foreground and background color can be changed or disabled in the ClearView C Menu 4 Reading mode 3 optional This mode enhances the foreground...

Страница 12: ...pen in the red spotlight on the reading table and the pen will be displayed in the center of your screen Press this button once again to deactivate the LED light After 30 seconds the pointer will auto...

Страница 13: ...s are used as guides to make reading text easier or to help you write under the ClearView C The window shades function is used to block a part of an image when screen brightness becomes inconvenient o...

Страница 14: ...ed an icon with a pencil will be displayed in the top right corner To enable the auto focus simply press the Auto focus button and the icon will disappear from the top right corner to indicate the aut...

Страница 15: ...sappear 6 If the ClearView C does not recognize or see the Control Pad the pairing sequence will be terminated within 30 seconds and the pairing icon will disappear Repeat steps 1 to 5 until the Contr...

Страница 16: ...rast modes Allows you to adjust the ClearView C automatic standby time Allows you to reset the ClearView C to its factory default settings Shows firmware versions and system information Allows you to...

Страница 17: ...creen Activate the menu by pressing the Menu button on the Advanced side of the Control Pad Use the Zoom dial to scroll through the menu items Select the menu option Brightness and activate this menu...

Страница 18: ...the Mode button to confirm your choice and exit the menu You can select the following color combinations Black White White Black Yellow Black Black Yellow Yellow Blue Blue Yellow Black Red Red Black...

Страница 19: ...is automatically powered off By default the power off time is set to 5 minutes These 5 minutes are activated after the default standby time of 15 minutes By default the unit is therefore automatically...

Страница 20: ...learView C to the factory default settings Activate the menu by pressing the Menu button on the Advanced side of the Control Pad Use the Zoom dial to scroll through the menu Select the menu option Res...

Страница 21: ...you exit the menu Activate the menu by pressing the Menu button on the Advanced Control Pad Use the Zoom dial to scroll through the menu Select the menu option Exit and activate this menu option by p...

Страница 22: ...make sure there is enough free space on the table to move the unit that there are no other objects placed on the table and that the power cable is long enough to move the unit Make sure that the table...

Страница 23: ...last for two to three years Make sure the Control Pad is paired with the ClearView C If not pair the Control Pad Image is not in focus If the pencil icon is displayed in the top right corner of the sc...

Страница 24: ...sing the handle please make sure the monitor is moved down to its lowest position the reading table is locked and the handle is locked before lifting the unit as to prevent fingers or any loose clothi...

Страница 25: ...anty claims or service during or after warranty period please contact your Optelec distributor Optelec is not responsible for any uses of this device other than those described in this manual Complian...

Страница 26: ...en Resolution 1920x1080 Dimensions base unit footprint 42 x 51 cm compact setting 42 x 62 cm comfort setting Dimensions table 42 x 32 cm compact table 42 x 42 cm comfort table Weight 15 7 kg and up Po...

Страница 27: ...Optelec ClearView C English Page 27...

Страница 28: ...Victorin Longueuil QC J4G 1Y9 Canada T 1 0 450 677 1171 www optelec ca Optelec GmbH Fritzlarer Strasse 25 34613 Schwalmstadt Germany T 49 0 6691 96170 www optelec de Optelec Nederland BV Breslau 4 299...

Страница 29: ......

Страница 30: ......

Отзывы: