


WorkBee Laser Upgrade Setup Guide
16 / 25
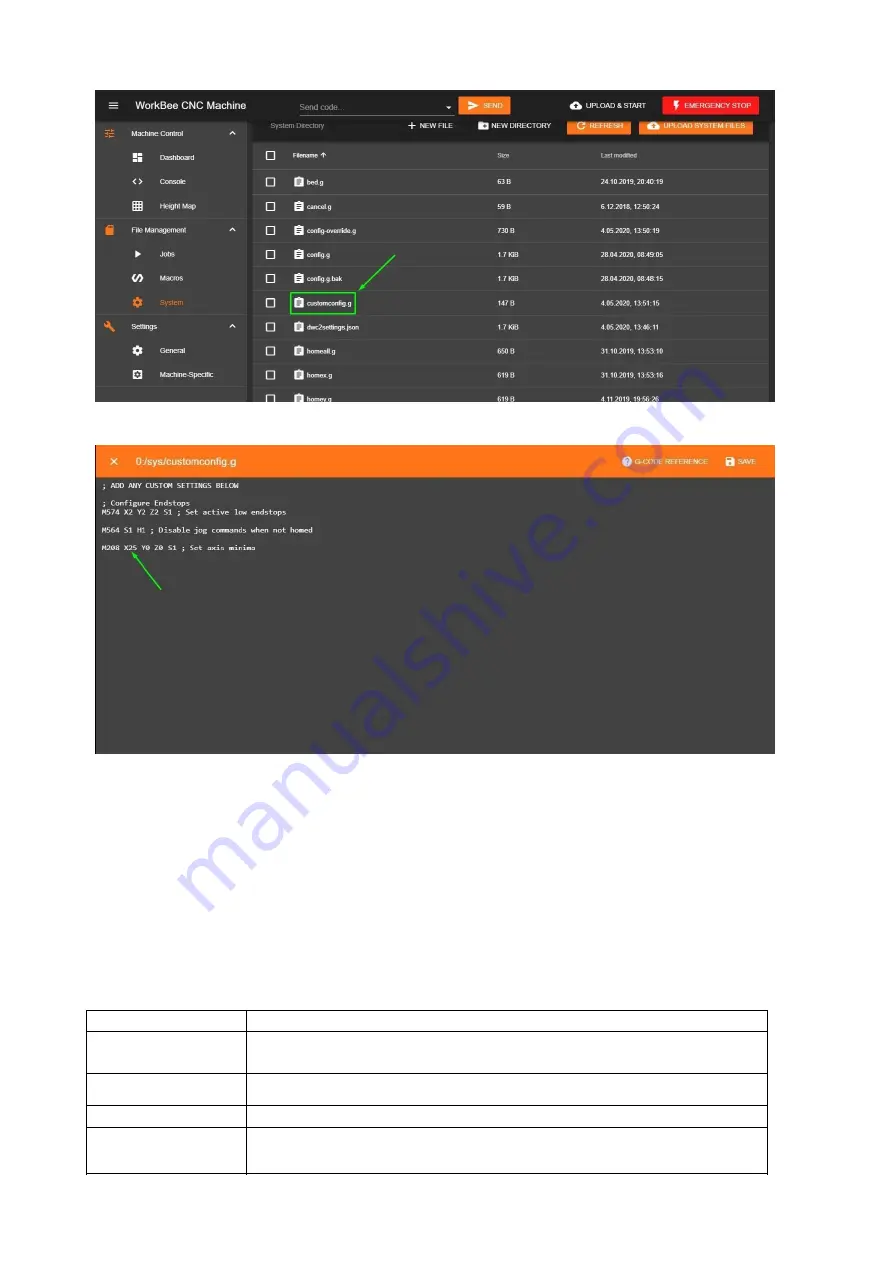
4.Paste the copied command and change the X value to 25. Save changes.
Now, your X-axis minimum is limited to 25 mm (in machine coordinates). Remember this when the
laser is not in use. Set working coordinates only when the machine position in the X-axis is equal or
higher than 25.
When a PLH3D-6W laser head is mounted, an additional 50mm in the X-axis has to be added. So the
minimum limit in this axis will be 75mm.
Generating G-code
To cut or engrave, it is necessary to generate the appropriate G-code using the following commands:
M307 H3 A-1 C-1 D-1
Disable Heater output on pin #8 (HEATER3)
M452 P3 R255 F1000
Enable Laser mode, on output 3 (HEATER3), with max PWM value 255, and a
PWM frequency 1000
M3
Laser ON
M5
Laser OFF
SXXX
PWM duty where XXX is number between 0 and 255 (e.g.: 0 = 0% and 255 =
Содержание ooznest WorkBee
Страница 17: ...WorkBee Laser Upgrade Setup Guide 18 25 3 Disconnect the docking station and attach the nozzle...
Страница 19: ...WorkBee Laser Upgrade Setup Guide 20 25 7 In the G CODE Settings tab choose the Duet 2 profile...
Страница 20: ...WorkBee Laser Upgrade Setup Guide 21 25 8 In the DXF G CODE tab click the Generate G code button...
Страница 24: ...WorkBee Laser Upgrade Setup Guide 25 25...


