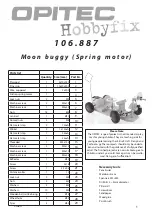
9
E106887#2
Instructions
Biegeschablonen M1:1
Öse
Plan view
Side view
Bend up at 90
degrees!
Страница 1: ...0 19 Screw 1 2x16 20 Screw 1 2 9x9 5 21 Distance roller 1 10 22 Lock nut 3 M4 23 Nuts 2 M3 24 Washers 5 M3 25 Washers 10 M4 26 Wooden ball mit Bohrung 1 15 27 Wheel hubs 4 22 28 Tyres 4 40 29 Necessar...
Страница 2: ...ographs 3a 3e Note The direction of the motor is important 5 Seats and consul Glue the seat piece A 10 x 20 x 70mm on to the plywood seat backs Photographs 5a 5c PC consul Assemble and glue parts C an...
Страница 3: ...w add a washer 26 and then insert the machine screw through from underneath through the second hole from the front in the plywood chassis Photograph 7b Place the axle holder on top so that it is centr...
Страница 4: ...the machine screw M4 x 50mm 7 Photograph 13a Insert the machine screw up through the central hole in the chassis 13a add another Washer the two nuts Part 8 tighten the lock nuts so that the machine sc...
Страница 5: ...the long side of the pine piece Photographs 16 16C On the long grain side fix a 7 hole metal strip with a screw and washer Photographs 16b 16e 17 Add a washer part 26 on the machine screw M4 x 70mm A...
Страница 6: ...e piece Part 12 long hole and finish with a washer and nut Photographs 18a 18e 19 Mount the paraobol reflector on the same machine screw M4 x70mmon the camera and fix with two lock nuts Part 8 Fertig...
Страница 7: ...7 E106887 2 10 35 60 70 6 20 58 105 135 180 165 185 200 250 3 3 4 4 4 3 5 20 38 70 30 20 30 200 20 30 20 A B Chassis Seat backs Seat backs Pine strip D C Plans SCALE 1...
Страница 8: ...z hlers Der Computer berechnete aus deren Daten die aktuelle Position relativ zum Landemodul Die Kommu nikationsr stung sowie zwei Kameras waren an der Front des LRV befestigt Mission Apollo 15 Gefahr...
Страница 9: ...9 E106887 2 Instructions Biegeschablonen M1 1 se Plan view Side view se Bend up at 90 degrees...