background image

8

E105026#1

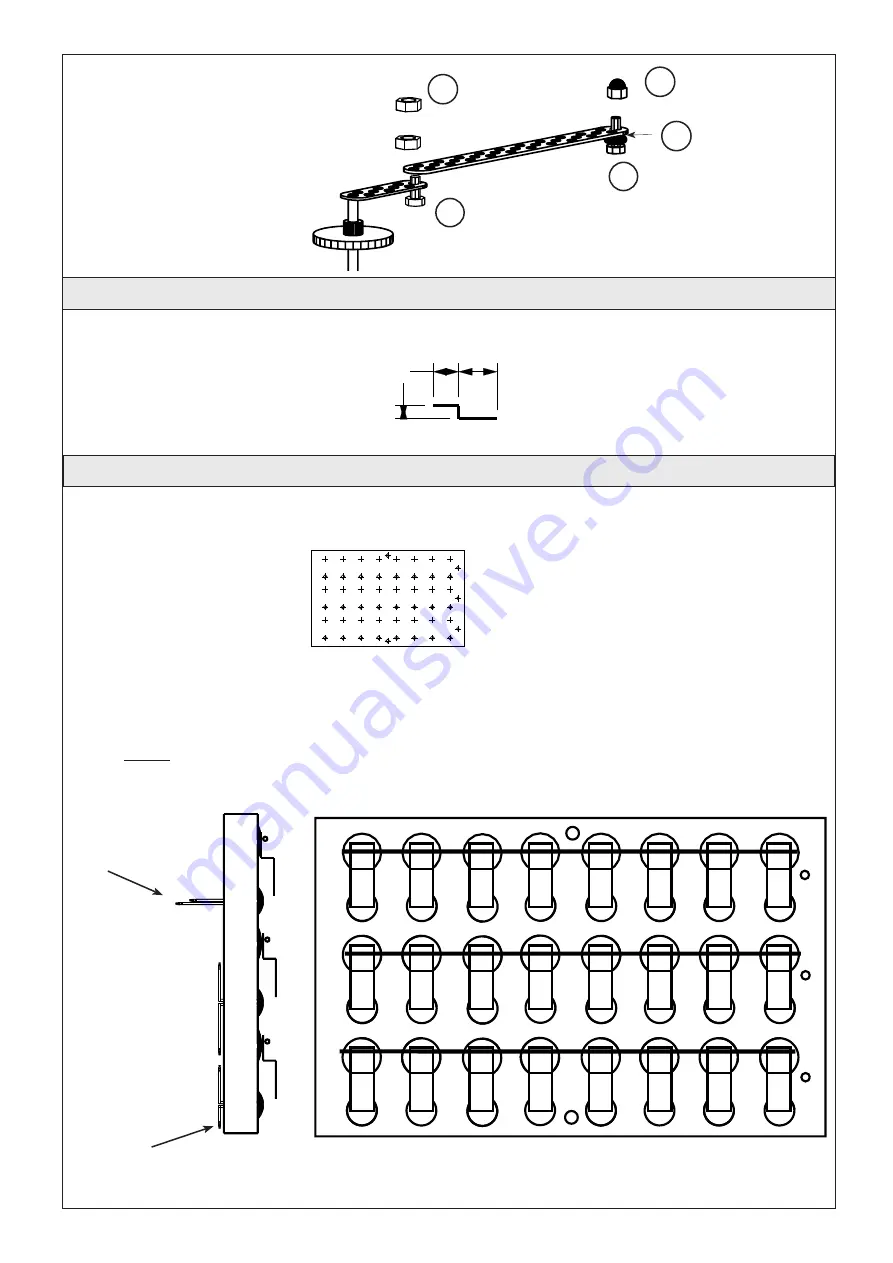
5.6. Making the switches:

• Cut the bronze band (11) into 24 strips each 18mm long and bend as shown.

5.7. Making the switch panel

• Mark out the position of the switches using the pattern on page 11 on the switch panel (3) 

8 x 75 x 120 mm. Mark out and drill the holes, 3 mm dia for the split pins, 3 mm dia for the screws and

2 mm for the wire.

• Cut three lengths, 100 mm long from the welding rod (9)

• Insert the drawing pins (28) into the panel. Push the split pins (30) through the holes and bend. 

Tin the drawing pin heads.

Note:


use a multicore solder with flux.


• Solder the switches to the drawing pin heads.

• Solder the bridging rods in position. (welding rod)

6

9

3

Bend  

the split pins

Snip off the excess legs from the lower row of split 

pins with side cutters

27

22

19

19

26

Содержание 105.026

Страница 1: ...young children They are teaching aids for young people learning the skills of Craft Design and Technolo gy These projects should only be undertaken and tested with the guidance of a fully qualified a...

Страница 2: ...out using a pattern or measurements Joining Use PVA wood glue screws Finish Use wax fluid or solid Wood paint undercoat top coat Wood stain coloured and water soluable finish with varnish 2 4 Materia...

Страница 3: ...d the work securely on a sawing board The Puk saws in our catalogue are ideal for sawing dowel and small strips Note Werkst ck einspannen Sanding Use a block and glasspaper for finishing all flat surf...

Страница 4: ...x 250 mm 2 Double gear 10 50 Z hne rot 2 Double gear 10 50 Z hne wei 3 Motor drive gear 1 Angle plates 2 Distance pieces 2 Distance tubes 25 mm 2 Motor R 20 1 Threaded rod 3 x 20 mm 2 Threaded rod 3 x...

Страница 5: ...making the switches 5 7 Making the switch panel 5 8 Wiring the circuit 5 9 Testing 5 10 Gluing the shelf in position 5 1 Assembling the hinges sides and door Screw 33 the hinges 31 on the door 5 accor...

Страница 6: ...23a 23b as shown in dia 2 These cuts are to ensure that the red gears 12 are a very tight fit on the shafts Clean up any burr on the end of the shaft Mount the holed metal strip on the end of the shaf...

Страница 7: ...ly on to the two strips Take the remaining holed metal strip 10 and shorten it to 11 holes long approx 93mm remove burr and round the ends Finally use the machine screw 19 nuts 22 and domed nut 27 to...

Страница 8: ...the split pins 3 mm dia for the screws and 2 mm for the wire Cut three lengths 100 mm long from the welding rod 9 Insert the drawing pins 28 into the panel Push the split pins 30 through the holes an...

Страница 9: ...chosen the code 4 6 3 To open the door you must press the fourth switch in the top row and the sixth switch in the middle row at the same time The relay is now activated and you only have to press th...

Страница 10: ...10 E105026 1 5 10 Gluing the shelf in position...

Страница 11: ...11 E105026 1 Pattern Switch panel scale 1 1 fixing screw fixing screw cable drawing pins split pins...

Отзывы: