background image

10

Introduction

Omation Model 2112 User Manual - OPEX Corporation use only - not for distribution

Output tray position

You can adjust the position of the output tray, if needed, for processing larger 
envelopes. The output tray can be in one of three positions: against the 
machine, one inch away, or two inches away.

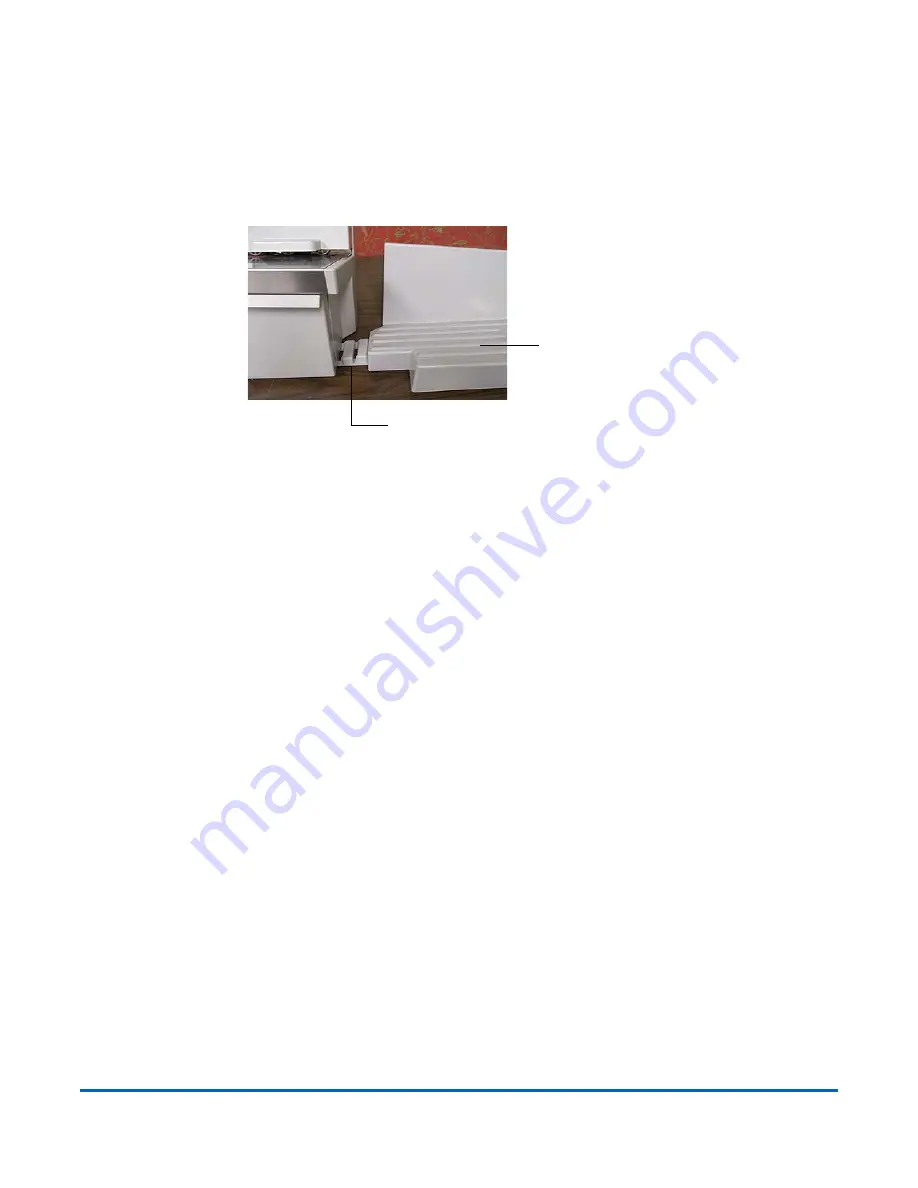
Figure 4: Output tray extended

Simply lift the output tray up, move it to the desired position, and press it down 
onto the stepped tray hitch (see Figure 4).

Stepped tray hitch

Output tray

Содержание OMATION 2112

Страница 1: ...User Manual Model 2112 June 2015...

Страница 2: ...PEX Technical Writers via email at GroupTechwriters opex com No portion of this manual may be reproduced in any form or by any means or stored in a database or retrieval system without the express wri...

Страница 3: ...ble of Contents 3 Omation Model 2112 User Manual OPEX Corporation use only not for distribution Table of Contents Safety 4 Introduction 6 Routine maintenance 11 Optional assemblies 12 Specifications 1...

Страница 4: ...uipment with the cover doors removed Do not set liquids on the Model 2112 which could spill into the machine Before cleaning make sure all power is disconnected Do not use high pressure canned air tha...

Страница 5: ...by turning the Cut No Cut Knob to the desired selection position Counter Function This displays the count for individual pieces of mail processed in either the No Cut or Cut mode Even if power is los...

Страница 6: ...sh This is because the machine cannot determine if the chip bin is full and needs to be emptied Open the bin and empty the chips if any Removal and replacement of the chip bin resets the indicator An...

Страница 7: ...andful of mail approximately 50 pieces onto the Envelope Feed Hopper Be sure to justify the side of the mail to be cut against the back of the Feed Hopper The Feed Thumper a rotating cam helps to jog...

Страница 8: ...see Figure 2 grasp the right end of the Nip Arm pulling upward and remove Reverse this procedure to re install the Nip Arm The Omation 2112 will not operate until the Nip Arm is properly installed Al...

Страница 9: ...mbly see Nip Arm Removal Installation on page 7 Figure 3 Cutter adjustment detail 2 Reference Figure 3 and make adjustments as described below For a deeper cut push the release button and with a Phill...

Страница 10: ...f the output tray if needed for processing larger envelopes The output tray can be in one of three positions against the machine one inch away or two inches away Figure 4 Output tray extended Simply l...

Страница 11: ...ressed air because of the flammable nature of many of these products There is a risk of equipment malfunction and or injury associated with the use of aerosol cleaners on OPEX equipment prior to the o...

Страница 12: ...ion use only not for distribution Optional assemblies The following assemblies can be ordered as replacement parts for the Omation Model 2112 Figure 5 Service Nip Arm Assembly 9130755 Figure 6 Retard...

Страница 13: ...Optional assemblies 13 Omation Model 2112 User Manual OPEX Corporation use only not for distribution Figure 8 Chip Bin Assembly 9131400...

Страница 14: ...2 mm Height 14 5 368 3 mm Weight base model 47 lbs 21 32 kg Speed Up to 400 envelopes minute 6 envelope Envelope Sizes Types All sizes and types including overnight envelopes Thickness Up to 0 188 4 8...

Отзывы: