25
Getting Started
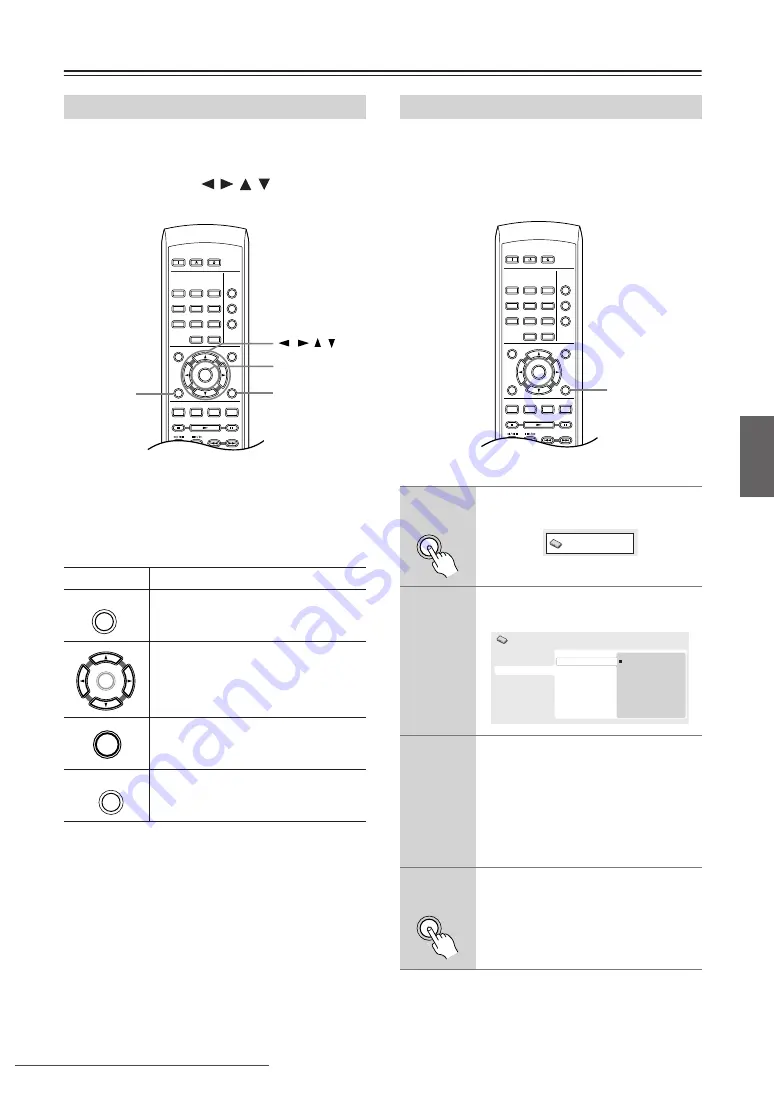
For ease of use, this player makes extensive use of graph-
ical on-screen displays (OSDs).
All the screens are navigated in basically the same way,
using the cursor buttons (
/
/
/
) to change the
highlighted item and pressing ENTER to select it.
Note:
• From here on in this manual, the word “select”
generally means use the cursor buttons to highlight
an item on-screen, then press ENTER.
If you have a widescreen (16:9) TV, you should setup the
player so that the picture will be presented correctly. If
you have a conventional (4:3) TV, you can leave the
player on the default setting and move on to the next sec-
tion.
Using the on-screen displays
Button
What it does
Display/exit the on-screen display.
Changes the highlighted menu item.
Selects the highlighted menu item
(both ENTER buttons on the remote
work in exactly the same way).
Returns to the main menu without sav-
ing changes.
ON
STANDBY
PLAY
MODE
DISPLAY
DIMMER
MENU
SETUP
TOP MENU
RETURN
AUDIO
ANGLE SUBTITLE ZOOM
CLEAR
OPEN/
CLOSE
ENTER
1
2
3
6
7
8
9
0
4
5
ENTER
/
/ /
SETUP
RETURN
SETUP
ENTER
ENTER
RETURN
Setting up the player for your TV
1
Press SETUP and select “Initial
Settings”.
2
Select “TV Screen” from the
“Video Output” settings.
3
If you have a widescreen (16:9) TV,
select “16:9 (Wide)”.
If you have a conventional (4:3) TV, you
can change the setting from 4:3 (Letter
Box) to 4:3 (Pan & Scan) if you prefer.
See “Video Output settings” on page 46
for more details.
4
Press SETUP to exit the menu
screen.
ON
STANDBY
PLAY
MODE
DISPLAY
DIMMER
MENU
SETUP
TOP MENU
RETURN
AUDIO
ANGLE SUBTITLE ZOOM
CLEAR
OPEN/
CLOSE
ENTER
1
2
3
6
7
8
9
0
4
5
SETUP
SETUP
Initial Settings
Digital Audio Out
Video Output
Language
Display
Options
Speakers
TV Screen
Component Out
4:3 (Letter Box)
4:3 (Pan&Scan)
16:9 (Wide)
Initial Settings
SETUP


