Joystick Controller
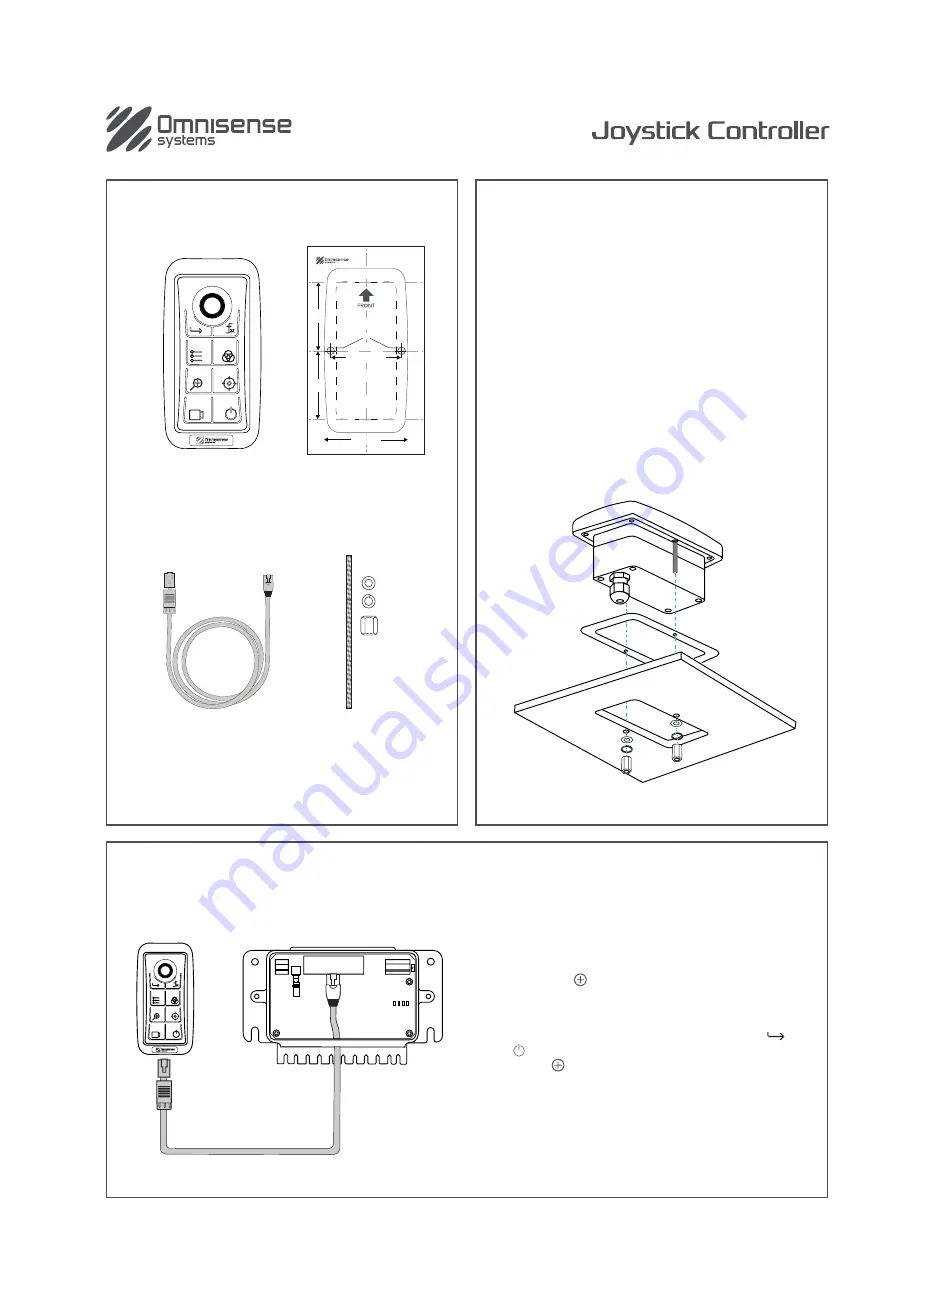
1. What’s in the box
2 X (M5 X 40)
studs, washers,
spring washers
and nuts
Mounting Decal
6.56ft (2m) Cable
Joystick Controller
Mounting Decal
2.13in
(54mm)
2.6 in (66mm)
2.2in (56mm)
0.24in (6mm) diameter
Cutout area
2.17in
(55mm)
2. Installation
The Joystick Controller must be panel mounted. When correctly
installed, the top side (front) of the Joystick Controller is waterproof
and suitable for open deck installation.
When mounting the Joystick Controller, select a location that
provides the best ergonomics for controller operation. The housing
of the Joystick Controller is designed to provide a stable grip while
your thumb or finger moves the knob.
1. The Joystick Controller has a flush back that can be easily
fitted onto any flat surface. Select a suitable location close to
your Multi-function Display (MFD)/Monitor.
2. Using the Joystick Controller Mounting Decal provided, mark
and cut out the space to mount the Joystick Controller.
3. Drill the 0.24in (6mm) holes required for attaching the
Joystick Controller.
4. Mount the Joystick Controller and use the bolts provided to
secure it in place.
3. Connecting the cable
Connect one end of the Joystick Controller Cable to the [Controller]
port in the Junction Box and the other end to the Joystick
Controller.
4. Connecting the Joystick Controller
To connect your Joystick Controller, launch the User Interface (UI).
Proceed to Settings > Controller and select [Scan]. The system
will automatically scan for a Joystick Controller connected to the
Junction Box.
Once the Joystick Controller is found, the serial number will be
displayed. Select
to connect the Joystick Controller and it will
be ready for use.
If the system is unable to locate the Joystick Controller, perform a
factory reset to the Joystick Controller by holding down the
and button simultaneously for 10 seconds. Upon completing the
reset, select
again to connect the Joystick Controller.


