OmniPrint OM220 Скачать руководство пользователя страница 8


4. Ribbon Installation 
 

Use a Ribbon that meets the specifications below. Only use ribbons that are  
from a known source. Make sure data is not being transmitted to the printer while 
installing the ribbon. 

 
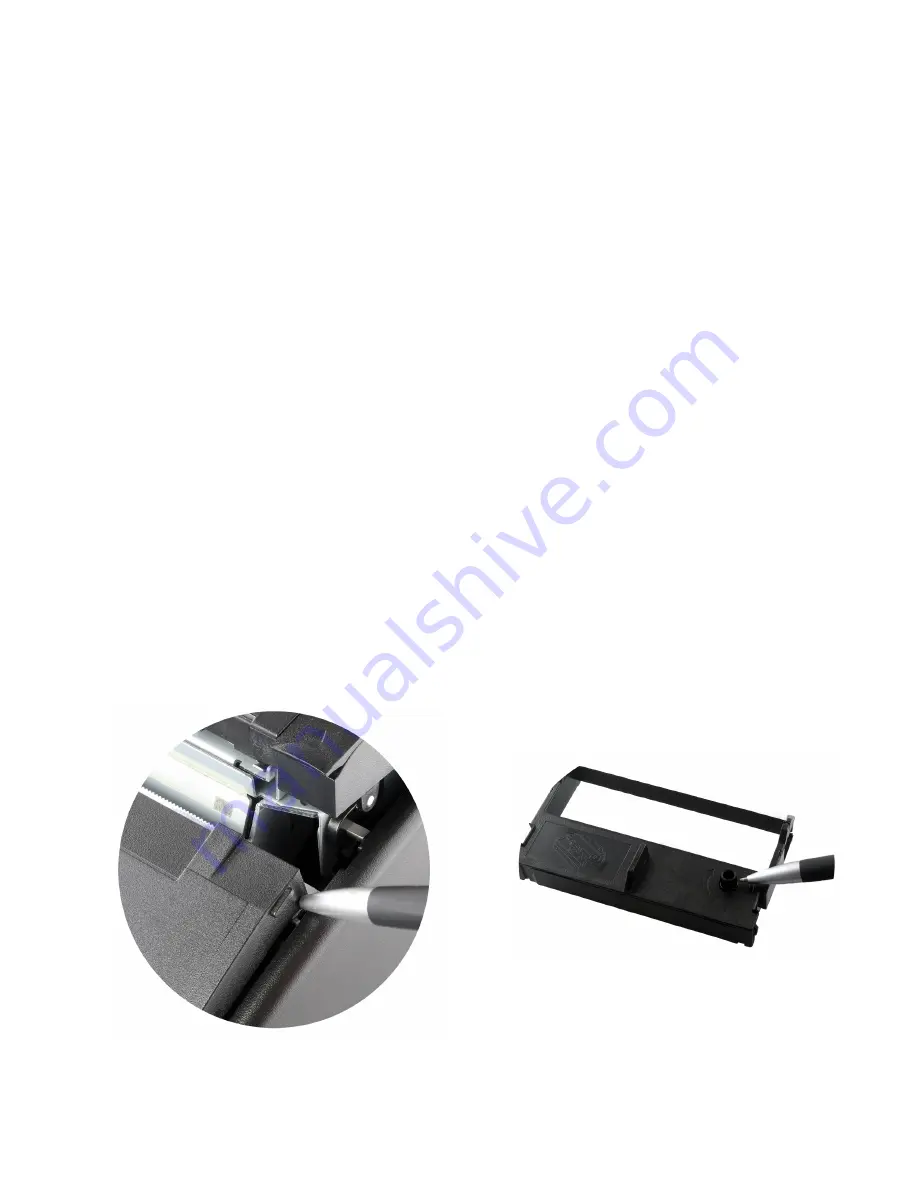
1.  To open the printer cover lift the cover up from the front as indicated in illustration “a”. 
2.  Open the cover fully and remove the paper from the mechanism. 
3.  Please make sure no objects are dropped inside and avoid touching any internal parts of the 

printer including the paper cutter and print head with any sharp object. 

4.  Remove any slack from the ribbon buy turning the spool in the direction shown on the ribbon 

cartridge. Illustration “b” 

5.  Make sure the ribbon is positioned as shown in Illustration “c”. Place the leading edge of the  

ribbon between the print head and the platen as shown.  “d” 

6.  Push down on the body of the ribbon cartridge until it seats in place as shown in Illustration  

“e”. Again, remove any slack in the ribbon caused by installation.  

7.  Reload the paper roll per the instructions in section “3”.  
8.  To reorder ribbons please use part number ERC-700. 


“a” 

“b” 

Lift off the Ribbon cover


Remove ribbon slack


Содержание OM220

Страница 1: ...1 OM220 User s Manual Revision 1 0 March 26 2018 OMNIPrint Inc 1923 East Deere Ave Santa Ana California 92705 U S A T 949 833 0080 F 949 833 0040 www omniprintinc com...

Страница 2: ...2 Front View 1 Printer Appearance Rear View Left Side View Right Side View...

Страница 3: ...s are on printer is out of paper When both Error and Paper LEDs are off printer has paper When only the Paper LED is on paper is low 3 Power Condition When Power LED is on printer is turned on When Po...

Страница 4: ...Unpacking The items illustrated below are included in the printer package If any items are damaged or missing please contact your supplier for assistance POWER ADAPTER POWER CORD INTERFACE CABLE MANUA...

Страница 5: ...Input 100 240VAC 50 60Hz Output 7 5VDC 2 0A Please replace with one of the following part numbers OMPS5200 2402 NA North America Japan Taiwan VDE Europe except Italy Switzerland Brazil India BSI UK HK...

Страница 6: ...and avoid touching any internal parts of the printer including the paper cutter and print head with any sharp object 4 Make sure the paper roll is positioned as shown in Illustration b At least 4 inch...

Страница 7: ...7 f Close cover slowly until it Locks c d Press the paper feed switch Tear off excess paper...

Страница 8: ...ter including the paper cutter and print head with any sharp object 4 Remove any slack from the ribbon buy turning the spool in the direction shown on the ribbon cartridge Illustration b 5 Make sure t...

Страница 9: ...9 c d e f Place ribbon between print head and platen Press ribbon body into place Installed ribbon...

Страница 10: ...all Philips screw driver to remove the cover By changing the switch positions you can modify the default setting for various functions such as cutter mode character set beeper printer speed etc NOTES...

Страница 11: ...sure the printer is turned off and then while pressing the Paper Feed button turn the printer on The printer starts printing its factory setting Example Only 6 1 Code Page Setting Refer to the Self T...

Страница 12: ...1 6 inch line spacing 18 ESC 3 Set line spacing using minimum units 19 ESC Select peripheral device 20 ESC Cancel user defined characters 21 ESC Initialize printer 22 ESC D Set horizontal tab position...

Страница 13: ...printer ID 50 GS L Set left margin 51 GS P Set horizontal and vertical motion units 52 GS V Cut paper 53 GS W Set printing area width 54 GS Set relative vertical print position in page mode 55 GS Exe...

Страница 14: ...ed Consult your authorized reseller or service representative for help Properly shielded and grounded cables and connectors must be used in order to meet FCC emission limits Proper cables and connect...

Отзывы: