background image

17 


CLEANING PROCEDURES 


Machine Operation (Tank 1) 


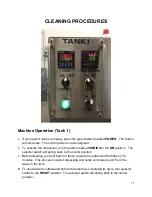
If you haven’t done so already, press the green button marked 

POWER.  

The button 

will illuminate.  The control panel is now energized. 


  To activate the ultrasound, turn the switch marked 

SONICS 

to the 

ON

 position.  The 

selector switch will spring back to the center position.


  Before cleaning your first batch of items, operate the ultrasound for fifteen (15) 

minutes.  This process is called degassing and helps eliminate any air from the 
water in the tank.


To deactivate the ultrasound before the timer has completed its cycle, turn selector 
switch to the 

RESET 

position.  The selector switch will spring back to the center 

position.


Содержание Viking PDX3

Страница 1: ...Omegasonics Ultrasonic Cleaning Equipment Operation Instruction Manual Viking Products PDX3 Model OMG 5022 DX3 T2U 208 240 VAC 50 60 Hz Read all instructions thoroughly before operating this equipmen...

Страница 2: ...ng Procedures 17 Machine Operation Tank 1 17 General Cleaning Tank 1 18 Operation and Rinsing Tank 2 19 Drying Tank 3 19 Specific Cleaning Procedures 20 Aluminum Housings 20 Electrical Components 21 M...

Страница 3: ...d cleaning speed and consistency when compared with simple soaking or immersion with agitation Additionally the bubbles are small enough to penetrate even microscopic crevices cleaning them thoroughly...

Страница 4: ...baskets tongs or wires to insert or remove parts from the tank Do not operate the unit with wet hands Use only biodegradable cleaning agents Never use solvents or flammable cleaning solvents without a...

Страница 5: ...seals the chamber permitting re circulated warm air to dry the items placed within the chamber The temperature of the air up to 180 F is adjusted by the digital temperature controller If the Dryer se...

Страница 6: ...to the external vent Similar to your home hot air clothes dryer There is an air flow control damper located on the back side of the machine This is used to control the flow of humid air leaving the d...

Страница 7: ...de the drying chamber can become very hot Avoid touching the walls of the drying chamber Only qualified personnel should have access to the inside of the console Note make sure the power is disconnect...

Страница 8: ...8...

Страница 9: ...9...

Страница 10: ...e on a level surface and lock all wheels Be sure all drain valves are completely closed handles perpendicular to the drain before filling the tanks Locking Wheels Tank 1 Main Bath Drain Tank 2 Weir Dr...

Страница 11: ...level sensor just below the spray bar it will be activated allowing the machine to function properly Plug the power cord into a proper electrical outlet and press green POWER button Unlock each lid by...

Страница 12: ...f this white spotting occurs and is not desired it will be necessary to use soft water drinking water or distilled water in the machine The level of final cleanliness will dictate the water source use...

Страница 13: ...Set Value is adjustable ALM 1 If this light is on it means that the machine is currently heating It will shut off once the desired temperature has been reached OUT If this light is on it means that th...

Страница 14: ...g the Set Value this lower display will flicker indicating the new value is not set To make this value permanent press the RETURN Key Experience shows that the optimum ultrasonic cleaning temperature...

Страница 15: ...display The ultrasound is factory set to 15 00 minutes To adjust the preset value press the blue keys Press the up arrow key to increase or down arrow key to decrease Left most blue key corresponds to...

Страница 16: ...lters and spray the filtered water back into the wash tank through the spray bar The pump and heat circuits can be operated simultaneously However the pump will not operate while the ultrasound is in...

Страница 17: ...CS to the ON position The selector switch will spring back to the center position Before cleaning your first batch of items operate the ultrasound for fifteen 15 minutes This process is called degassi...

Страница 18: ...be cleaned should not exceed thirty percent 30 of the total tank volume Once the timer has been set activate the ultrasound by switching SONICS to ON Cleaning times will vary depending on the temperat...

Страница 19: ...hen lowering the items into the tank via baskets or tongs be sure to arrange the items so they are not touching the bottom of the tank They should be suspended at least above the tank bottom This can...

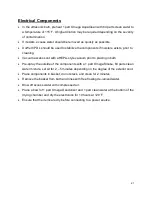
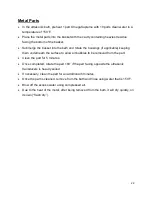
Страница 20: ...ngs In the ultrasonic bath preheat 1 part OmegaSupreme with 10 parts clean water to a temperature of 125 F Wipe off the readily accessible exterior excess from the parts to be cleaned Arrange the part...

Страница 21: ...PA style vacuum prior to placing in bath Pre spray the outside of the components with a 1 part OmegaSmoke 64 parts clean water mixture Let sit for 2 5 minutes depending on the degree of the exterior s...

Страница 22: ...ping them underneath the surface to allow air bubbles to be removed from the part Clean the part for 5 minutes Once completed rotate the part 180 if the part facing opposite the ultrasonic transducers...

Страница 23: ...Buff the inside of the tanks with a clean soft cloth Do not use steel wool cleaning pads as they are too abrasive and will scratch the tank surface Rinse the tanks again If the tanks will not be used...

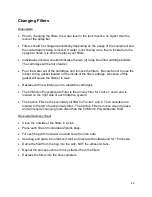
Страница 24: ...er s to leak Replace with new filter s and re install the cartridges The 50 Micron Polycarbonate Filter is the primary filter for Tanks 1 and 2 and is located on the right side of each filtration syst...

Страница 25: ...e the responsibility of the user This warranty does not include damage or product failure which results from cavitation erosion misuse abuse or transportation damage This warranty is limited to the or...

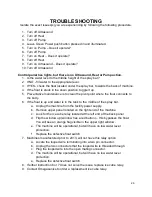
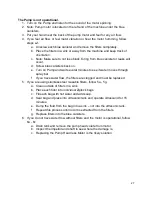
Страница 26: ...p and water is in the tank to the middle of the spray bar a Unplug the machine from the facility power supply b Remove upper panel located on the right end of the machine c Look for the ice cube relay...

Страница 27: ...minutes to see if water moves through spray bar f If you have water flow the filters are clogged and must be replaced 5 If you are using stainless steel reusable filters follow 5a 5g a Clean outside o...

Страница 28: ...charcoal white they must be replaced 5 Call Omegasonics to order new heat blanket s Pump is causing the circuit breaker to trip 1 Likely cause is a faulty or shorted motor 2 The timer could also be sh...

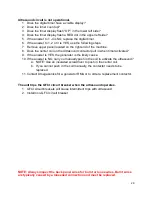
Страница 29: ...vates 9 If the answer is YES the generator is the likely cause 10 If the answer is NO can you manually push in the coil to activate the ultrasound a NOTE Use an insulated screwdriver to push in the ce...

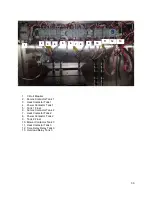
Страница 30: ...k 1 4 Power Contactor Tank 1 5 Tank 1 Float 6 Sonics Contactor Tank 2 7 Heat Contactor Tank 2 8 Power Contactor Tank 2 9 Tank 2 Float 10 Blower Contactor Tank 3 11 Heat Contactor Tank 3 12 Time Delay...

Страница 31: ...Timer Digital Temperature Controller 3 Digital Temp 3 Position Selector Sonics and Drying Cycle 3 Switch 3 Position Selector 2 Position Selector Heat and Pump 4 Switch 2 Position Selector Power Butto...

Страница 32: ...osphate rust inhibitors or with another cleaning agent containing rust inhibitors OmegaCitriSurf 2250 Designed for industrial and aerospace applications where stainless steel passivation the removing...

Страница 33: ......

Страница 34: ......

Отзывы: