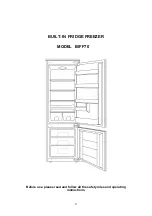
APPLIANCE DETAILS
ELECTRICAL DETAILS:
Rated Voltage: 220‐240 Vac 50 Hz.
Supply Connection: 10 A domestic socket.
Max Rated Inputs: See data label on unit.
This information can be found on the rating
plate (data label) affixed to the rear of the
appliance
Dimensions (WxDxH): 495x560x828mm
Weight: 23kg
1. Door Hinge.
2. Freezer Compartment.
3. Thermostat Control.
4. Adjustable Shelf.
5. Small Glass Shelf.
6. Adjustable Feet.
7. Upper Door Shelf
8. Central Door Shelf
9. Lower Door Shelf
OPERATING INSTRUCTIONS
Once plugged into the power supply and turned on, adjust the thermostat control to the coldest setting (7) and
allow the appliance to run for 2‐3 hours before placing any food inside. Adjust the thermostat to the central mark
(3‐4) and then adjust up or down to suit the food inside, the room temperature, introduction of large amounts of
warm food, number of times door is opened etc.
To turn off, adjust the setting to 0.
During use, moisture from the air & food can collect inside the appliance forming a layer of ice. Ice will limit the
transfer of heat out of the appliance. If this becomes more than 2mm thick, the appliance should be defrosted.
Turn the thermostat to 0 & remove any food from the freezer compartment and refrigerator. Open the outer door
& prop open the freezer compartment door. Allow the ice to melt and let water collect in the tray under the
freezer compartment. Discard any water and ice and replace tray. To speed up the process, a bowl of warm water
(~50°C) can be placed inside the compartment. Do not scrape ice from the compartment walls & do not use any
other heating devices (as it is a safety hazard and may damage the appliance).
4


