background image

RTD  THERMOMETER 

3


4. OPERATION INSTRUCTIONS 


4.1 Power-Up 

Press the “

  ” key to turn 

ON

 the thermometer and Press and hold “

  ” buttons for 3 seconds 

to 

OFF

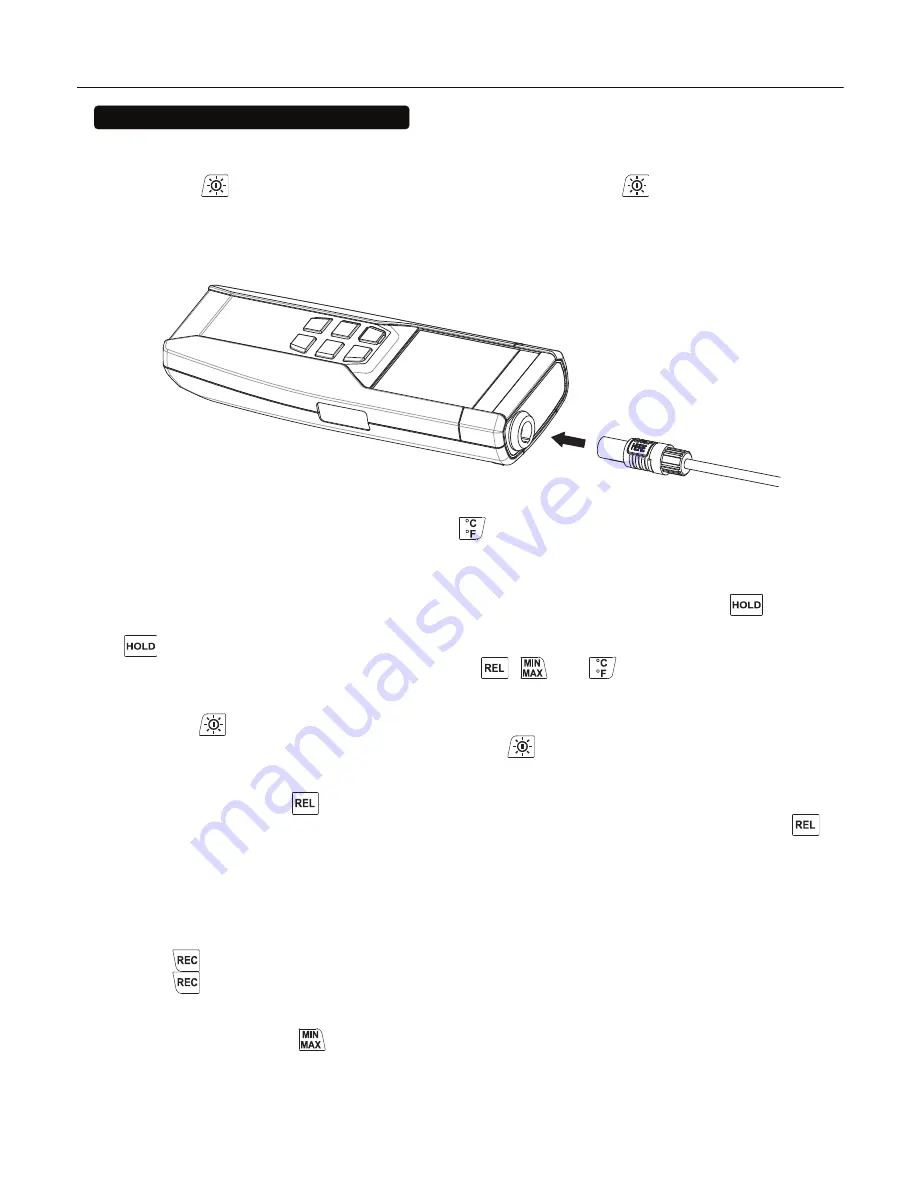
4.2 Connection the Temperature Pprobe 

For measurement, plug the temperature probe into the input connectors. 


4.3 Selecting the Temperature Scale 

When the meter is first powered on, the default scale setting is set at Celsius (°C) scale. The user  
may  change  it  to  Fahrenheit  (°F)  by  pressing 

  button  and  vice  versa  to  Celsius  and  change 

the default scale. 

4.4 Data-Hold Operation 

The  user  may  hold  the  present  reading  and  keep  it  on  the  display  by  pressing  the 

  button. 

When  the  hold  data  is  no  longer  needed,  one  may  release  the  data-hold  operation  by  pressing 

  button again. 

When the meter is under Data Hold operation, the 

  and 

  button are disabled. 

4.5 Back light Operation: 

Press the 

  button will turn the back light on and Pressing it once again will it turn off. 

The meter will turn the back light off if there is no push 

  button for 30 seconds.


4.6 Relative Operation: 

When one presses the 

  button, the meter will memorize the present reading and the difference 

between  the  new  reading  and  the  memorized  data  will  be  shown  on  the  display.  Press  the 


button again to exit the Relative operation. 

4.7 Record Operation: 

Starting  and  Stopping  Logging  Setup,  memory  clear,  and  PC  communications  are  inaccessible 
during logging. 


Set the logging interval. (See “Changing the Logging Interval.”) 


Press 


button to start logging. The display shows “

REC

”. 


Press 

  button again to stop logging. 

4.8 MAX/MIN Operation: 

When  one  presses  the 

  button  the  meter  will  enter  the  MAXMIN  mode.  Under  this  mode  the 

maximum value, minimum value is kept in the memory simultaneously and updated with every new 
data. 
When the 

MAX

 symbol is displayed, the Maximum reading is shown on the display. 

Содержание HH376

Страница 1: ...omega com e mail info omega com For latest product manuals omegamanual info User sGuide HH376 Data Logger RTD Thermometer Shop online at MADE IN TAIWAN ...

Страница 2: ... Managed by the United Kingdom Office Toll Free 0800 466 342 TEL 33 0 161 37 29 00 FAX 33 0 130 57 54 27 e mail sales omega fr Germany Austria Daimlerstrasse 26 D 75392 Deckenpfronn Germany Toll Free 0800 6397678 TEL 49 0 7056 9398 0 FAX 49 0 7056 9398 29 e mail info omega de United Kingdom OMEGA Engineering Ltd ISO 9001 Certified One Omega Drive River Bend Technology Centre Northbank Irlam Manche...

Страница 3: ...ld Operation 3 4 5 Back light Operation 3 4 6 Relative Operation 3 4 7 Record Operation 3 4 8 MAX MIN Operation 3 4 9 Auto Power Off 4 4 10 Low Battery Condition 4 5 Temperature Measurement 4 6 Setting the Time 5 7 Changing the Logging Interval 5 8 Clearing Memory 5 9 Temperature Meter Calibration Setup 6 10 Communicating with a PC 7 Testlink HH376 Software 7 11 Power Preparation 11 12 Maintenance...

Страница 4: ...00 C 0 05 reading 0 1 C 148 F 752 F 0 05 reading 0 2 F Temperature Coefficient For ambient temperatures from 0 C 18 C and 28 C 50 C for each C ambient below 18 C or above 28 C add the following tolerance into the accuracy spec 0 005 of reading 0 01 C 0 005 of reading 0 02 F Note The basic accuracy Specification does not include the error of the probe please refer to the probe accuracy specificatio...

Страница 5: ...r Off is enabled REC Readings are being logged REL The reading is now under Relative Mode C F Centigrade and Fahrenheit indication This indicates that the minus temperature is sensed h m hours minute 1 Pt type temperature sensor connector 7 HOLD button 2 LCD display 8 C F control button 3 Power ON OFF and Back light button 9 PC Interface 4 Relative readout button 10 External DC 9V power supply jac...

Страница 6: ...ck light Operation Press the button will turn the back light on and Pressing it once again will it turn off The meter will turn the back light off if there is no push button for 30 seconds 4 6 Relative Operation When one presses the button the meter will memorize the present reading and the difference between the new reading and the memorized data will be shown on the display Press the button agai...

Страница 7: ...it is under auto power off mode The meter will power itself off after 30 minutes if there is no key operation One may press and hold button and then power on the meter there will be two successive beeps to indicate that the auto power off is disabled 4 10 Low Battery Condition The temperature meter low battery indication shows as follows Low battery Replace the batteries 5 TEMPERATURE MEASUREMENT ...

Страница 8: ...g down REC or C F causes the number to change more quickly 7 CHANGING THE LOGGING INTERVAL The logging interval determines how often the thermometer stores logged readings in memory 7 1 Press and hold button and then power on the meter to enter setup mode 7 2 Press button to enter Interval setting mode The left two digits blink 7 3 Press or button until the display shows the correct hour 24 hour f...

Страница 9: ... offset until the display reading matches the calibration temperature Press and hold buttons and then power on the meter to enter setup mode Press button to enter calibration mode in 3 seconds Press button to enter calibration mode in 3 seconds Press or button to confirm present Temperature value Press button twice to confirm selection Note To abort during the process press button to exit calibrat...

Страница 10: ... 7 3 Minimum Hardware Required PC or NoteBook with Pentium 800MHz or higher 128 MB RAM At least 50 MB hard disk space available to install SE376 Recommended screen resolution 800X600 or above 4 Install SE 376 1 We recommend closing all other applications before installing SE376 2 Insert setup CD disk to CD disk drive 3 Choose the Start button on the Taskbar and select Run 4 Type E SETUP and choose...

Страница 11: ...ick then input the new sampling rate The change will be effective immediately It will keep up to 5000 data points when data points exceed this limit the oldest 100 points will be replaced sequentially 6 Real Time Graph You can Zoom this graph by using mouse To Zoom 1 Press and hold the Shift key 2 Press the left mouse button and drag the cursor to select the new extents 3 Release the mouse button ...

Страница 12: ...a Logger When you have the thermometer connected to a computer select Load Data to start loading the recorded data from the thermometer There will be a progress indicator to show the loading progress If error occurs just click Load Data again After the data has been successfully loaded to a computer the left side window will show how many data sets were loaded and their detailed information start ...

Страница 13: ...port and turned thermometer on but it still shows NO CONNECTION A This could be caused if all serial ports are occupied by other applications Close all applications restart your computer and run SE376 again Q In TABULAR window I saved a file Can I use EXCEL to open this file A If the decimal separator is comma in your area you cannot use CSV file because CSV file uses comma to separate data This w...

Страница 14: ...have Clean the device and the window of the display with a clean lint free antistatic and dry cleaning cloth Do no use cleaning agents that contain carbon or benzenes alcohol or anything similar to clean the product since these substances damage the surface of the measuring instrument Moreover these fumes are hazardous to health and explosive Do not use tools with sharp edges screwdrivers metal br...

Страница 15: ... otherwise shall not exceed the purchase price of the component upon which liability is based In no event shall OMEGA be liable for consequential incidental or special damages CONDITIONS Equipment sold by OMEGA is not intended to be used nor shall it be used 1 as a Basic Component under 10 CFR 21 NRC used in or with any nuclear installation or activity or 2 in medical applications or used on human...

Страница 16: ...ine Paddlewheel Systems 䡺 Totalizers Batch Controllers pH CONDUCTIVITY 䡺 pH Electrodes Testers Accessories 䡺 Benchtop Laboratory Meters 䡺 Controllers Calibrators Simulators Pumps 䡺 Industrial pH Conductivity Equipment DATA ACQUISITION 䡺 Data Acquisition Engineering Software 䡺 Communications Based Acquisition Systems 䡺 Plug in Cards for Apple IBM Compatibles 䡺 Data Logging Systems 䡺 Recorders Print...

Отзывы: