15
Initial Setup
Sequence
If a key press is not
sensed within five
minutes, the Menu
System is automatically
exited and the
controller reverts to the
Operating Mode/
Process Value display.
These setup instructions
apply to PID-type
control outputs.
Many of the menu parameters you will need to set up the
controller for your application are interdependent. We
recommend following the steps below when configuring
your Series CN8200.
1) Place the unit in Standby Mode
as follows. Press the
Mode/Enter
key for three seconds. Press the Raise
or Lower key to select Standby. Press the Mode key
again and the upper display will alternate between
and the process value.
2) Input Type.
Press and hold Menu Access
key for three
seconds to access the menu system. The Input menu
will be displayed. Then press Mode/Enter
key
until
appears. Use Raise
or Lower
key to
select Input Type. If Input Type is set to one of the linear
input options, use the Mode/Enter
key to scroll to
scaling limits,
and
, before proceeding. Use the
Raise
or Lower
key to set low and high scaling
limits.
3) Output Type.
Press the Menu Access
key to display
. Use the Mode/Enter
key to index to the Output
Type parameter. Using the Raise
or Lower
keys,
select the correct Output Type for your application. Follow
these steps (using the Mode/Enter and Raise or Lower
keys) to set the Output Action, Cycle Time, and Limit
parameters for PID outputs. Alarm or on/off output
settings and displays will be different. Refer to Output
menu description on page 31.
14
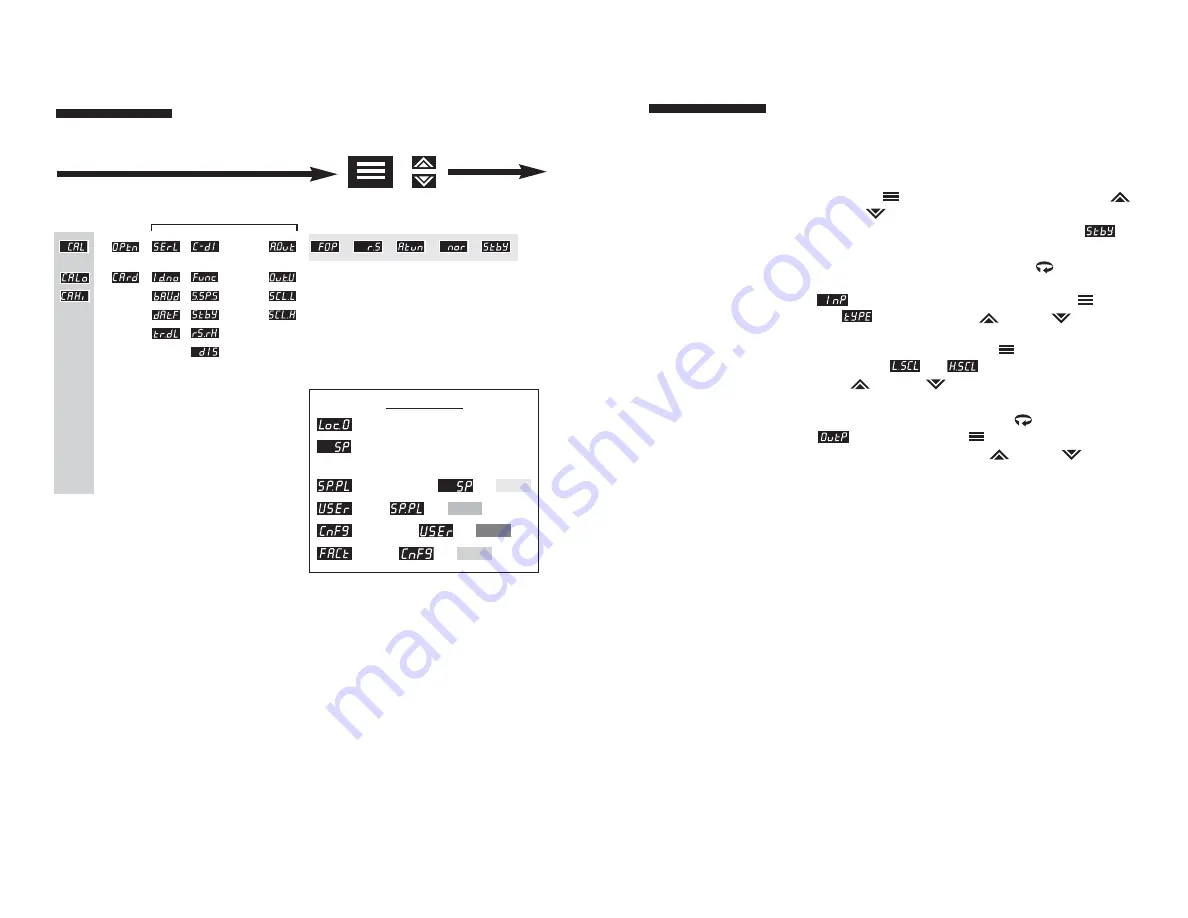
Mode/
Enter Key
(three seconds)
Functional When Option Card Installed*
Raise/
Lower Key
Security Levels
(Key Lockout) = No Access
(Setpoint) = Setpoint Value or Output
Percentage (Manual Mode)
(Setpoint plus Mode) =
Plus
(User) =
Plus
(Configuration) =
Plus
(Factory) =
Plus
*See options manual for
parameter selections.
Figure 11. Chart of Series CN8200 Menu System and
Security Levels
(CONTINUED TO FROM PREVIOUS PAGE)
Menu System
Overview


