3
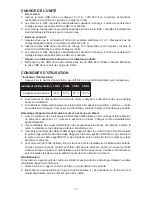
CHARGING THE UNIT
* At Home
1. Insert the power plug of the home charger provided with this product into the outlet and insert
the other plug into the input port of the host to charge the host.
2. The LEDs flash one by one during charge time. The host is full charged once the 4 power LEDs
are bright.
3. Charge time: approximate 4 ~ 5 hours if the battery is consumed completely.
4. Remove the power plug from the outlet to save your money once the battery is full charged.
* In A Vehicle
1. At first make sure the voltage of the car is 12V. Do not charge the host on 24V vehicles.
2. Insert the power plug of the car charger provided with the product into the cigarette lighter
socket and insert the other plug into the input port of the host to charge the host.
3. The LEDs flash one by one during charge time. The host is full charged once the 4 power LEDs
are alight.
OPERATIONAL GUIDANCE
* Power Indicator
1. Press the power button to show power indicator light, see below.
Power Indicator
1 LED
2 LED
3 LED
4 LED
Battery Capacity
25%
50%
75%
100%
2. To ensure optimum condition of unit battery, charge fully as soon as possible after use.
3. If the power indicator light remains off after switching to the "on" position, the unit cell is fully
discharged. Please charge the unit as soon as possible to avoid damage.
Jump Start 12V Gasoline or Diesel Engines
1. With three power indicators are alight, this product can jumpstart vehicles of 12V gasoline /
motorcycle/diesel. Charge the host immediately to maintain the battery power in a good condi-
tion after jumpstarting vehicles.
2. Turn off all electric appliances in a car such as: air condition, car audio, lights and etc.
3. Insert the blue plug of Smart Jumpstart Cable to the EC5 socket of the host and the red light
on the cable top-box is alight. Connect the red clamp of Smart Jumpstart Cable to the positive
(+) terminal of the car battery and the black clamp to the negative (-) terminal and then turn the
ignition switch to start the engine.
4. If the green light on cable top box is alight which means that the cable clamp connection to
the battery in a vehicle is correct and then you can turn the ignition switch to start your engine.
If the red light on the cable top box is alight which means that the connection is incorrect, user
just switches the connection of two clamps on the battery and then the green light illuminates or
flashes before attempting to start the engine.
5. After the vehicle engine is started, the cable top-box flashes and cuts off the power circuit to
meet inverse charge protection.
6. Once the unit connected to the vehicle battery, the cable top-box begins to count. If the time
exceeds 45 seconds and the unit cable top-box enters dormancy mode showing a slow flash
red light. Just remove the red clamp from a vehicle battery and connect it back. The green light
illuminates again and then users can start the vehicle engine.
7. Remove the blue plug of Smart Jumpstart Cable from the EC5 of the host and then remove
the clamps of Smart Jumpstart Cable from the car battery.
Reset
If the red and green lights on the black box of the Smart Jump Start cable are not working during
jump starting the vehicle, please reset the jump starter as follows:
1. Remove the red clamp from the positive (+) terminal of the car battery.
2. Connect the red clamp back on the positive (+) terminal.
Now the green light is on again and
the product is ready for use.
Содержание 81100
Страница 16: ...16...


