background image

5

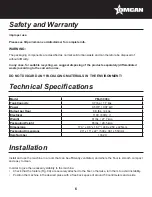
Safety and Warranty

• 

Read all warning labels applied to any part of the machine, and promptly replace them when they become 

worn or illegible.

• 

Only trained and authorised personnel should operate the machine.

•  If any part jams or locks up, before clearing make sure you first switch off the motor. DO NOT clean, oil 

or grease by hand any moving parts of the machine. In addition, all repair and setting operations of any 

moving parts with the motor running, are prohibited, unless the necessary precautions to prevent any 

accidents have been taken beforehand.

•  All moving parts are fitted with adequate guards and protections. Always remount them after removal for 

servicing.

•  Be sure to wear tight-fitting clothing without any loose parts. Never wear open or unfastened jackets, shirts 

or overalls.

•  To prevent accidents and ensure best performance, the machine must not be modified or altered unless 

authorised by the manufacturer nor must it be used in conditions or for purposes other than those for which 

it has been expressly designed. Any arbitrary modification implemented in this machine will automatically 

exempt the manufacturer from any liabilities for ensuing damage or injury.

• 

Always keep children away from the machinery.

• 

For reasons of hygiene, health and warranty, it is strictly prohibited to use the machine for the processing of 

substances other than foods. Any other uses are contrary to the applications as originally intended by the 

manufacturer, who shall consequently not be held liable for any damage to the machine itself or to other 

objects, or for any injuries to persons that may arise thereof. In taking the risk of misuse, the user will be 

held responsible for any consequences.

For your own personal safety, before connecting the machine to mains:

•  Check that power mains leading to distribution socket is fitted with an appropriate multipolar switch 

protected against overloads and shortcircuits.

•  Carry out all phase connections, as well as any neutral and ground connections (compulsory) with a 

standard plug compatible with the above mentioned socket. The protection lead (ground) is the one 

with the yellow/green insulating sheath; make sure that the power supply cable is appropriate to its use, 

according to length, mains voltage and machine consumption.

•  Unless adequate protections against electrical shock are fitted, do not operate the machine in damp or wet 

environment.

Strictly do not start up the machine without the protective panelling. This may jeopardise personnel 

safety and machine serviceability.

Caution

: Store this manual in a safe place, near the machine, and disclose its storage location to all involved 

personnel.

1 YEAR PARTS AND LABOUR BENCH WARRANTY

Within the warranty period, contact Omcan Inc. at 1-800-465-0234 to schedule a drop off to either 

an Omcan authorized service depot in the area, or to an Omcan Service warehouse to repair the 

equipment.

Unauthorized maintenance will void the warranty. Warranty covers electrical and part failures, not 

Содержание PM-IT-0004

Страница 1: ...Pasta Machine Model PM IT 0004 Instruction Manual Revised 11 18 2020 Toll Free 1 800 465 0234 Fax 905 607 0234 Email service omcan com www omcan com Item 13320...

Страница 2: ...ents Section General Information Safety and Warranty Technical Specifications Installation Operation Maintenance Troubleshooting Instructions Fran ais Instrucciones en Espa ol Illustrated Drawings Par...

Страница 3: ...e It s of the utmost importance to save these instructions for future reference Also save the original box and packaging for shipping the equipment if servicing or returning of the machine is required...

Страница 4: ...entro de la caja y no encuentre da os ocultos en la m quina Si el paquete ha sufrido un manejo de poco cuidado golpes o da os visible o oculto por favor anote en la factura antes de aceptar la entrega...

Страница 5: ...ry to the applications as originally intended by the manufacturer who shall consequently not be held liable for any damage to the machine itself or to other objects or for any injuries to persons that...

Страница 6: ...d can therefore be disposed of without difficulty In any case for suitable recycling we suggest disposing of the products separately differentiated waste according to the current norms DO NOT DISCARD...

Страница 7: ...n the ring nuts by hand and verify that all the pieces are in their places and that they are aligned along the axle In order to start production position the selector on the position Fig 3D and push t...

Страница 8: ...der part is sustained by the dragging shaft Make sure that the plastic cap Fig 1B which replaces the drawplate is correctly positioned and the ring nut Fig 1C is tightly well screwed on Lastly lock th...

Страница 9: ...the elements which are in contact with the product protection cover pool mixer Archimedean screw drawplate ring nut when the product is still soft The moving parts have to be disassembled as follows...

Страница 10: ...CLEANING OF THE ARCHIMEDEAN SCREW MIXER RING NUT AND DRAWPLATE Eliminate the dough residue and wash the pieces with water you may use a soft brush or a plastic egg slice These elements can be thorough...

Страница 11: ...r Too short kneading time Increase the kneading time Too reduced water percentage Increase the quantity of water in order to respect the aforementioned percentage The product does not come out from th...

Страница 12: ...n alimentaires Toute autre utilisation sera consid r e contraire l utilisation pr vue par le fabricant qui ne pourra par cons quent tre tenu pour responsable des dommages aux choses et la machine elle...

Страница 13: ...lbs 29 5 kgs Dimensions 17 3 x 9 8 x 16 7 440 x 250 x 425mm Dimensions de l emballage 20 x 15 x 22 508 x 381 x 559mm Num ro d article 13320 INSTALLATION Pour positionner et utiliser la machine pr voir...

Страница 14: ...t appuyer sur le bouton poussoir de d marrage Fig 3B Normalement le premier produit se pr sente la sortie de la machine sous un aspect non acceptable C est pour cela qu il doit tre limin Peu de temps...

Страница 15: ...arbre d entra nement S assurer galement que le bouchon en plastique Fig 1B qui remplace la fili re est bien positionn et que la douille Fig 1 C est bien viss e Enfin bloquer de mani re sure le malaxe...

Страница 16: ...capot de protection cuve malaxeur vis de s lection fili re douille tant que le produit est encore mou Les parties mobiles devront tre d mont es de la mani re suivante Malaxeur S assurer que la pale ex...

Страница 17: ...ou corrosifs Eviter absolument d utiliser des moyens rugueux ou abrasifs tels la paille d acier les ponges abrasives etc Ne pas nettoyer le couvercle de la cuve avec de l alcool ou avec d autres solv...

Страница 18: ...alis ou par le revendeur D PANNAGE PROBL ME CAUSE REMEDES La machine ne fonctionne pas Fiche d branch e Enfoncer la fiche Fils de la fiche non fix s correctement S assurer que les fils sont fix s corr...

Страница 19: ...prestaciones la m quina no debe ser modificada o alterada en modos no aprobados por el constructor ni tampoco debe ser empleada bajo condiciones o para fines a los que no est prevista Toda modificaci...

Страница 20: ...claimer para obtener informaci n completa ADVERTENCIA Las piezas de embalaje se clasifican como residuos s lidos urbanos y por lo tanto se pueden eliminar sin dificultades En cualquier caso para el re...

Страница 21: ...agua de donde fue colocada despu s de su ltima utilizaci n Enjuagar bien con agua corriente caliente de modo que la pieza alcance la justa temperatura Secarla con pa o m rbido Desenroscar la abrazade...

Страница 22: ...las piezas a contacto con el producto manguito de extrusi n c clea recipiente mezclador e hilera PRINCIPIO DE FUNCIONAMIENTO La m quina elaborando productos alimenticios deseados permite obtener vari...

Страница 23: ...e pero en breve tiempo a trav s de la rendija de la tapadera A final de la operaci n de amasijo de una duraci n aproximada de 10 minutos asegurarse que el producto tenga la justa consistencia debiendo...

Страница 24: ...limpieza de la parte externa e interna de la m quina Desconectar el enchufe de alimentaci n de la red de energ a Limpiar con pa o m rbido las superficies barnizadas y desinfectarlas con alcohol Para l...

Страница 25: ...rdidas de revoluciones verificar la correcta tensi n de la correa de transmisi n Fig 13A Para eso hay que colocar la m quina sobre un lado y cerciorarse que la correa quede suficientemente tensa En c...

Страница 26: ...l autom tico no adecuado Gancho de seguridad sobre tapadera recipiente no correctamente insertado Posicionar el gancho a fin de carrera Producto es pegajoso en la salida Amasijo empleado demasiado h m...

Страница 27: ...27 Illustrated Drawings Fig 12 A Fig 8 A Fig 7 A Fig 6 A B Fig 5 A B C Fig 11 B E D F A C Fig 1 A C B E D Fig 2 C Fig 4 A Fig 3 A D C B E Fig 9 70 80 cm 70 80 cm 50 cm Fig 10 F Fig 13 B A...

Страница 28: ...28 Parts Breakdown Model PM IT 0004 13320...

Страница 29: ...4 for 13320 17 74592 Start Button Stop for 13320 28 74569 Spherical Grip for 13320 6 74581 Lower Shaft for 13320 18 74593 Reversing Direction Switch for 13320 29 74570 Spring Pin for 13320 7 74582 Tre...

Страница 30: ...30 Electrical Schematics Model PM IT 0004 13320...

Страница 31: ...ter online by visiting OMCAN PRODUCT WARRANTY REGISTRATION 3115 Pepper Mill Court Mississauga Ontario Canada L5L 4X5 https omcan com warranty registration or email to service omcan com Purchaser s Inf...

Страница 32: ...relations avec nos clients et les fabricants de valeur Aujourd hui avec des partenaires en Am rique du Nord Europe Asie et Am rique du Sud nous travaillons continuellement am liorer et d velopper l e...

Отзывы: