En
11
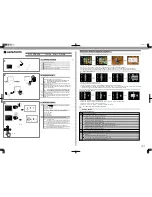
Basic operation
While in shooting mode, use these buttons for quick access to some of the more
commonly used features.
1
u
button (Monitor/Viewfinder)
Toggles between the monitor and viewfinder.
2
h
/
P
button (Digital image stabilization/Print)
Switches over the digital image stabilization mode between [ON] and [OFF].
3
#
button (Flash pop-up)
Opens the flash. Press this button to take a picture with flash.
4
DISP./
E
button
Displays the composition guide lines and histogram. With menu items selected,
hold down this button to display the menu guide.
5
MENU button (MENU)
Displays the top menu.
6
Y
/
S
button (Self-timer/Erase)
Use this setting to take a picture with the self-timer. Select the length of the time to
delay the shot.
7
p
&
button (Macro mode)
Use macro or super macro mode when taking close-up pictures such as of a flower.
8
s
F
button (Exposure compensation)
Use this setting to overexpose (+) or underexpose (–) a picture.
9
q
#
button (Flash mode)
Select from 6 flash modes - Auto, Red-eye reduction, Fill-in flash, Red-eye fill-in,
Slow flash or Flash off.
0
r
QUICK VIEW button
Quickly displays the last image taken.
a
o
button (OK/FUNC)
Displays the function menu and sets the functions often used in shooting mode.
Also confirms and sets your selection of menu items.
Shooting Mode Buttons
a
0
8
9
7
2
1
3
5
4
6
4322_basic_e.book Page 11 Tuesday, July 18, 2006 9:45 PM