background image

3

c
d

a

b

P

la

yback

47

EN

Playback

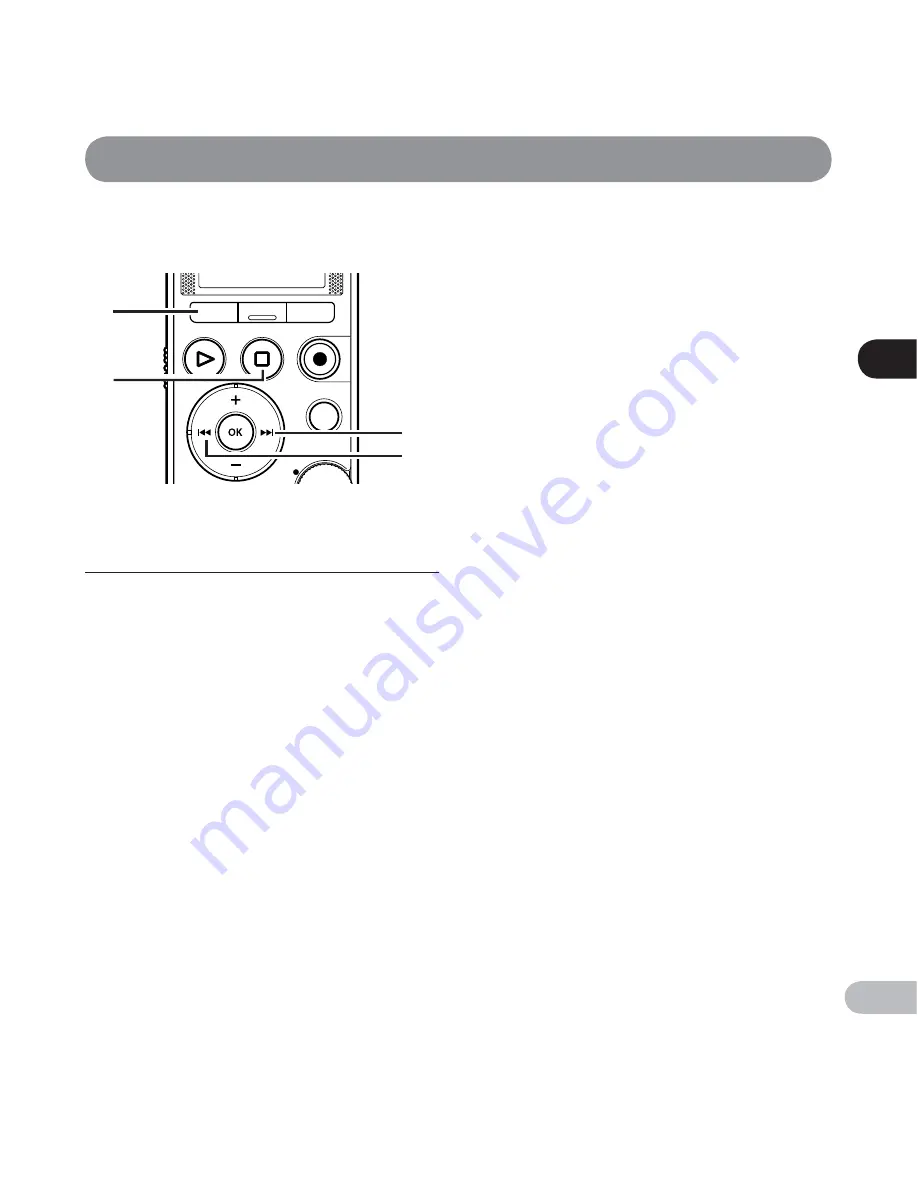
 Pressing any of the following buttons 
releases segment repeat playback. 


a

   Press the  

F1

   ( 

CANCEL

 )  button 

 Pressing the  

F1

   ( 

CANCEL

 ) button releases 

segment repeat playback, and it will return to 
normal playback mode. 


b

   Press the  

STOP

 / 

w

   ( 

4

 )  button 

 Pressing the  

STOP

 / 

w

   ( 

4

 ) button releases 

segment repeat playback and stops playback. 


c

   Press the  

9

   button 

 Pressing the  

9

  button releases segment repeat 

playback, and makes the recorder skip to the 
beginning of the next file. 


d

   Press the  

0

   button 

 Pressing the  

0

  button releases segment repeat 

playback, and makes the recorder skip to the 
beginning of the current file. 

 Canceling the segment repeat playback 


function 

Содержание LS-12

Страница 1: ...afely Keep the instructions handy for future reference To ensure successful recording we recommend that you test the record function and volume before use LINEAR PCM RECORDER LS 14 LS 12 Linear PCM Re...

Страница 2: ...lting from a defect of the product repair performed by a third party other than Olympus or an Olympus authorized service station or for any other reason Trademarks and registered trademarks IBM and PC...

Страница 3: ...ction P 2 Getting started P 10 About recording P 26 About playback P 40 File management P 48 Menu setting P 64 About the tuner P 80 Using the recorder on your PC P 82 Other information P 89 INDEX 1 2...

Страница 4: ...me screen operations 22 Notes on the folders 24 Selecting folders and files 25 2 About recording Recording tips for each instrument 26 Recording 28 QUICK mode 28 SMART mode 29 MANUAL mode 30 Dividing...

Страница 5: ...c Menu 66 Play Menu 70 LCD Sound Menu 71 Device Menu 72 Guidance Voice Guide LS 14 only 74 Changing the time and date Time Date 75 Changing the USB class USB Settings 76 Formatting the recorder Format...

Страница 6: ...a car parked in direct sunlight or at the seashore in summer Do not store the product in a humid or dusty place If the product gets wet immediately wipe water off with a dry cloth Especially avoid sa...

Страница 7: ...remove the battery 2 Contact your dealer or the Olympus Service Station for service Continuing to use it could cause a fire or electric shock s Do not insert a card other than SD or SDHC card into the...

Страница 8: ...ar a heater Doing so could cause a fire burn or injury due to liquid leak heat generation blowout or other reason f Caution s Do not turn the volume up before starting operation Doing so could cause a...

Страница 9: ...immediately s Do not leave the battery within the reach of infants or children They could swallow the battery If this happens immediately consult a doctor s If you notice an abnormality such as abnorm...

Страница 10: ...the optimum level to suit the volume input within the set time MANUAL mode In this mode the recording level can be adjusted manually Tuning Mode v to measure the difference between the source and the...

Страница 11: ...arious other recording functions In addition to the normal recording modes two other functions can be selected Overdubbing and Pre recording You can select the recording mode and function according to...

Страница 12: ...one jack 4 LINE IN jack 5 Card cover 6 STOP w 4 button 7 REC s Record button Recording indicator light LED 8 MENU button 9 Mode dial 0 PEAK indicator light LED LED indicator light Display LCD panel F1...

Страница 13: ...er name 4 Function guide indicator 1 Current folder name 2 Battery indicator 3 File name 4 Function guide indicator e EAR Earphone jack r REMOTE jack Connect the receiver of the exclusive remote contr...

Страница 14: ...indicator H REC Record indicator G PAUSE Pause indicator F STOP Stop indicator E PLAY Play indicator I FF Forwarding indicator J REW Rewinding indicator X F PLAY F Play indicator Y S PLAY S Play indic...

Страница 15: ...tended period of time When you are playing a file from the built in speaker the recorder may turn off depending on the volume level due to the reduced voltage output of the batteries even if L is disp...

Страница 16: ...ower While the recorder is turned off slide the POWER HOLD switch in the direction of the arrow Power save mode If the recorder is on but is not used for 10 minutes or longer default the display shuts...

Страница 17: ...e POWER HOLD switch to the A position After Hold appears on the display the recorder is set to HOLD mode Notes If you press any button while the recorder is in HOLD mode the clock screen lights for 2...

Страница 18: ...n 2 Press the or button to change the value Follow the same steps by pressing the 9 or 0 button to select the next item and pressing the or button to change the value You can select between 12 and 24...

Страница 19: ...g the setup operation the recorder will save the items that were set to that point After setup a message will sound prompting you to select Off if voice guidance is not required and the screen will go...

Страница 20: ...at an angle could damage the contact area or cause the SD card to jam If the SD card is not inserted all the way data may not be recorded on the SD card When you insert the SD card the recording media...

Страница 21: ...maging jp introduces manufacturers and types of SD cards confirmed to be compatible Please note however this is not meant to guarantee that SD cards will operate Some SD cards may not be recognized co...

Страница 22: ...so verify the current settings for recording and playback Switching functions Recording starts A In SMART mode recording starts automatically when the countdown by the automatic adjustment function en...

Страница 23: ...Press and hold the F3 INFO button on the Home screen You can also check it while recording is paused The following settings will be displayed 1 Mic Gain P 66 2 Rec Format P 66 3 Mic Select P 67 4 Play...

Страница 24: ...same hierarchical level as the RECORDER folder will not be recognized This recorder will not recognize folders if they are created inside the 01 02 or 03 folder RECORDER 01 02 03 Library folder Notes...

Страница 25: ...ceed OK button Pressing this button opens the folder or file selected in the list screen or button Selects a folder or file Home screen Folder list screen File list screen File screen Folder list scre...

Страница 26: ...ecorder slightly away to get a richer sound Wind instrument Position the recorder pointing to the center of the so called bell If breathing noises are audible move the recorder slightly away from the...

Страница 27: ...rophone Then fix the recorder with a tripod or other tool before starting recording Electric guitar To record sound directly from the speaker of a guitar amplifier position the recorder slightly away...

Страница 28: ...the set time Recording starts after the recording level is adjusted so even sudden loud sounds are recorded without distortion This mode allows you to set a time for detecting the input volume P 29 P...

Страница 29: ...able to record in high quality even when the volume of the sound source changes significantly However even higher quality can be realized by adjusting the recording level manually 3 Press the STOP w 4...

Страница 30: ...remainder of the set time will be displayed P 68 If you want to cancel automatic adjustment press the F1 CANCEL or STOP w 4 button If you want to skip automatic adjustment and start recording immedia...

Страница 31: ...ng indicator light turns on and H appears on the display d Elapsed recording time e File length Distorted sound will be recorded while OVER is displayed Adjust the recording level so that OVER is not...

Страница 32: ...recommend formatting the recording media in the recorder before recording Recording more than 2 GB of data in linear PCM format Recording will continue even if the volume of a single file exceeds 2 GB...

Страница 33: ...ck on the recorder After recording has started you can hear the audio being recorded through the earphones Notes You cannot control the recording level using the volume button To avoid hurting your ea...

Страница 34: ...ER folder is 999 If there are already more than 998 files file division will not be possible If you have already reached the limit calculate the number of times you will divide the file and delete the...

Страница 35: ...jack Using the overdubbing function The overdubbing function enables you to dub sound over a file while listening to it The recorded file is saved under a different name This is useful when practicin...

Страница 36: ...s overdubbing also ends When the OVER DUB function is used the following functions cannot be used DIVIDE P 34 Pre Recording P 68 Metronome P 68 Using the metronome function The metronome is a useful r...

Страница 37: ...ively assigned regardless of changes in the selected recording media 3 Extension This is the file name extension indicating the recording format used when recording with this recorder Linear PCM forma...

Страница 38: ...inoperable when an external microphone is plugged into the recorder s MIC jack Microphones supported by plug in power can also be used When an external monaural microphone is used while Rec Format is...

Страница 39: ...d will distort and cannot be recorded properly Recording audio from this recorder with another device Audio from this recorder can be recorded to another device by connecting the audio input terminal...

Страница 40: ...ition bar indicator d File length e Level meter 3 Press the or button to adjust the volume The volume can be adjusted within the range of 00 to 30 4 Press the STOP w 4 button at any point where you wa...

Страница 41: ...olume too high Listening at very high volume may lead to hearing loss To EAR jack Forwarding While the recorder is in stop mode in the File screen press and hold the 9 button I appears on the display...

Страница 42: ...t reaches the beginning of the file Continue pressing the 0 button to continue rewinding from the end of the previous file Locating the beginning of a file While the recorder is in stop mode or playba...

Страница 43: ...es for music files which the recorder can play back are given below File format Sampling frequency Bit rate WAV format 44 1 kHz 48 0 kHz 16 bit 88 2 kHz 96 0 kHz 24 bit MP3 format MPEG1 Layer3 32 kHz...

Страница 44: ...s can be used to temporarily remember desired locations 1 While the recorder is in recording mode or playback mode press the F3 INDEX button A number appears on the display and an index mark or temp m...

Страница 45: ...e marks will automatically be erased Up to 99 index and temp marks can be set in a file If you try to set more than 99 index or temp marks the No more can be set message appears for index marks and th...

Страница 46: ...back the segment until segment repeat playback is canceled Note As in normal playback mode the playback speed can be changed during segment repeat playback as well P 43 If an index mark or temp mark i...

Страница 47: ...de b Press the STOP w 4 button Pressing the STOP w 4 button releases segment repeat playback and stops playback c Press the 9 button Pressing the 9 button releases segment repeat playback and makes th...

Страница 48: ...keeps important data from being accidentally erased File Divide 1 P 54 Only files recorded with this recorder can be divided Partial Erase 1 P 56 An unwanted part of a file can be erased Only a PCM f...

Страница 49: ...card to another folder within the internal memory Move to SD Move a file from the internal memory or SD card to another folder in the SD card Copy to SD Copy a file from the internal memory or SD car...

Страница 50: ...utton to move to the respective setting If you selected 4 One file 1 Press the or button to select the file you want to move or copy If you selected 4 Selected files 1 Press the or button to select th...

Страница 51: ...2 OPTION button The OPTION screen appears on the display Notes The recorder cannot copy when the memory capacity is not sufficient You cannot move or copy files if the number of files in the move dest...

Страница 52: ...TION screen from the File list screen Protect multiple files Proceed to Step 5 5 Press the or button to select the number of files you want to protect 3 Press the or button to select File Lock 2 Press...

Страница 53: ...se the OPTION screen File list screen On Locks the file and prevents it from being erased Off Unlocks the file and allows it to be erased 8 Press the OK button to complete the setting Pressing the F1...

Страница 54: ...the PLAY button and play the file to the position where you want to divide it While the recorder is in playback mode press and hold the 9 or 0 button to fast forward or rewind It is useful to mark the...

Страница 55: ...d File name_1 mp3 and the latter part of the file is named File name_2 mp3 If a file has an extremely short recording time it may not be divided even if it is an MP3 file or PCM file Do not remove the...

Страница 56: ...e you want to start partial erase Forward the file to the position where you want to start partial erase If the file is long use the 9 button to move to the position you want to delete 6 At the positi...

Страница 57: ...he position where you want to end partial erase press the F2 END button again 9 Press the OK button The display will switch to Partial erasing and start the partial erase The deletion is completed whe...

Страница 58: ...the recorder is in stop mode press the F2 OPTION button The OPTION screen appears on the display 4 Press the OK button 5 Press the PLAY button and play the file to the position where you want to star...

Страница 59: ...tops the beginning of the edited file Note If a file has an extremely short recording time it may not be trimmed even if it is a PCM file 9 Press the OK button The display will switch to Trimming and...

Страница 60: ...r is in stop mode press the F2 OPTION button The OPTION screen appears on the display 3 Press the or button to select Property Name File name Date Time stamp Size File size Bit Rate File format and Fi...

Страница 61: ...recorder is in stop mode in the File screen press the ERASE button 3 Press the button to select Start 4 Press the OK button The display changes to Erasing and erasing starts Erased is displayed when...

Страница 62: ...elect the file to be erased 6 Press the OK button Repeat steps 5 and 6 to select the files to be erased 7 Press the F2 GO button Erasing multiple files at once 1 Select the folder where the file you w...

Страница 63: ...ot be recognized by the recorder the file will not be erased Please connect the recorder to your PC to erase the file Replace the battery with a new one in order to ensure that the battery does not go...

Страница 64: ...method 2 Press the 9 or 0 button to move to the area that contains the item you want to set 3 Press the OK button 4 Press the or button to move to the item you want to set Menu setting Menu items can...

Страница 65: ...en during recording or playback pressing the F3 EXIT button allows you to return to the recording or playback screen without interrupting recording or playback Notes The recorder stops if you leave it...

Страница 66: ...e the sound volume The sound can be recorded at a predetermined volume to produce equalized recordings This setting is suitable for voice recordings Off Use this position when adjusting the input leve...

Страница 67: ...ernal microphones that you do not want to support with plug in power are connected Turn the plug in power function to Off when an external microphone that does not need to be supported by plug in powe...

Страница 68: ...art time will vary according to Rec Format settings To confirm the setting press and hold the F3 INFO button at the Home screen P 23 SmartTime Set the automatic adjustment time to be used in SMART mod...

Страница 69: ...e metronome will be output from the EAR jack Connect earphones when using the metronome The sound of the metronome will not be recorded When Rec Monitor is set to Off no metronome sound is output P 68...

Страница 70: ...and hold the F3 INFO button at the Home screen P 23 Skip Space This function enables you to skip forward or reverse skip rewind a small portion of the file being played This function is convenient for...

Страница 71: ...trast can be adjusted in 12 levels You can adjust the LCD display contrast level from 01 to 12 LED You can set the recorder so the LED indicator light does not turn on On Enables the LED light functio...

Страница 72: ...e Voice Guide P 74 Device Menu Memory Select When an SD card is inserted you can select to record to either the internal memory or to the SD card P 20 Internal memory Internal memory SD card SD card T...

Страница 73: ...formatted all the saved data including locked files and read only files are erased See Formatting the recorder Format P 78 Memory Info The recordable capacity remaining and overall capacity of the re...

Страница 74: ...Off selection 4 Speed setting 1 Press the or button to select from Speed 5 Speed 4 Speed 3 Speed 2 and Speed 1 2 Press the OK button to exit Speed selection Volume setting 4 1 Press the or button to s...

Страница 75: ...Device Menu For details on how to enter the menu settings see Menu setting method P 64 Hour flashes on the display indicating the start of the Time and Date setup process Follow the same steps by pres...

Страница 76: ...the Device Menu For details on how to enter the menu settings see Menu setting method P 64 USB Connection Setting for connecting to a PC USB Class Setting for USB class 3 Press the OK button 4 Press...

Страница 77: ...irst connect the recorder to your PC as an external storage device the driver for the recorder will be automatically installed in your PC The PC cannot recognize that the recorder is connected to the...

Страница 78: ...es to a computer before formatting the recorder 1 Select Format from the menu on the Device Menu For details on how to enter the menu settings see Menu setting method P 64 2 Press the or button to sel...

Страница 79: ...ernal memory or SD card so that there is no mistake P 23 P 72 Replace the battery with a new one in order to ensure that the battery does not go flat during formatting In addition it may take over 10...

Страница 80: ...tion 2 Tune the musical instrument by playing a single note a The name of the note closest to the entered sound b Target position indicated by the reference tone c Tuning meter d Calibration value The...

Страница 81: ...right LED indicator lights will turn on simultaneously The lights enable you to tune an instrument even when the display is in difficult lighting conditions To change the calibration reference value p...

Страница 82: ...han one free USB port Notes This is the operating environment required for saving files recorded by this recorder to your PC via the USB connection The support service does not cover you if your PC ha...

Страница 83: ...ansferred On a PC do not format the drive of the recorder Initialization is not successfully achieved on a PC For initialization follow the instructions in the Format screen of the recorder P 78 If fo...

Страница 84: ...other company s cable is used it may lead to malfunction of the recorder Also never use this dedicated cable with any other company s products Remote Storage is displayed on the recorder if the USB co...

Страница 85: ...ating that it is safe to remove hardware appears close the window 2 Confirm that the recorder PEAK indicator light has turned off before disconnecting the USB cable Note NEVER disconnect the USB cable...

Страница 86: ...SD card it is recognized as Removable Disk 3 Open the product name folder 4 Copy the data 5 Disconnect the recorder from the PC P 85 Note While data is being transmitted Busy is displayed and the PEAK...

Страница 87: ...rring voice files to your PC Drive names and folder names when a PC is connected Internal memory Untitled Drive name Folder name Recognized by the drive name of the product RECORDER 01 02 03 Removable...

Страница 88: ...ay be destroyed Windows 1 Connect the recorder to your PC P 84 2 Open the Explorer window When you open My Computer the recorder is recognized by the drive name of the product 3 Open the product name...

Страница 89: ...ecessary files P 48 P 61 Memory error Error in the memory Error in the memory This is a malfunction so go to the store where you purchased the recorder or an Olympus service station for repair P 99 Ca...

Страница 90: ...files can be played on this recorder P 43 Select a file Unselected File File is not selected Please select a file then carry out the operation P 25 Same folder Can t be moved copied Folder cannot be m...

Страница 91: ...record through the external microphone An external device is connected to the LINE IN jack Disconnect the connecting cord from the recorder An external microphone that must be supported by plug in pow...

Страница 92: ...t to a monaural recording mode Set Rec Format to the stereo recording mode P 66 Cannot find the recorded Voice File Wrong folder Switch to the correct folder P 25 Noise heard during playback The recor...

Страница 93: ...nting the microphones at the earphones or lowering the volume of the recording monitor Cannot record using overdubbing The chosen playback file is not a PCM 44 1kHz 16bit format file Choose a PCM 44 1...

Страница 94: ...sitive noise cancellation monaural microphone unidirectional ME52W This microphone is used to record audio at a distance while minimizing surrounding noise s Tie clip microphone omni directional ME15...

Страница 95: ...ory LS 14 4 GB LS 12 2 GB SD card 2 GB to 32 GB The recorder uses some of its memory capacity to maintain a management file The indicated remaining capacity is less than the total capacity of the medi...

Страница 96: ...the upper limit value of the frequency response depends on the recording format 4 During playback mode 20 Hz to 20 kHz The upper and lower limit values of the frequency response depends on each recor...

Страница 97: ...h 25 min 23 h 40 min 11 h 45 min 44 1 kHz mono 10 h 35 min 4 h 40 min 94 h 55 min 47 h 20 min 23 h 35 min 4 MP3 format Recording format Internal memory SD card LS 14 4 GB LS 12 2 GB 32 GB 16 GB 8 GB...

Страница 98: ...On LS 14 only 4 In voice file playback mode Recording format Built in speaker Alkaline battery Linear PCM format 44 1 kHz 16 bit 62 h MP3 format 320 kbps 53 h 64 kbps mono 61 h Recording format Earph...

Страница 99: ...034 0610 U S A Telephone Number 1 888 553 4448 Canadian RFI This digital apparatus does not exceed the Class B limits for radio noise emissions from digital apparatus as set out in the Radio Interfere...

Страница 100: ...2951 Ishikawa machi Hachioji shi Tokyo 192 8507 Japan Tel 81 0 42 642 6162 http www olympus com OLYMPUS IMAGING AMERICA INC 3500 Corporate Parkway P O Box 610 Center Valley PA 18034 0610 U S A Tel 1...

Отзывы: