


DMTA031-01EN, Rev. B, October 2014
Connections and Cables
27
2.7
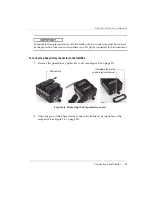
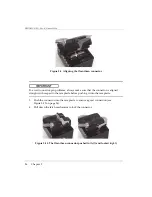
InterBox Installation
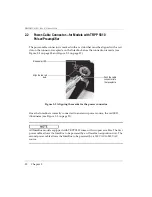
The InterBox can be attached to an Olympus HSMT manual scanner with the supplied
mounting bracket (see Figure 2-12 on page 28). A pair of T-nuts with thumb screws
secures the InterBox to the frame of the scanner (see Figure 2-11 on page 27 and
Figure 2-12 on page 28).
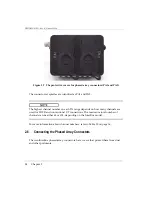
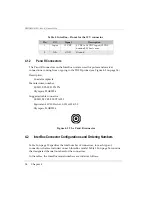
Figure 2-11 The mounting bracket for the HSMT manual scanner
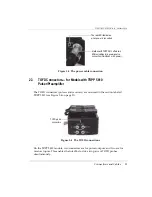
To install or remove the InterBox
1.
Identify a location on the scanner’s frame where the InterBox will be installed.
Ensure that this location allows access to the InterBox’s different connectors
without limiting the scanner’s mobility (see Figure 2-12 on page 28).
2.
Slide the two T-nuts into the frame bar of the scanner.
3.
Move the InterBox assembly along the scanner’s frame bar to the desired location.
T-nut to attach the assembly to the scanner
Mounting bracket
UT-connector side facing up
Содержание InterBox EIB-T-8-M-15-OM
Страница 6: ...DMTA031 01EN Rev B October 2014 List of Abbreviations vi ...
Страница 10: ...DMTA031 01EN Rev B October 2014 Labels and Symbols 4 ...
Страница 20: ...DMTA031 01EN Rev B October 2014 Important Information Please Read Before Use 14 ...
Страница 22: ...DMTA031 01EN Rev B October 2014 Introduction 16 ...
Страница 36: ...DMTA031 01EN Rev B October 2014 Chapter 3 30 ...
Страница 44: ...DMTA031 01EN Rev B October 2014 List of Figures 38 ...
Страница 46: ...DMTA031 01EN Rev B October 2014 List of Tables 40 ...
Страница 50: ...DMTA031 01EN Rev B October 2014 Index 44 ...